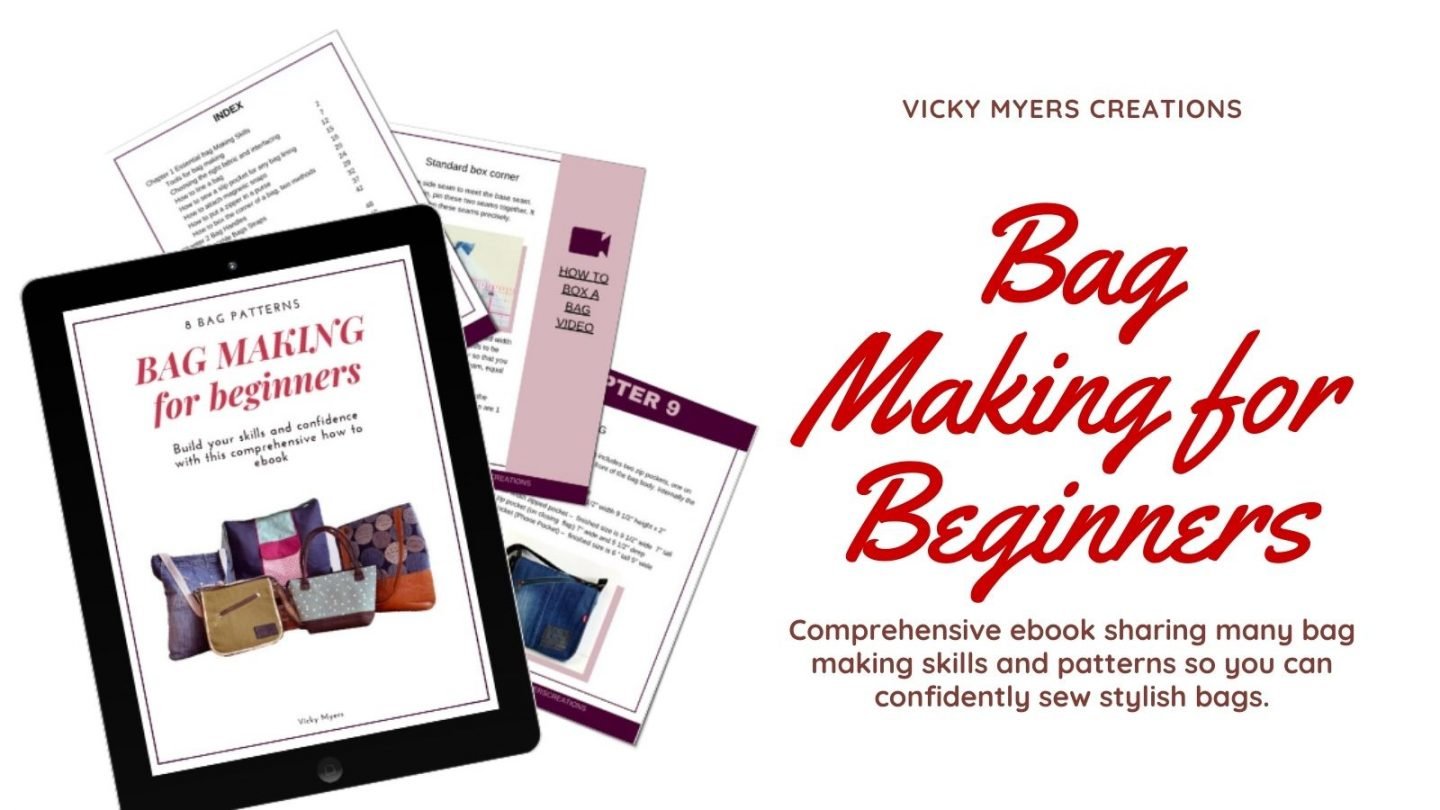
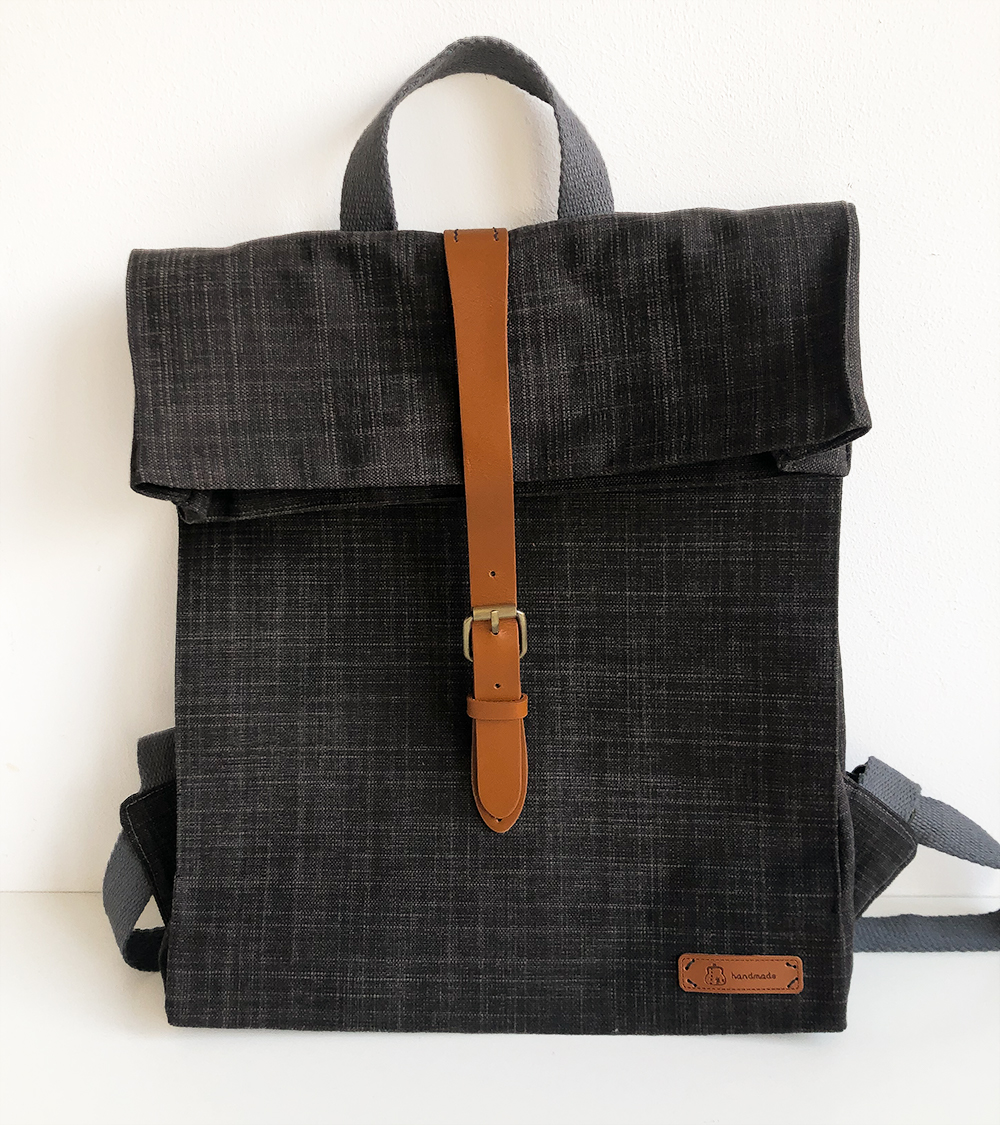
Learn how easy it is to make this stylish DIY Backpack. This small backpack pattern for adults is perfect for your wallet, snacks, drinks. A fabulous DIY mini backpack the construction draws on the design of a paper bag.
There are many cute small backpacks around at the moment, this backpack design is my take on a mini backpack, with a rolltop fastening! Small enough to be cute but big enough to be practical.
The mini backpack pattern is suitable for an intermediate sewer, step by step instructions are complemented with a backpack video tutorial.

What fabric is suitable for the backpack sewing pattern?
Heavier fabric such as upholstery type fabric, waxed fabric, denim, canvas are all suitable. When considering your choice of fabrics think about the durability of the fabric, you may wish to choose a waterproof fabric or line with PUL. Personally, I think waxed fabric would look gorgeous. For this version, I am using a piece of heavy upholstery fabric. Ensure you choose a strong fabric. Check your sewing machine is comfortable sewing through two layers of your chosen fabric plus a layer of Decovil, a denim needle will help. For the lining pieces, I like to use cotton quilting fabric in a fun bright print.


If you love bag making then do check out my free bag making for beginners course. If you like making bags from different materials check out my waxed tote bag pattern or crossbody bag made with cork.
If you would like an ad free PDF backpack pattern with the printable pattern pieces, then for less than a coffee you support me and purchase one in my Etsy shop. Alternatively, enjoy the free instructions below. It is easy to measure out the rectangles required on your fabric., especially with a quilters ruler.
This mini backpack pattern includes one internal slip pocket, the perfect size for a mobile phone. If you are an experienced bag maker consider external pocket options, such as a zipper pocket to the back of the backpack below the strap facing. An external zipper pocket would be a great addition, and somewhat tricky for pickpockets to get to. If you are a multi pocket lover, feel free to add some!
(this post may contain affiliate links, which means I get a small % back if you purchase after clicking, at no cost to you- refer to ‘disclosure policy’ in the menu for more info)
DIY Backpack Tutorial
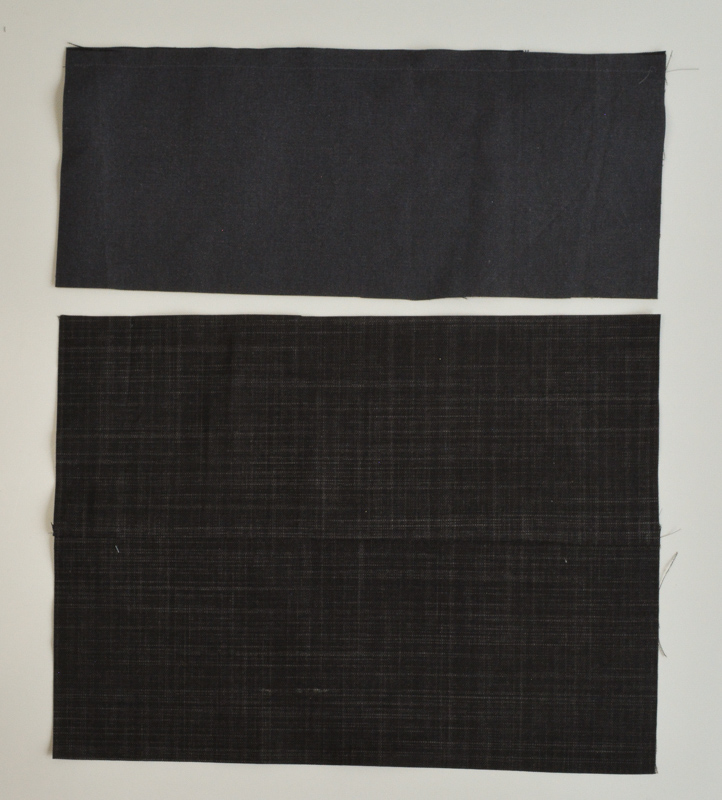
- Heavy Weight exterior fabric Two pieces 15″ by 14″ (Outer bag pattern pieces)
- Heavy Weight exterior fabric Four pieces 15″ by 6″ (Roll top panels)
- Heavy Weight exterior
- fabric – One piece 15 by 2 1/2″ (Top back trim)
- Lining Fabric Two pieces 15 by 14″ (I like to use quilting cotton fabric for linings)
- Lining Fabric 13 by 7 ” (Slip pocket)
- Decovil 1 two pieces 11 by 15″
- Iron on Interfacing two pieces 15 by 14″
- Webbing 3 Yards
- Two D rings and Two sliders
- Bag Fastener (this bag closure is the one I purchased, and this a shorter alternative)
- Heavy Weight fabric Two squares of fabric 3 1/2″ (side tabs)
- Quilters ruler
The seam allowance is 1/2″ unless specified differently.
Prepare backpack pattern pieces
Start by cutting out and preparing your backpack pattern pieces as per the sizes above. Iron the Decovil centrally to the wrong side of your heavyweight fabric. Iron the interfacing to the wrong side of your cotton lining fabric (I like to choose an accent fabric).
Adjustable Straps


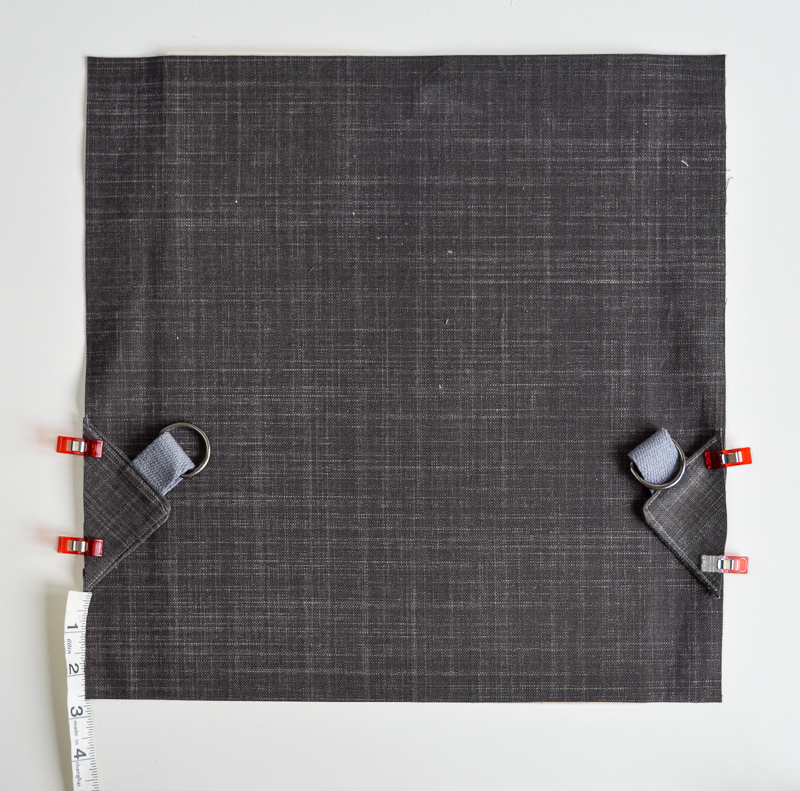
Corner tabs – Fold over the 3″ webbing strip in half, threading through a D ring. Pin onto triangle, along a straight edge so the webbing and D ring are facing the right side of the fabric, place the second triangle on top, right sides facing.
Stitch around two straight edges, trim corner and turn right side out. Press.
Top stitch the straight edges. Repeat for second set of triangles so you have two fabric tabs, one for each side of the bag.
Place onto the bag, 2 1/2″ up from the bottom, so the raw edge aligns with the edge of the side of the bag. Baste in place 1/4″ in from edge (within the seam allowance). Repeat for the other side.
Create the top handle piece, placing webbing 1 1/2″ down from the top, 5″ in from the side of the bag. Stitch to secure with a rectangle of stitching with a cross in the centre. This stitching will be covered by a piece of fabric.

For your adjustable straps zigzag raw edges of webbing. Thread your webbing through the slider, fold over back on itself 1 1/2″ and stitch to secure (with rectangle and cross). Thread through the D ring on your tab, then back through the top of the strap slides. Repeat for the second side.

Place the two ends of the adjustable straps parallel and next to the top bag strap. Stitch to secure with a rectangle and cross.
Let’s finish the adjustable strapping off. Press in 1/4″ of each long edge of your top back trim. Place along the top of your bag covering the edges of your webbing/handles and straps. Top stitch to secure.

Roll Top Closing Panel
Place two pieces right sides together. Sew along one long edge 3/8″ seam allowance.
Press the seam allowance to one side, the side which will be inside the bag. Topstitch to secure. Repeat with your second two pieces.
Place one set of panels (non top stitched piece at the top) right sides facing the right side of the outer bag panel. Stitch to secure. Repeat for the second set of panels and outer bag piece.

Bag Closure
Work out the position of your closing strap. This will vary on the size of strap closure you have. To work this out fold in the lower top panel. Then fold the top panel down. Place your strap closure onto your fabric, centrally. I have placed my strap so the top piece fits onto the top panel, and does not cross over to the strap panel. Hand stitch the lower part of the strap to the front bag panel.

Sew up the outer bag
Place the two outer bag pieces right sides together. Machine stitch down the two top panels, down the side, along the bottom and back up, the three edges of a rectangle.

Fold the side seam to meet the bottom seam, mark a 2 3/4″ straight line at 90 degree angle to the seam to box the corners. If you have not boxed corners before check out my detailed tutorial. Stitch the marked line. Trim the corner. Repeat for the second corner of the bag.

Create the side pleats. The fabric should fold to create a neat edge along the edge of you Decovil 1. Continue the fold up the first top panel. Topstitch the pleat, going as close as you can to the bottom of the bag. Repeat so you have four pleats marking the edges of the bag.

Add the second piece of your bag closure, place centrally and stitch to secure.
Internal Pocket
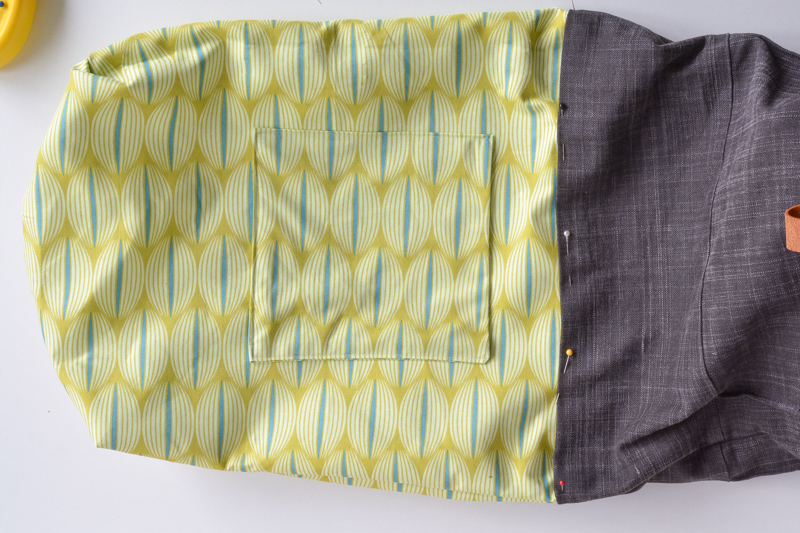
To create the internal slip pocket, fold the cotton lining fabric right sides together. Sew along two edges, trim the corners. Turn right side out, fold in raw edges, press and topstitch to close.

Place the slip pocket on the lining, with the opening placed at the bottom of the pocket. The position of the pocket is 4 1/4” in from each side of the bag lining and 2 5/8” down from the top. Stitch around three sides, leaving an opening at the top thus creating the pocket. Ensure you backstitch at the top of each side as this point takes considerable wear and tear.

You may choose to add an external zip pocket to the back of the back (this location is harder to access for a thief). Check out my detailed tutorial How to Make a Zip Pocket.
Lining
Sew up the side seams and a couple of inches in from edge along the bottom. Next we are going to mark the position of the pleats with taylors chalk and a quilting ruler. Mark a line 1 1/2″ in from the long edge on each long side.
Box the corners as you did for the outer bag.

Let’s join the external bag with the lining. Turn each right side out. Press under 3/8″ the edge of the top panel, on the outer bag so the wrong edges face each other.

Place the lining so the top edge is pinned underneath this turned edge. This create one very long stretch of fabric.
To stitch this seam, gather the bag lining up and place over the arm of the sewing machine so you can top stitch all round this pinned edge.
Turn the bag wrong side out. Pin and sew the marked creases along bag lining and the top panel for the four sides.

Turn the bag right side out. Fold the raw edges in on the bottom of the lining and topstitch to close. Lastly, insert the lining inside the bag and press the bag.