
Learning how to applique is easy and fun. I am going to share with you five different methods of applique for your sewing projects.
Applique is a great way of using your fabric scraps. Each of the applique methods I am sharing gives slightly different effects, so I suggest fully reading before starting your sewing project, so you can choose the most suitable method for you.


I have worked my applique sampler in scraps of linen left over from dressmaking, cotton fabric is the most commonly chosen fabric for applique as it is very stable. You can applique with any fabric but as with dressmaking slippery fabrics will be harder to work with. As a beginner, I advise starting with cotton fabric.

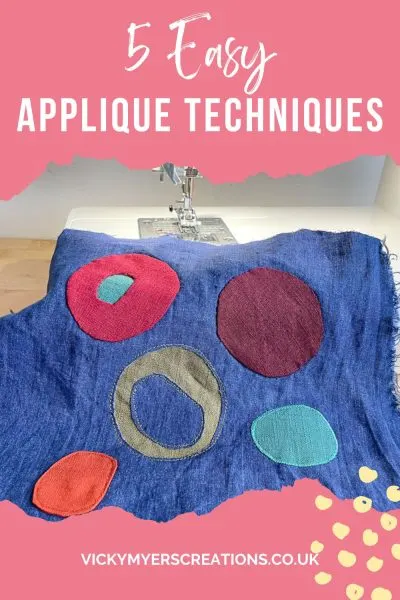
Table of Contents
Materials for applique
The materials you need vary depending on your chosen method but generally speaking, you will need:
- Background fabric
- Scissors
- Applique fabric
- Fusible interfacing
- Fusible webbing
- Freezer paper
- Sewing machine
- Needle and thread
- Glue stick
How to Applique Video Tutorial
How to raw edge applique
(This is a how to applique with sewing machine)
This is likely to be the fastest way to applique and the simplest method, particularly for very small shapes. For this applique technique, you need fusible webbing, which is a fabric glue that comes attached to a sheet of paper. Draw on the paper side of the fusible webbing.
Place the glue side of the webbing onto the wrong side of the fabric for the applique, and iron to adhere the glue. This takes a few seconds, I suggest placing a piece of baking/parchment paper over the fabric and fusible webbing to protect your iron.
Now cut out your applique shape following your drawn lines.


Peel the paper backing off the applique shape and place it into position glue side down. Iron again to secure (don’t forget your baking paper as protection, I speak from experience!)


As you can see you now have a secured piece of fabric. To finish the applique off I suggest machine stitching with either a straight line or a tight zigzag stitch.

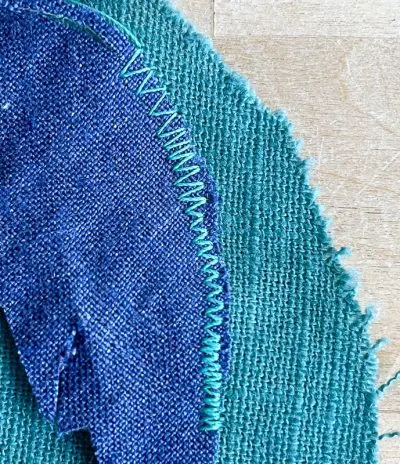
I strongly suggest checking the width and tightness of your zigzag stitch machine settings on fabric scraps first. If choosing zig-zag stitch you are looking for a tight stitch.
How to Needle-turn Applique
(This is a how to applique fabric by hand method)
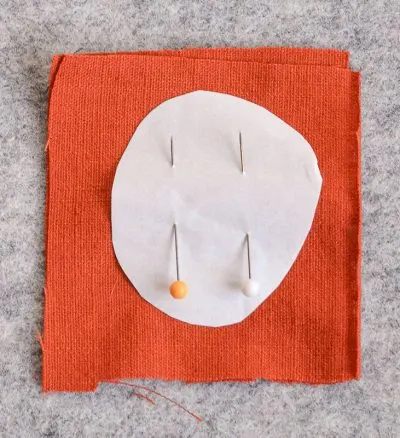
Cut out your shape with a small seam allowance, I am using freezer paper as a guide.


Using a hot iron turn in the seam allowance and press, if need be cutting into the seam allowance. I find the freezer paper template gives me an edge to follow when turning in and pressing. It helps me gain a smooth curve.


Place onto the fabric and hold with pins, as you can see I placed a contrasting fabric beneath, held in place with fusible webbing.


Slip stitch to secure, following the pressed edge.


If you are not familiar with slip stitch (ladder stitch) bring your needle up through the pressed folded edge and insert into the base fabric creating a tiny stitch. repeat bring the needle back up along the folded edge and straight back down into the base fabric.


Freezer method of applique
(This is a how to applique with sewing machine and by hand)
Grab your freezer paper, draw your design on the mat side (a pencil works well). Cut out the shape adding a little seam allowance.
Place onto your freezer paper so the shiny side is facing the right side of the applique fabric and iron so the freezer paper temporarily adheres.
Next machine stitch with a straight stitch over your marked design.


Tear away the freezer paper and trim the applique fabric, so your seam allowance is 5mm or 3/8″.
Press the seam allowance in along the stitch line. This stitched line helps you get a nice curve, the fabric will fold easily along the stitched line.
Place your applique onto your backing fabric right sides facing. Slip stitch to secure.


The freezer paper method is good for tight curves.


How to Bag Out Applique
(This is a how to applique by machine)
This particular applique method differs from all the others in that you need two pieces of fabric for each applique shape.
Cut out your two pieces of fabric with a small seam allowance, 5mm or 3/8″, or alternatively place a piece of freezer paper with chosen drawn design onto the two pieces of fabric as a sewing guide.

Place your two pieces of fabric so the right sides are facing each other, and sew fully around the shape.
Carefully cut a slash in one side of the fabric and pull the fabric through the hole.

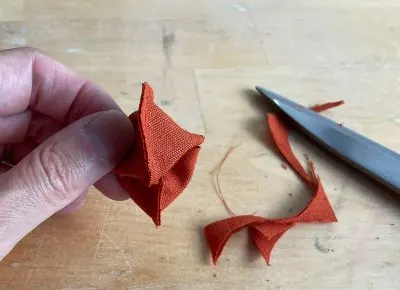
Ensure you have fully pushed the shape out, it may help to cut into the seam allowance.
Place the applique piece into the base fabric, and iron.


Choose your method of securing your applique pieces, straight stitch and blanket stitch are common choices. Stitch to secure.


I have to admit my shape is not as smooth as I hoped but I am sure I could improve on this, snipping into the seam allowance would definitely help.


How to Reverse Applique
(This is a how to applique by machine)
Let’s start by ironing lightweight interfacing to the back of your base fabric. This will stabilize the fabric and reduce fraying.


If using freezer paper as a guide for sewing draw your design on the matt side. Place your freezer paper so the shiny side is facing the right side of the base fabric and iron so the freezer paper temporarily adheres.


Cut out a piece of applique fabric with a good 1cm 6/8″ seam allowance. Use a glue stick to place glue around the edge of the applique shape and position on the back of the background paper making sure you fully cover the design on the front.


Machine stitch your design, I have chosen a running stitch and stitched around the shape twice.
Remove the freezer paper.
Carefully fold the base fabric away from the applique fabric and cut. Cut along the edge of your machine stitching.


Personally, I love the effect of reverse applique.


I hope you have enjoyed my five how to applique techniques. There are pros and cons for each of these different techniques for applique. Having completed my sampler I have learned that I would have achieved a more even tension if I had either used iron-on interfacing across the whole sampler or used an embroidery hoop.


For a more complex applique design, my preferred method is fusible applique as this enables you to build up a picture adhering to the fabric as you go. Only yesterday I came across a fabulous tool to help you (affiliate link) – an applique fusing mat with applique pressing sheet.
Applique Projects
There are so many ways to use your applique skills:
- applique pillow
- embellishing a dress
- applique quilt
- applique as a form of decoration on bags
- as a patch to repair clothes
- to create pictures as wall art
- to decorate, jazz up, clothes
- book cover sleeves
- needle case
- fabric applique cards
I particularly like the work of Jo Avery who combines applique with embroidery, adding decorative stitches to abstract shapes appeals to me.

