
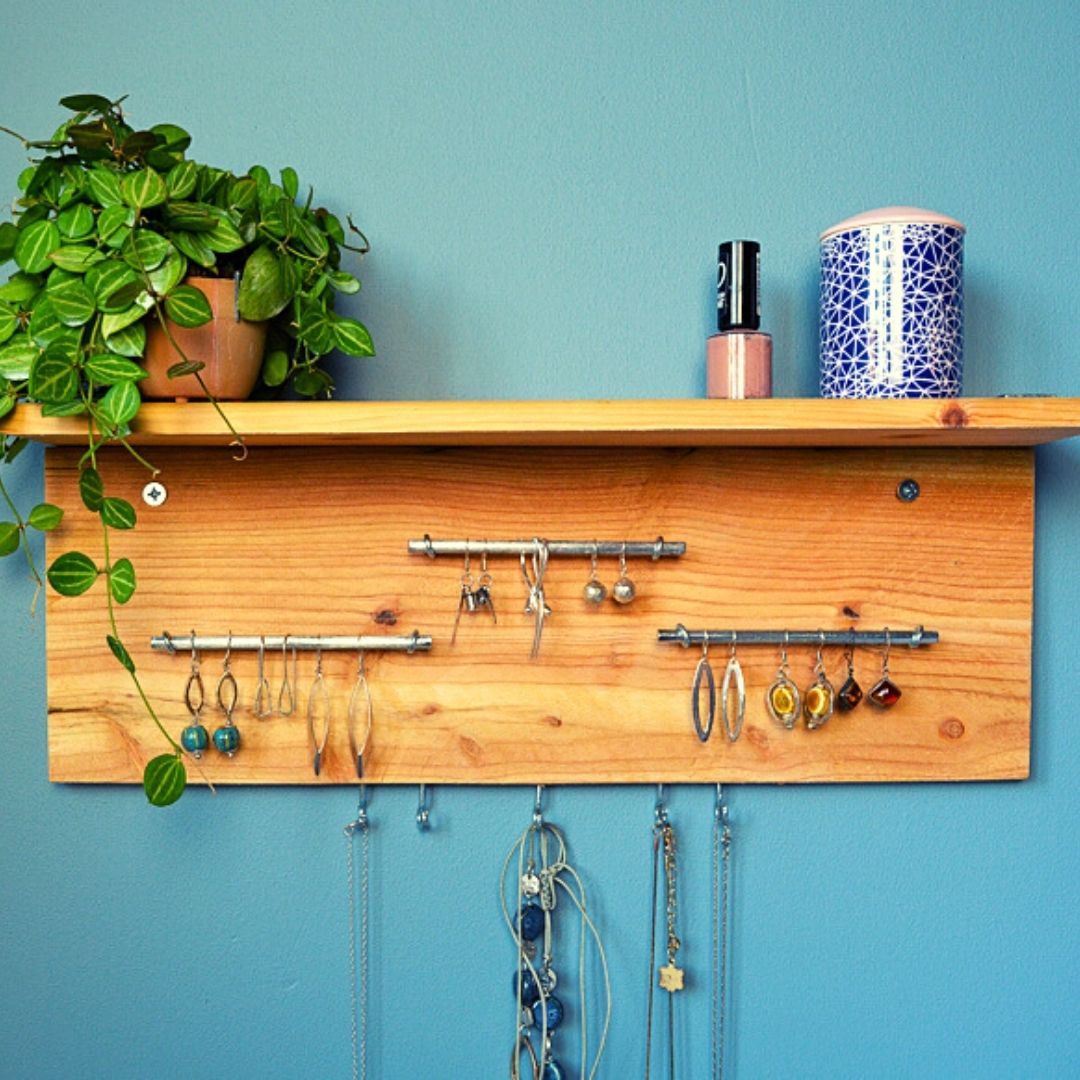
Looking for a stylish yet functional storage solution for your earrings and necklaces? Then I have a great solution for you which you can make within the hour!
This wooden wall mounted jewelry holder can be adapted to fit your collection of jewelry – adding or reducing the number of bars and hooks.


This rustic DIY jewelry holder was rustled up from materials in the shed. After showing my creative husband ideas I had spotted on Etsy for jewelry organization, he rustled away and produced this stunning wall mounted jewelry holder for me.

I am delighted to have a stylish storage solution which also displays my earrings and necklaces.
I can easily find what I am looking for, rather than the jumbled up pile on my bedside table! No more hunting for the other half of a pair!! Plus I love the fact the jewelry holder is wall-mounted with mini shelf – all I have to do now is keep the plant alive!
Check out other beautiful wooden projects Jared has made me:-

How To Make A Jewelry Holder
Learn how to make your own jewelry holder. All measurements given can be adjusted to suit your needs (longer, or smaller).
Materials
- Wood board 16 1/2" by 5 1/2" by 1/2"
- Wood shelf (ours is a former skirting board), 16 1/2" by 3 3/4" by 1/2"
- 5 Hooks for necklaces (or more!)
- 3 metal rods measuring length 4 3/4" width 3/16"
- 6 Screw eys to fix metal rods - we used suitably sized from a multi-box
- 8 Screws 1/2"
- Two right-angle brackets, ours from the shed are 3"
Tools
- Drill
- Braddle
- Ruler or measuring tape
- Saw
- Sandpaper
Instructions
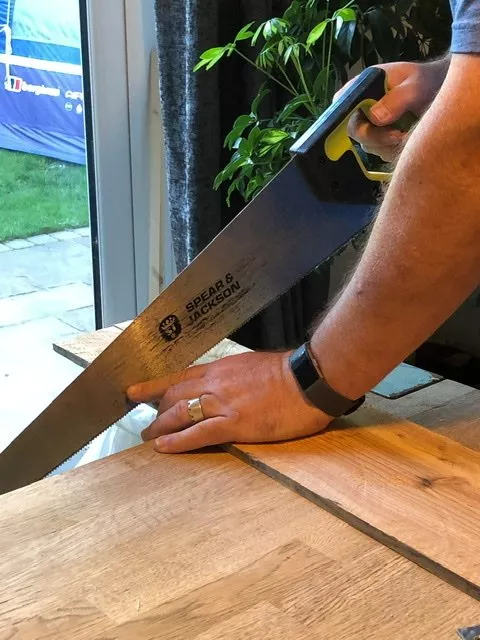
- Start by cutting your wood to size, we used a saw.

- Sand your wood with sanding paper wrapped around a wooden block. Ensure you not only do the ends but also sand the surfaces. You don't want to get a splinter whilst placing your earrings onto your jewelry holder!


- Place your two pieces of wood at right angles, mark with a drabble and then screw the right angle plates in place. We used the edge of the table to guide us for the right angle. Ensure your screws are the right length to hold securely but not come through to the front of the wood. The right angle brackets are placed on the back of the wood and top of shelf.


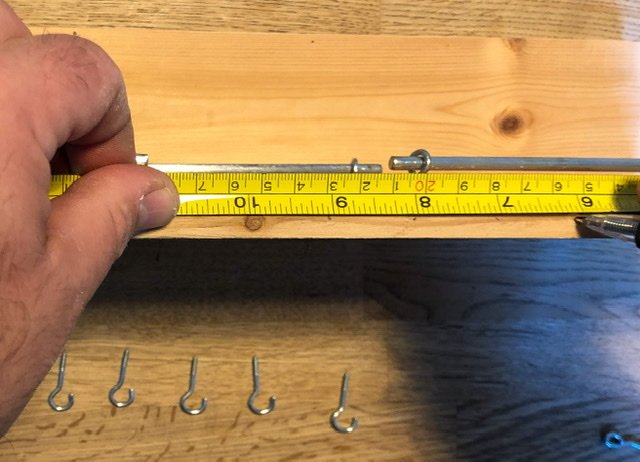
- Next work out the placement of your metal rods, we have used three, two parallel with the middle one higher. You could choose to have two full-length road the length of your jewelry holder. Think about the length of your earrings.


- Mark holes with a braddle for your metal loops, then screw into position. Place your metal rods into position then with pliers slightly twist the circles to prevent the rods sliding out.


- The last step is to add hooks along the base of your jewelry holder. We started with marking the central position then measuring out from there. Mark the position with your braddle then screw in.

- Finally, wall mount your rustic jewelry holder, predrill through the wood under the shelf, drill your wall adding raw plugs before screwing into position.


Stacy
Saturday 12th of June 2021
What a beautiful jewelry hanger! I love the natural wood look. Thank you for sharing How to make this shelf. The handles are just perfect. I am going to try this by my little self!