
Do you have a fabulous sea glass collection you wish to display? Then these DIY sea glass Christmas trees are for you. These tree ornaments are a fabulous and unusual addition to your holiday decor.
As a family we love walking along the coastline hunting for beach glass, often having a competition to see who can find the smallest piece, or the largest or even a blue piece (particularly rare where we live). There’s nothing like a walk scouring the beach for treasures.

But as always, there is a dilemma once home about how to display the beach glass. Let me show you how to create your own DIY sea glass Christmas trees at home, showcasing the gorgeous colors of genuine sea glass creating a unique addition to your holiday season decor.
Where to find sea glass
Sea glass is a type of beach and ocean debris that has been washed up on the shore. It can be found in many different sizes, shapes, colors, and textures. The most common color is blue, but it can also come in other colors such as green or white. Some sea glass pieces are smooth while others have sharp edges.
Variations to the beach glass Christmas trees
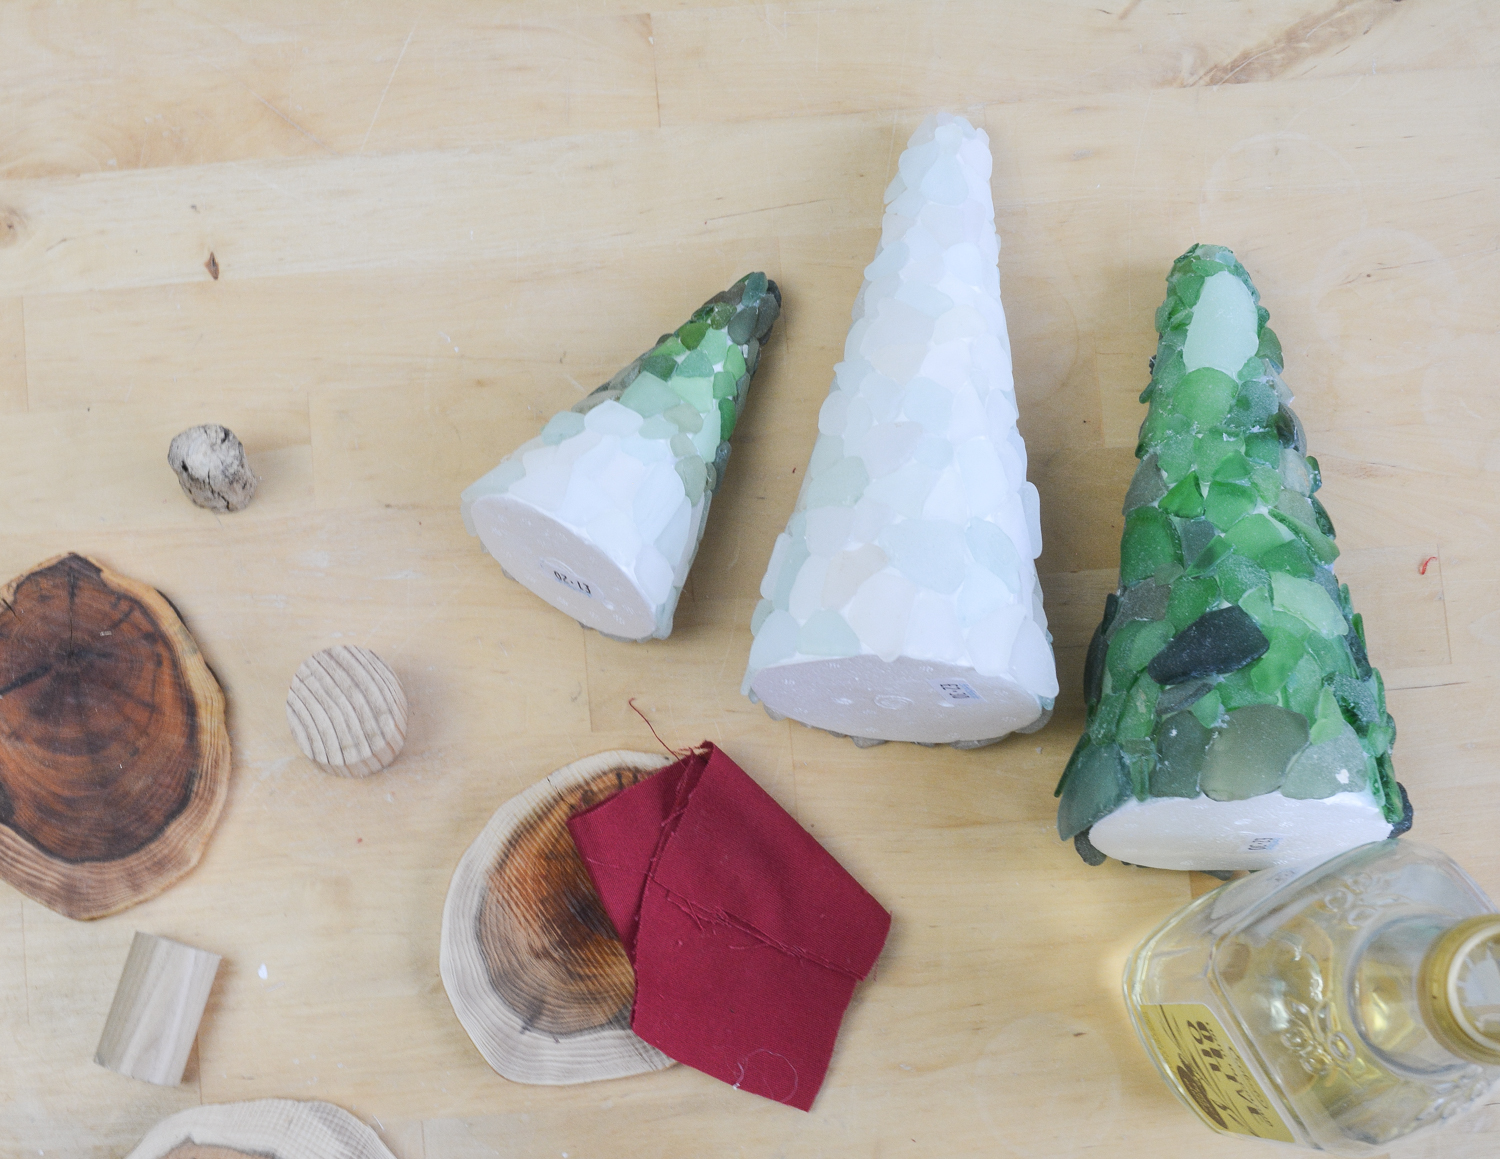
With my three sea glass Christmas trees I have demonstrated choosing one solid color for your trees, such as green, but also an ombre effect where you start with one color and gradually change colors as the tree progresses.
To change them up you could add a mini starfish to the top of the cone to represent a star – I have chosen not to do this as I wish to display my Sea Glass Trees all year round!
Sea Glass Christmas Tree DIY
Materials for DIY Sea Glass Christmas Trees
- Polystyrene cones
- Sea glass, I have a mixture of green sea glass and white sea glass
- Hot Glue gun
- Extra Glue sticks
- Wood Slices for base
- Curtain pole, broom handle, thick wood branch – one of these for tree trunk
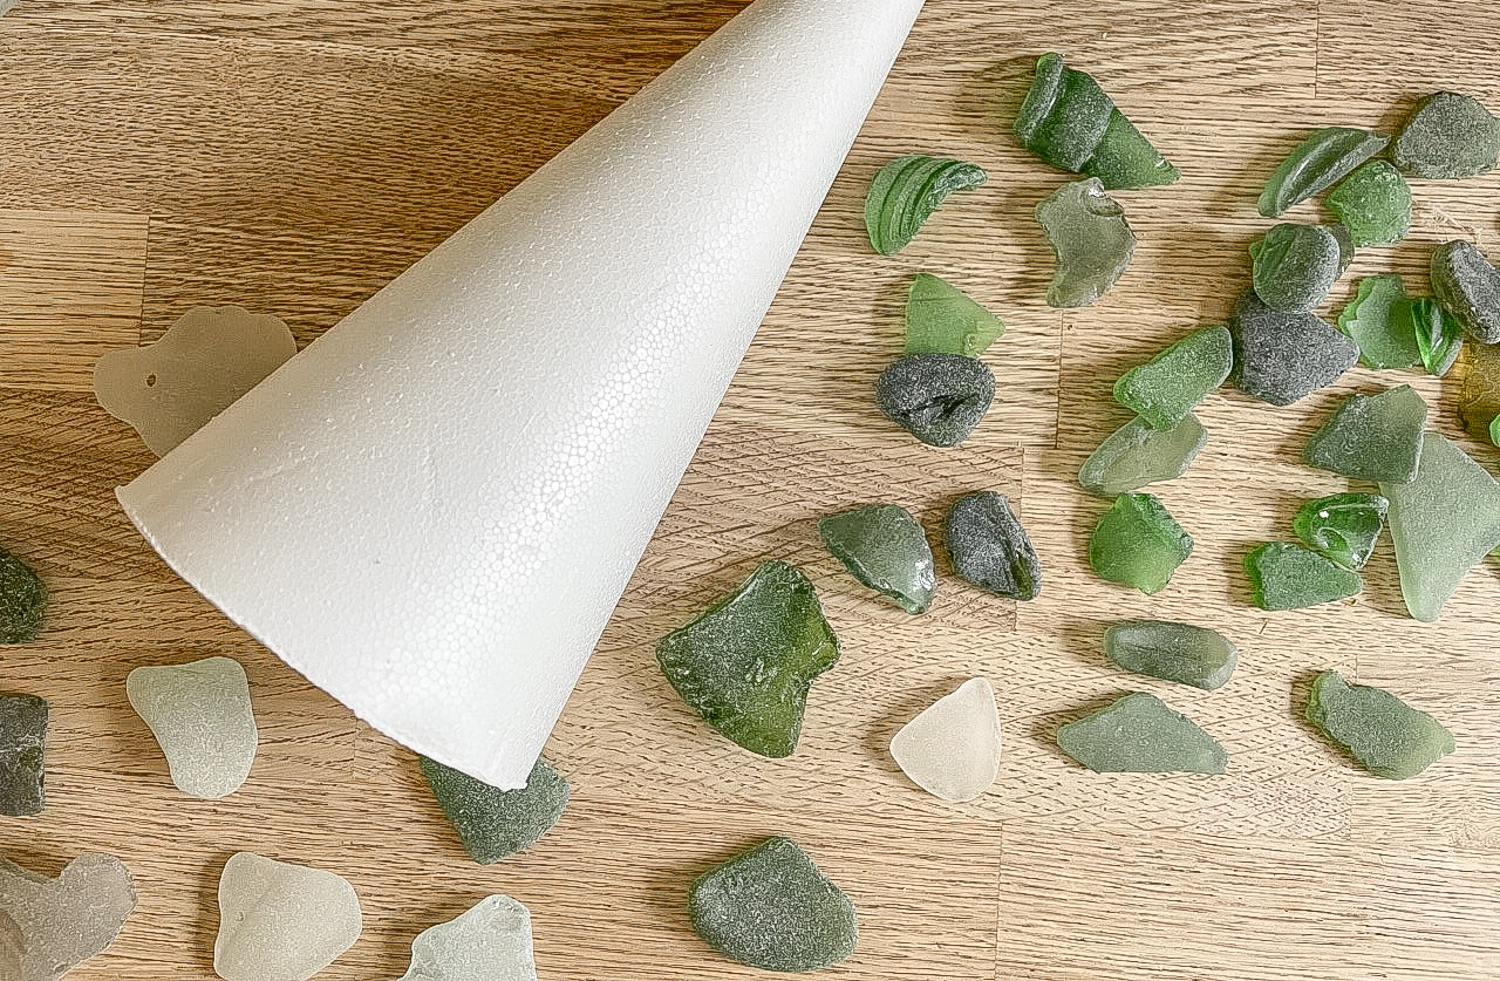
Step One – Applying sea glass
We are going to start at the base of the cone, applying a row of sea glass around the base with a dab of glue per piece of natural glass using a glue gun.

Ensure you remove loose glue strands as you work (they are the downside to glue guns!).
Gradually work up the cone until it is fully covered in sea glass.
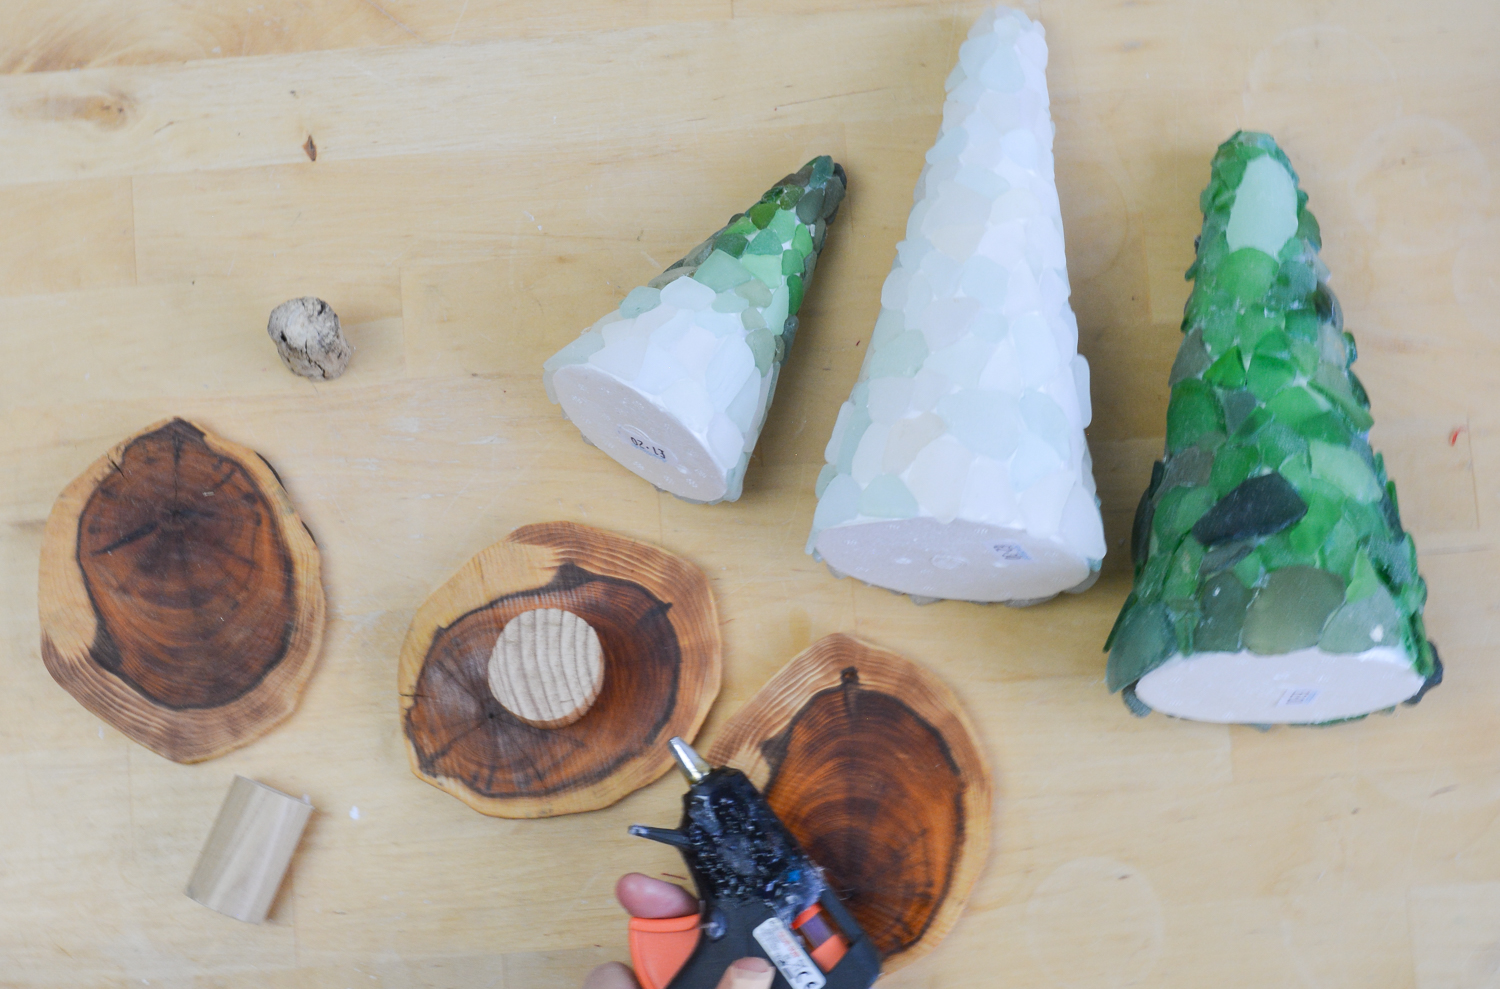
Step Two – Preparing the base and trunk
My husband kindly sliced me three bases from a piece of yew he had in the shed (using a band saw), apply olive oil with a cotton rag to bring out the color of the wood.
A great alternative is to buy some ready-made log slices or even drinks coasters for the base of the Christmas trees.
Cut a piece of a branch for the tree trunk, ours is approx 1″ in length. Ensure you have good flat ends which are 90 degrees to the trunk piece – if your angle is off your tree will tilt slightly!!
Step Three – Finishing the Sea Glass Christmas Tree
Now to assemble the finished beach glass Christmas trees, my favorite bit! Using your hot glue gun attach the tree trunk to your wooden base.
Lastly, apply glue to the top of the trunk and place your tree ornament centrally into the trunk. Step back and admire your handwork.

I hope you enjoyed this tutorial for gorgeous sea glass christmas trees. Unique seaglass Christmas tree’s make great decor for your holiday table. Do check out my many other sea glass crafts for further inspiration:-
- Sea Glass Bowl
- Sea Glass Christmas Decorations
- Sea Glass Jewelry
- Sea Glass Mirror
- Sea Glass Decor
- Sea Glass Lamp
Or check out my round up post with 30+ sea glass craft ideas

Julie
Tuesday 21st of December 2021
These are beautiful Vicky, definitely a good call to be able to display them all year round. I've heard that a hair dryer is good to get rid of those hot glue strands but I've never tried it so can't guarantee it would work, might be worth a try though?
Vicky
Wednesday 22nd of December 2021
Oove I've not heard of that tip, thank you :)