
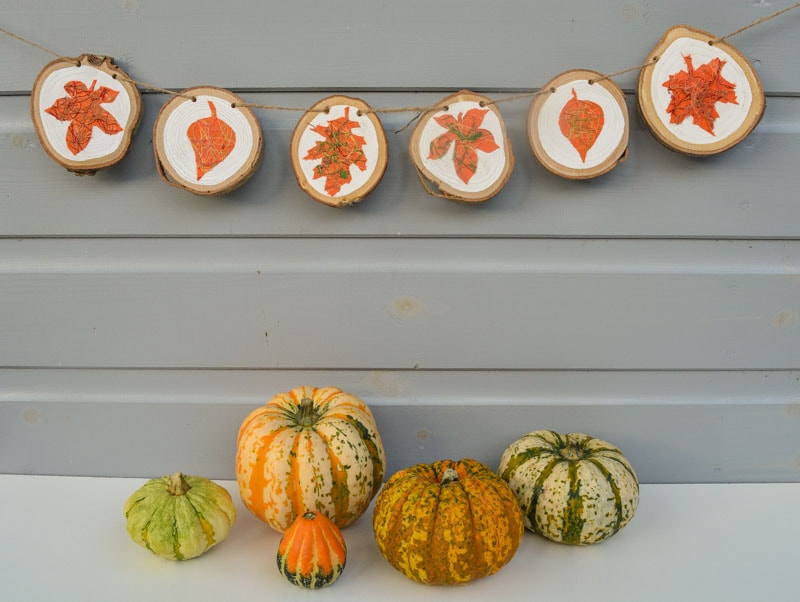
The weather here remains summer-like, I love it, any extra moments of warm sunshine are gratefully received. The rest of the family are loving the Christmas decorations appearing in the shops, busy planning the decorations they are going to make this year. But hang on its autumn!! Time for some autumn decoration – let’s celebrate each season. My DIY autumn garland is inspired by my love of autumn leaves, the wonderful colours and shapes that surround us as the leaves fall.
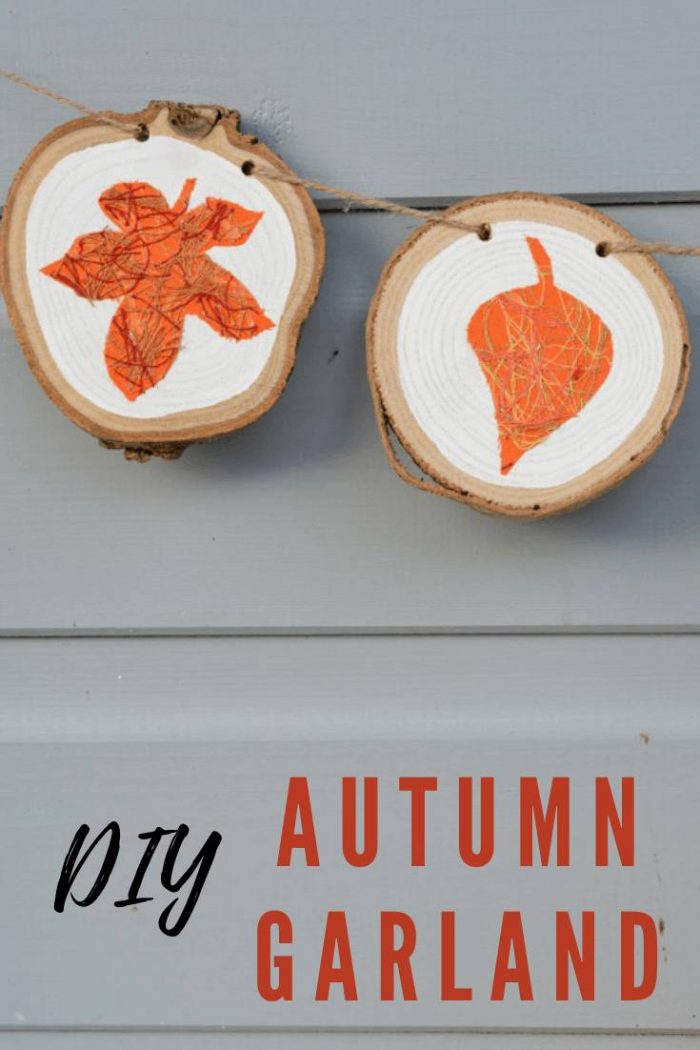
This DIY autumn garland is made from wood slices and the odds and ends of threads left over from projects. It was only recently that I learnt that some people save their ends of threads, I have to admit I dug around in the sewing room bin for mine!

My prototype just didn’t quite work, arranging the threads with no base fabric left the leaves a little indistinct. The base orange fabric underneath brings the leaves to life.


DIY Autumn Garland
- Paper-backed fusible interfacing (Wonder Under or Heat ‘n Bond) In the Uk Bond a web
- Wood slices (handmade or bought)
- Sewing threads
- Iron
- Orange Fabric
- Drill with wood drill piece
- White milk paint
- Baking paper
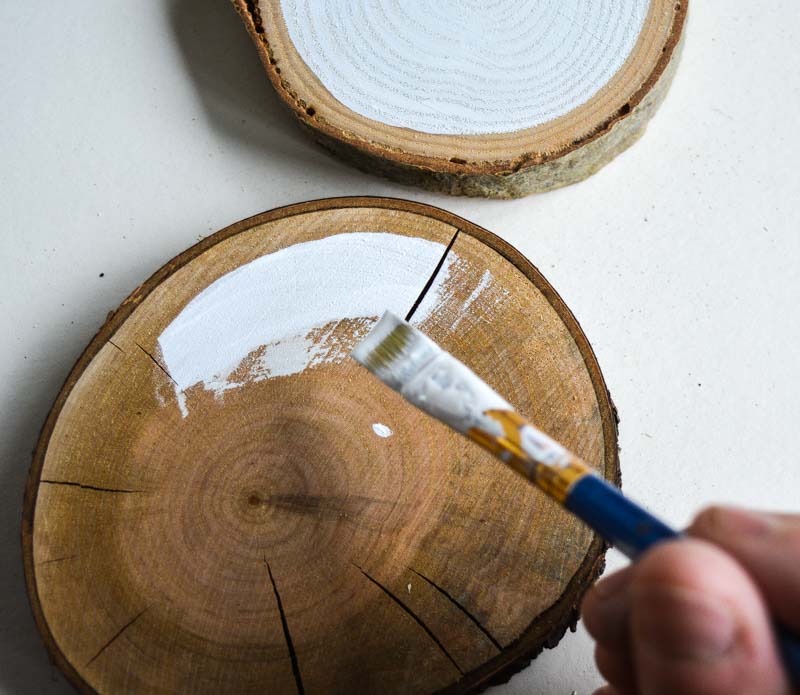
Check your wood slices, if required lightly sand.

Carefully paint one side of the slice white with the milk paint, I have a left a 1/4 gap around the edge revealing the beautiful wood. Set aside to dry.
Download the template of leaf line drawings. Find the leaf template here.
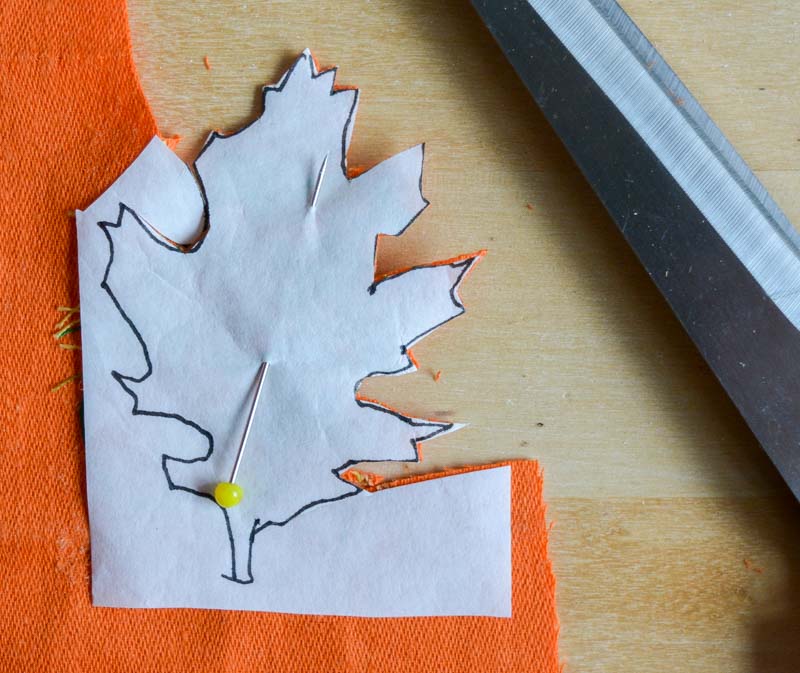
Place underneath the fusible interfacing so the paper side of the interfacing is facing you. Trace around the leaf shapes.

Cut up your sewing threads and place on the glue side of the interfacing, ensure you fill each leaf shape with good cover. You need a good amount so that they adhere well together and when cut out are identifiable as a leaf shape.
Cover the glue with baking paper to protect the iron, then iron. You will need to iron each leaf for a good ten seconds so the threads adhere to the glue.
Peel the threads and remaining adhesive off the backing paper, you will see a glue residue.

Place glue side down on the fabric. Iron to glue the threads to the fabric, don’t forget you baking paper between the leaf and you’re iron otherwise you will have sticky residue on the iron.

Using the traced leaf paper (which you just peeled off) as a template cut the leaf shape out.
Place your cut out leaf onto the wood slice, using a glue stick to adhere the two surface together.
Drill holes into the wood slices. If like me you are always wondering which drill pieces is for wood, which for mason etc.. then sign up to my newsletter for a quick hints and tips sheet.

Thread the autumn leaf garland with garden twine. I used an upholstery needle to thread the twine through.

If you would like the cheat sheet for remembering the correct drill pieces for DIY jobs sign up here:
[mailerlite_form form_id=1]
I love working with Paper-backed fusible interfacing (I am trusting I have the correct American translation!), first introduced by my art teacher back at school 25 years I still use it regularly. Do you have any favourite autumn crafts? It’s such a great time of year, here’s to celebrating the seasons.

Cindy
Saturday 20th of October 2018
Love this idea...any projects using leftover bits of yarn?
Lisa // Cucicucicoo: Eco Sewing & Crafting
Saturday 20th of October 2018
Oh, this is so pretty and perfect for Autumn! I love your idea of using the string bits (it never even occurred to me to save them!) on felt, and also painting the center of the wood slices. It all makes for a very pretty composition. :) Lisa