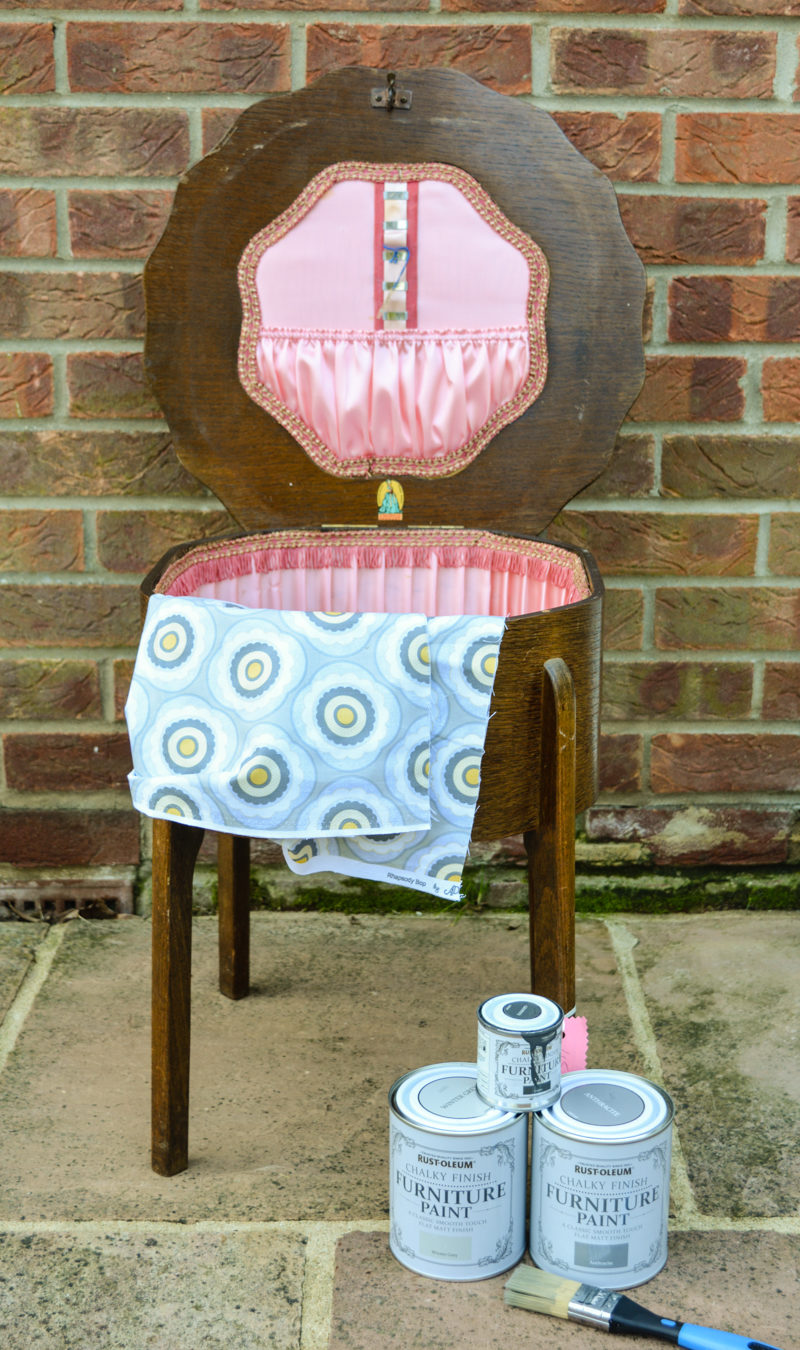
When I stumbled upon this rather cute wooden sewing box with legs in a charity shop I just knew I had to squeeze it into storage – now we have moved it’s time to modernise it. I love how the legs form part of the sides. It is perfect as a side table, with storage to hide my current crochet project plus the right height for a cup of tea.
The living room is decorated with a soft purple accent wall with gentle grey walls. We like the colour scheme and plan to keep it, with a fresh lick of paint when time allows. So my decision about paint colours for the sewing box was easy. Several tones of grey – this makes it an easy piece to blend in anywhere. I have used chalk paint and relined with fabric on the inside.


Follow my creative journey by signing up to the newsletter – includes access to a resource library with hints and tip sheets for painting with chalk paint.
[mailerlite_form form_id=1]
Sewing Box Makeover
- Wooden Sewing Box with Legs
- Sand paper
- Chalk Paint
- Wax
- Pretty Fabric
- Fusible fleece
- Card
- Glue gun
- E6000 glue
- Braid 2 meters
Lightly sand back the furniture to remove any chipped varnish /sealant. Clean off any grease and sawdust.

Carefully remove the lining, the original lining will act as a template for cutting out your new fabric.

Paint thin coats of chalk paint to the surface. This avoids drips. If you wish to have a flat look with no paint brush marks change the direction of your brush for the second coat, then sand with fine sandpaper.

Apply a thin layer of wax- a common mistake for beginners with chalk paint is being a little heavy handed with the wax. If you do put too much on by accident leaving streaks of wax brush with fine wire wool.

Place the lid lining onto a piece of fusible fleece. Cut around fractionally smaller. Iron the fusible fleece onto the back of your chosen fabric, and cut out.

Attach the new fabric to the inside of the lid, I have used E6000. Initially, the plan was to staple it in place but I couldn’t find any staples for my staple gun!
I found some braid at a local charity shop which I painted with chalk paint to add a little touch of colour. I love how you can use chalk paint on fabric.

Attach braid around the join between the fabric and lid.

Now to line the base of the box. Cut out fabric wider than the base.

Using spray adhesive place in the base of the box.

If required use PVA to attach the overlap to the sides of the box.

Measure the height of the box.

Cut out cardboard 1/4 shorter than the height. Cover in fabric, I have held mine in place with a glue stick.

Place the fabric sides inside the box. Attach with a glue gun as you need a quick drying adhesive.

Finish by attaching braid along your top edge, I used a glue gun.

If you have enjoyed this project you may like my post on how to convert three dining room chairs into a bench seat.
This is the first upcycled project I have completed since we moved in. I am surprised at how one project has helped with adjusting to our new home. To be creative, to get outside with some paint, to make a mark has helped ease the unexpected homesickness I had for our former home.
Any tips for helping make a house a home are most welcome.


Karen Cooper
Tuesday 3rd of July 2018
I have just found one of these sewing boxes in my local charity shop which I have sanded, chalk painted the bottom cream and oil the wooden top. I then came across your blog which helped me with the inside. I now too have a place to hid my crochet project and coffee table all in one. Thank you for sharing x
Vicky
Tuesday 3rd of July 2018
So glad you have found it helpful, Vicky
Migdalia Garcia
Monday 30th of April 2018
Beautiful!!!!
Deb
Monday 30th of April 2018
Too bad you PAINTED over that beautiful wood. I would NEVER paint anything with a good wood grain. Nothing can match the beauty of natural wood. Painting that piece was nothing more than destruction!
Vicky
Monday 30th of April 2018
I appreciate painting old wood furniture is not to everyone's taste. If in future I wish to return it to the wood I can easily sand back.
Julie
Monday 30th of April 2018
It's lovely Vicky, I especially love that fabric choice for the inside. Moving is a funny thing, we've been here 3 years now and I still call it 'the new house'! Making a few bits and putting them round the place really does help though, I found once there were some photos up on the walls it felt more like home too.
Kelly
Monday 30th of April 2018
Love this post, now if I can find an old sewing basket!!! Your instructions are very clear & easy to understand, even though I've never done anything like this, I think even I could do it! I follow you on Instagram, & now will follow you here also, on Facebook & Pinterest! Also sent a request to subscribe to your newsletter! Your newest fan!!!
Vicky
Monday 30th of April 2018
I am so pleased the instructions are clear to understand, enjoy hunting for a sewing box. I hope you continue to find inspiration here :) Vicky