
As a gelli plate printing adict I regularly experiment with different techniques. Today I am sharing a variety of gelli plate resist techniques for you to try as part of your creative journey.
The Gelli Plate, a versatile and flexible surface for monoprinting, allows you to create beautiful, layered prints at home. By incorporating resist materials such as masking fluid, wax, or cornstarch, you can block or repel paint in specific areas, allowing for intricate designs and added texture.


Gelli Plate resist techniques create dynamic contrasts and depth within your prints, adding visual interest to your designs. Whether you’re new to printmaking or have prior experience, this step-by-step guide will teach you how to combine resist methods with the Gelli Plate to achieve stunning, one-of-a-kind results.
Table of Contents
Gelli Plate Resist Video
If you like video as well as a written tutorial check out my you tube video
Materials for gell plate printing
- Gelli plate
- Acrylic Paint
- Roller
- Paper
- Vaseline
- Wax Crayons
- Masking fluid
- Oil Pastels
- Corn Starch
If you have not gel plate printed before check out my How to Start Gelli Plate Printing.
1. Vaseline
We are going to use stencils, but you will see that using vaseline gives a different result, gaining a far more grunge effect.
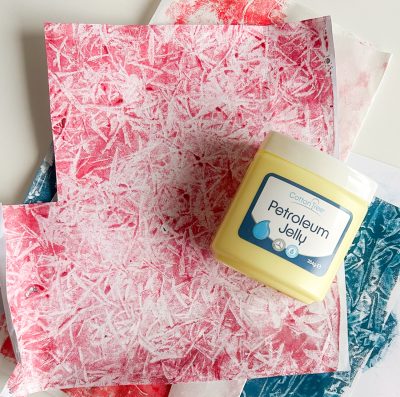

Gather paper, failed prints or plain – any works! Grab a stencil and apply a light layer of vaseline through the stencil with either your finger or pallet knife.


Before you remove the stencil rub off the vaseline with a paper towel, taking care not to slide the stencil. Carefully lift the stencil straight up.
Apply a layer of acrylic to your gelli plate, place your sheet of paper onto the gelli plate, and take your print.


Once your print has fully dried remove the vaseline from the paper by rubbing gently with a baby wipe.


To clean the stencil wash with soap and water.
This method of printing gives a more grungy effect than printing through the stencil as you can see on this example showing both methods.


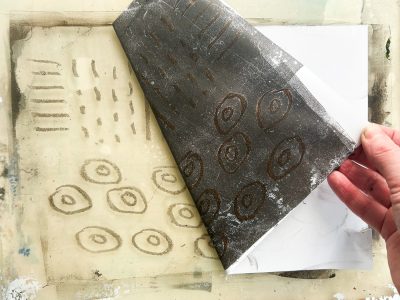
2. Wax Crayons
Rember carrying out wax crayon rubbings as a child? Let’s revisit this with our gel plate. Grab some paper and wax crayons and see what textures you can find to rub. My immediate thought turns to patterned drain covers and textures in old churches.

You can make card reliefs to rub from, or even rub a cut lino.


Apply a thin layer of acrylic to your gelli plate, and place your rubbing over the top, smooth over and lift. This will leave acrylic where your wax crayon pattern is.


Let this dry then apply a layer of paint, apply your paper and allow to dry before pulling your final print.


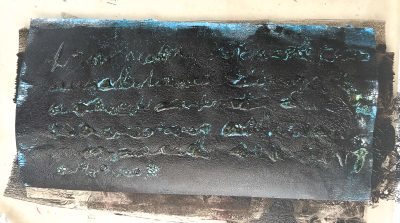
3. Masking Fluid
This is such a fun method- I recommend a stronger weight in paper for a better result, as you will see my copy paper ripped when removing the masking fluid.
To start with you may like to apply a base print, before applying the masking fluid.


Ensure the masking fluid has fully dried, apply a layer of acrylic to your gelli plate and place your paper down to take a print.

Allow this to fully dry then rub off the masking fluid to reveal the color below.
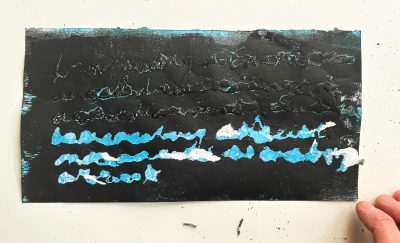

As you can see some of my copy paper has ripped –
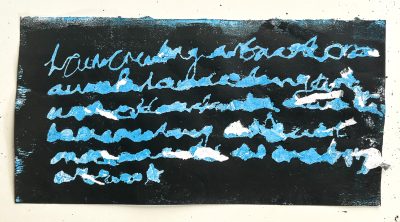

My mixed media paper has faired a lot better.


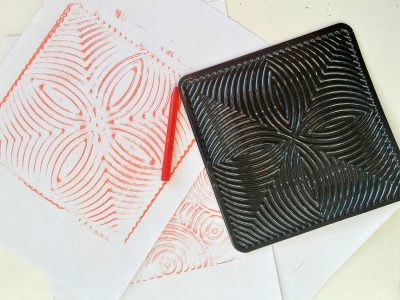
4. Oil Pastels
Experiment with oil pastels, think about the thickness of line, just play. The color of the oil pastel doesn’t matter.


Apply a thin layer of acrylic to the gelli plate. Place your design down onto the plate, the paper will pick up the acrylic leaving behind your original design on the plate.

Allow to fully dry you may wish to add a layer of paint through a stencil.
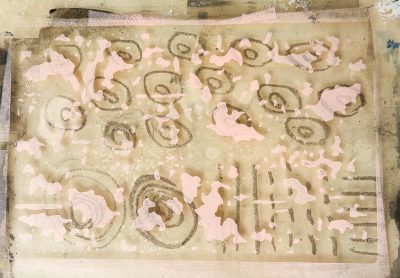

Apply a layer of acrylic, then your piece of paper for the finished print. Allow to dry before pulling your print.


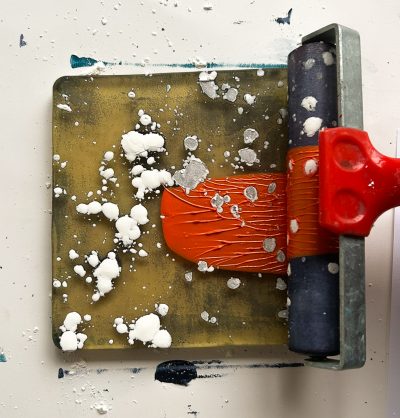
5. Cornstarch / Talc Powder
This is a fun technique for grunge effect papers perfect for collage papers.
Start by placing a layer of acrylic on your plate, and then sprinkle on your cornstarch.
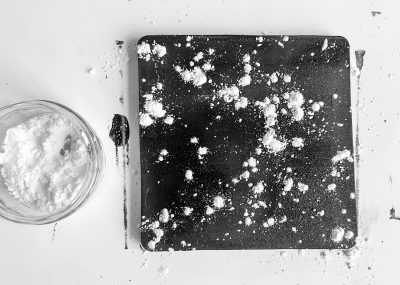

Take a print, once dry wipe off any remains of cornstarch on your print.


You now have a choice… to keep as is or layer up. You can roll a second colour onto your gelli plate, on top of the remaining cornstarch, then take a print.

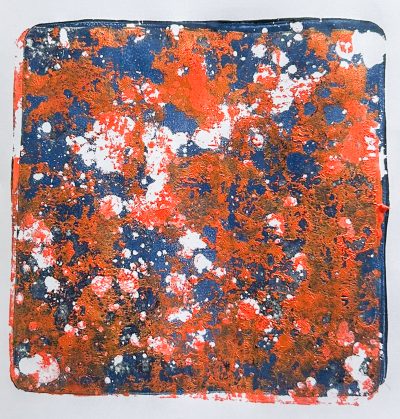

Another option is fully clean your plate (I like baby wipes for this), roller out acrylic and sprinkle the cornstarch, which will give you a different result.


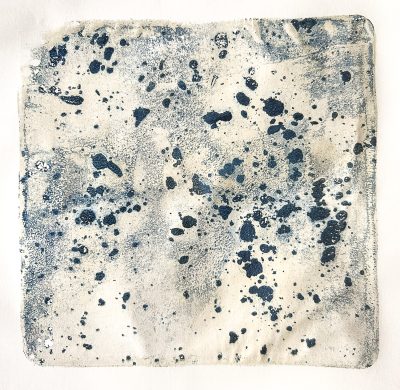
You can choose to leave the cornstarch on the plate until it’s fully dried, then carefully brush off the cornstarch and apply a layer of acrylic. This gives another unique print.


Apply the paper and allow to dry before pulling the print.

There is nothing to stopping your from combining these techniques…. this print is a combination of a wax rubbing, followed by masking fluid then a print.


I have had a lot of fun playing with these different gelli plate resist techniques. Remember “failed” prints can be transformed by any of these methods – have fun playing and creating.

