
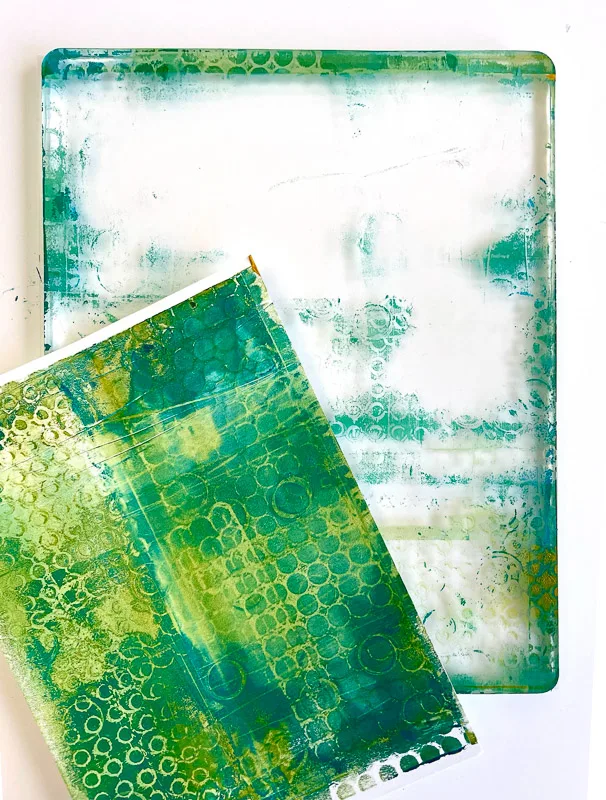
I am super excited to show you just how easy it is to get started with gelli printing – all you need is a gelli plate, acrylic paint, and a brayer to make fabulous prints. This is a super fun, fast, and quick-drying method for printing.
As with any printing the best results come with practice, but I have you covered with some great suggestions and ideas to get you started to make fabulous gel prints. Be warned you will quickly become addicted!

What is Gelli Plate Printing?
It is a printing plate without a press. This makes printing at home very accessible – the modern take on mono-printing.
The surface of the gel plate is an absorbent surface that releases the ink onto the paper. If you are vegetarian don’t worry bought gelli plates do not have gelatine in them. The reusable plate allows you to make fabulous prints with crisp details, using affordable quick drying acrylic paints.


Gelli Printing Materials
- Newspaper or wipeable tablecloth to protect your work surface
- Acrylic paints
- Gelli Plate ( you can buy gelli pads in a variety of sizes from different manufacturers but if you would rather make one check out this how to make a gelatin plate tutorial)
- Brayer
- Sheets of paper (you can use a wide variety of types of paper, from plain to watercolor, to tracing paper, to old books)
- Materials for adding pattern or texture to your prints
How to make a Gelli Print
First, take one of the plastic protective sheets off the top of the gel plate. It is wise to keep the bottom side on so it doesn’t stick to the newspaper on the table. If you take both off you may get ghost images of text from the newspaper on the bottom side, don’t worry if this does happen. I can speak from experience and say this does not transfer onto the images!
Next, let’s squeeze dots of acrylic paint onto the gelli plate. You do not need a lot of paint, less is more (you can always add more if you put too little on to start with.


Using the brayer roll the acrylic paint across the gelli pad until it is fully covered with a thin layer of paint that is evenly spread.


Now for the fun part, add any texture or pattern to the ink, such as stamps, drawing with a soft tipped tool, or one of my favorites removing some paint with a crumpled paper towel.


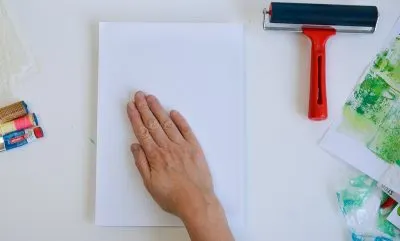
Place your sheet of paper over the top of the gelli plate (standard printing paper works well, or experiment and try tracing paper, water colour paper, old sheets from books)
Using your hand smooth the paper down gently and evenly across the gelli plate.

Slowly pull the paper up from the gelli plate then set aside to dry.


If you have used too much paint and have a small amount of paint residue left on the pad from your first print take a second print, this is called a ghost print. I love keeping these as a base layer to print on a second time once dry.
Roll your brayer on a spare piece of paper to remove any excess ink and you are ready for your second print.


If you have used too much paint and have a small amount of paint left on the pad from your first print take a second print, this is called a ghost print.
Eight ways to add texture and pattern to your gel prints
Think about what materials you have around your home, and what can you use to add pattern or texture to your print. Everyday objects provide endless resources to add to your gelli arts printing tools, the possibilities are endless.
Rubber Stamps
You can use rubber stamps across the inked gelli pad prior to printing. This takes a layer of paint off the surface of the pad.


Water drops
Ink up your plate, then using a paint brush flick drops of water across your plate. Allow to dry then add another layer of ink before taking a print.


If you are not patient enough for this (that’s definitely me!), once the acrylic is dry on the pad take a print that will dry the water drops and give this lovely effect, your plate is then ready to add your second layer of ink.


Stencils
It is super easy to make your own stencils out of paper or you can buy a huge variety of stencils.

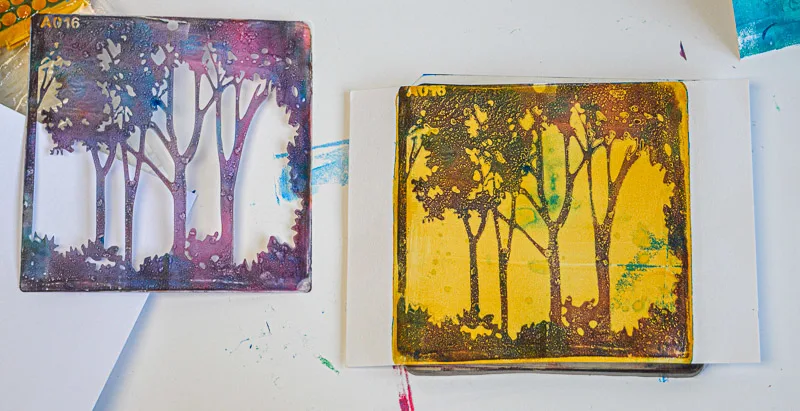
For this tree print, I started with a dry printed yellow background, inked up the gelli pad, placed the plastic stencil on and took a light print off the top. I then removed the plastic stencil and printed onto my first yellow print.
An alternative approach is to use the stencil as your negative space. You can have creative fun building layers of stencils prints. Be aware if you make your own paper stencils the paper absorbs the ink, therefore as you cut out your stencil remove the part of the stencil you wish to appear on your printed surface.


Looking to make your own stencils? Check out my how to make a stencil with a Cricut.
Everyday objects for texture
These can range from corks to bottle tops, to rubber bands, to buttons, to string, to leftover packaging such as bubble wrap. There are so many different things that create fun textures.


Crumpled fruit netting, kitchen towel, plastic
This is one of my all-time favorite methods of adding texture to a gelli plate print. Grab your material, crunch it up and dab the inked-up printing plate. You will achieve different effects from different surfaces. Kitchen towel has small circular indentations which I just love crumpled up, whereas plastic wrap will keep it simple with just the crumpled effect


Soft-tipped tools
The opposite end of the paintbrush makes a nice tool for drawing on the gel plate. You can create all sort of patterns simply drawing with the soft end (taking care not to press to hard!)
Nature
Have you thought of gelli plate printing with leaves, feathers and petals? They make great natural stencils. I have been experimenting with leaves from the garden, and have some drying flat in books for further experimental prints. I suggest starting by creating lots of backgrounds, adding plants veins pointing towards the plate. Not all prints will work but its fun experimenting.


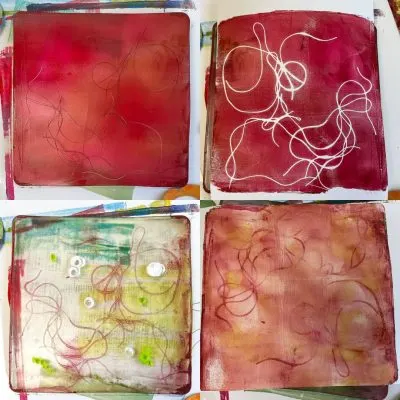
It is fun to build up layers of prints.

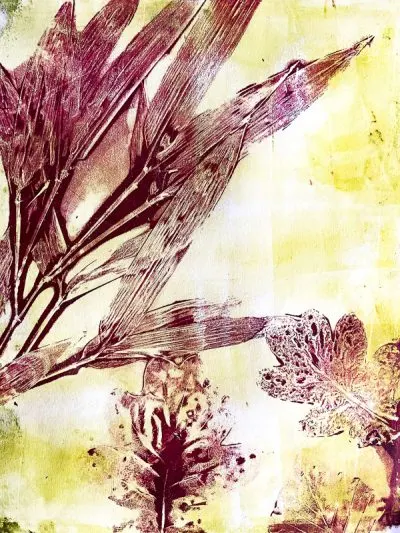


These two prints start with a background print, add paint to the pad followed by leaves veins facing the plate, a light throwaway print taken then remove the plants before printing onto the original background print.


This print was created in layers, if you do not like your first print simply print over the top, after all, you have nothing to loose!
Layers and blocking
This is where the real fun starts, building a base layer, adding a second print over the top. Or building acrylic over the ghost print of the previous one.


I am particularly enjoying playing with blocking. I have printed part of the paper, then printed a different section, building up blocks of prints – scraps of paper work as masks on your printing pad.


How to clean your gelli plate
I like to wash my gelli plate with warm water and gentle soap, such as washing up liquid. Simply soak the plate and brayer in warm soapy water and wipe off the remaining paint until you have a clean surface. You can use baby wipes as a quick method but this is not as good for the environment.
Store the clean plate in its original packaging at room temperature. This preserves the sticky nature of the plate and helps prevent the surface from being damaged accidentally by a sharp implement.
What to make with your fabulous gelli prints?
- Handmade abstract cards
- Christmas Cards
- Heart Garland
- Abstract Art prints
- Art journalling
- Gift wrapping
- DIY resin earrings
- Decoupage Coasters
- Fall Banner
As you explore the wonderful world of gelli printing you can learn how to print on fabric, opening up silk scarves, patchwork quilts, bags. Or explore the wonders of image transfers. Check out my 25 projects for your gelli prints.
Frequently Asked Questions
How do I remove dried-on paint?
Don’t worry if you get distracted! Simply apply a layer of acrylic over the top and take a print. This will lift the original dried paint off the plate. Alternatively use a baby wipe or wash in warm soapy water and dry.
What should I not use on a gelli plate?
Sharp objects are a serious no no as they can easily damage the extremely sensitive surface of the gel plate. Another no no is glossy photo paper which can damage the surface of the plate.
How long do homemade gelli plates last?
Homemade gelli plates must be kept in the fridge, when done so they will keep for two to four weeks.


How to gelli print

Instructions
- First, take one of the plastic protective sheets off the top of the gel plate. Keep the bottom side on so it doesn’t stick to the tablecloth on the table.)
- Squeeze dots of acrylic paint onto the gelli plate.
- Using the brayer roll the acrylic paint across the gelli pad until it is fully covered with a thin layer of paint that is evenly spread..
- Add any texture or pattern to the ink, such as stamps, drawing with a dull soft object, or removing some paint with crumpled paper towel.
- Place your piece of paper over the top of your gelli plate.
- Using your hand smooth the paper down gently and evenly across the gelli plate.
- Slowly pull the paper up from the gelli plate.
- Set your paper print aside to dry.
Gelli printing with kids is a fabulous way to make freeing art together. For more advanced gelli printing ideas I suggest searching instagram for quick video reels which provide fabulous inspiration. I am keen to try out Deco pens on a gelli plate.
Interested in trying other print methods? Have you heard of tetra pak printing? Check out my Easy Tetra Pak Printing at Home article.


julia
Friday 1st of March 2024
Thank you, very helpful beginners guide.
But I have 2 questions I couldn't find answers to on the web.
Do Gelli plates have a wrong side, or can I print on both sides (e.g. turn the plate around if one side got scratched or something)?
GelliArts says in their FAQ to store the plate between 2 sheets of white copy paper. But the paper absorbs oil(?) from the plate and I fear that will reduce its durability. But when I try to put the plastic sheet back on, I can't smooth out the bubbles and they show up as "dimples" in the plate the next time I want to use it. Can you give me any further tips on storage?
Kind regards, julia
Vicky Myers
Sunday 3rd of March 2024
Great Questions Julia :) There isn't a right or wrong side to your gelli plate, you can use both sides. The paper does absorb oil but this is perfectly normal. You can clean and refresh your gelli plate with mineral oil.
Marjorie
Friday 24th of February 2023
I am interested in fabric painting on homemade fabric napkins. Do you have any tutorials for this?
Thanks,
Marjorie
Vicky Myers
Tuesday 14th of March 2023
Not as yet :)