
Learn how to make this stunning DIY Thank You card, using recycled packaging. This method uses recycled Tetra Pak, insulation tape, and a Gelli plate to create a textured, handmade “THANKS” print. It’s a fun, experimental process—expect a few attempts before you get the perfect pull.
Tetra Pak is found in packaging for oat milk, passatta etc… today we are going to wash it out and get printing with either a die cut machine or pasta making machine!
I have chosen to gelli plate print wet strength tissue paper for my card, but you can easily skip this step and use any tissue paper you have to hand.


Table of Contents
Collography Printing at Home
If you have not done this before its a fun creative process. You will need either a die cut machine or a pasta making machine – basically a gadget which has two rollers you can wind layers of paper through, thus adding pressure to the tetra pak printing plate so the etching ink transfers onto your damp print paper. Think of it like a mangle.
If you are new to this I strongly suggest having a simple go first. You will need your preferred machine, thick felt (such as an old blanket), and layers of paper. When you place your tetra pak between the layers and turn the handle you should feel a bite when your reach your tetra pak plate. If you don’t, add more layers of paper. Its important there is enough pressure for the ink to transfer.
Sally Hirst has a wealth of information re collagraphy printing – here she is reviewing six different die cut machines for this process.
Materials You’ll Need
- A clean piece of Tetra Pak (juice/milk carton)
- Insulation tape or aluminium‑backed sticky tape
- Gelli plate (optional)
- Acrylic paint (optional)
- Wet strength tissue paper or coloured tissue paper
- Double‑sided tape (optional but helpful)
- Die Cut Machine or pasta machine
- Etching Ink
- Inoue ink applicator or old toothbrush
- Scissors or craft knife
DIY Thank You Card Step by Step
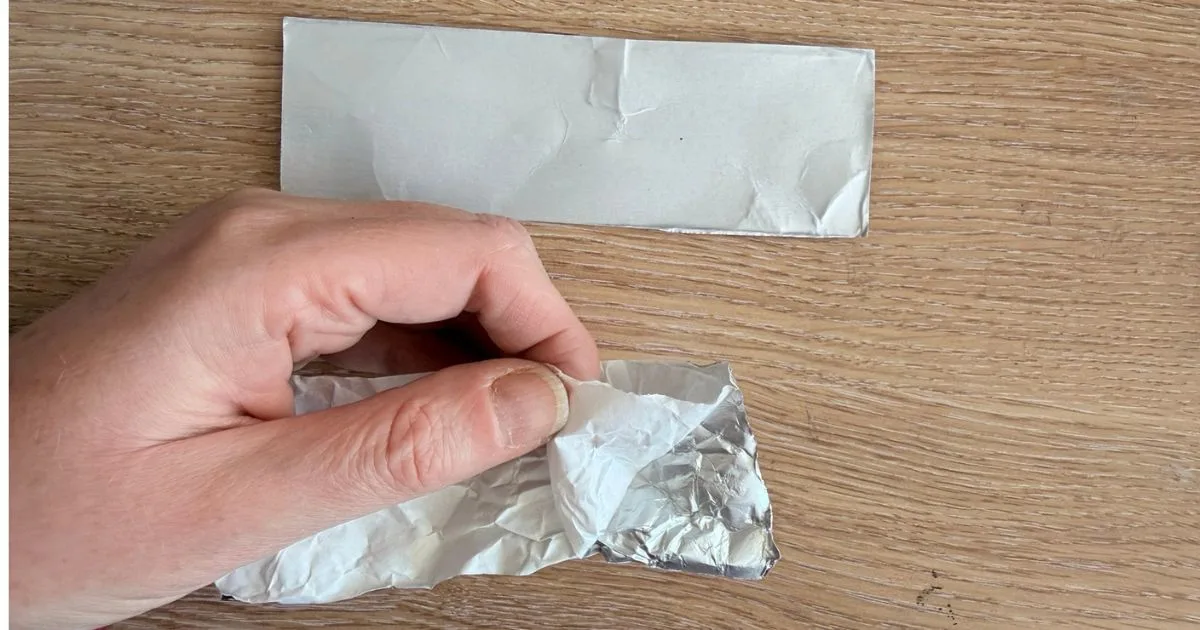
Step 1: Prepare the Tetra Pak Plate
- Cut a flat piece of Tetra Pak.
- Crumple your insulation tape slightly to create texture.
- Peel off the backing and stick the tape onto the shiny side of the Tetra Pak.
- Smooth it down, keeping some of the creases—they are the detail which adds character to the print.

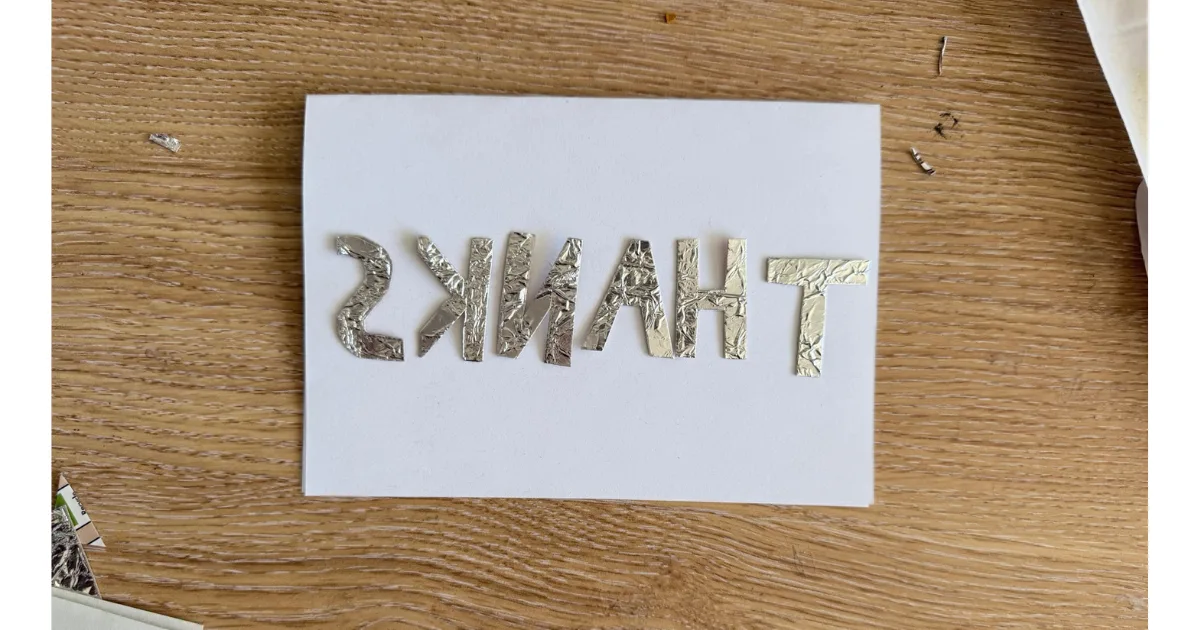
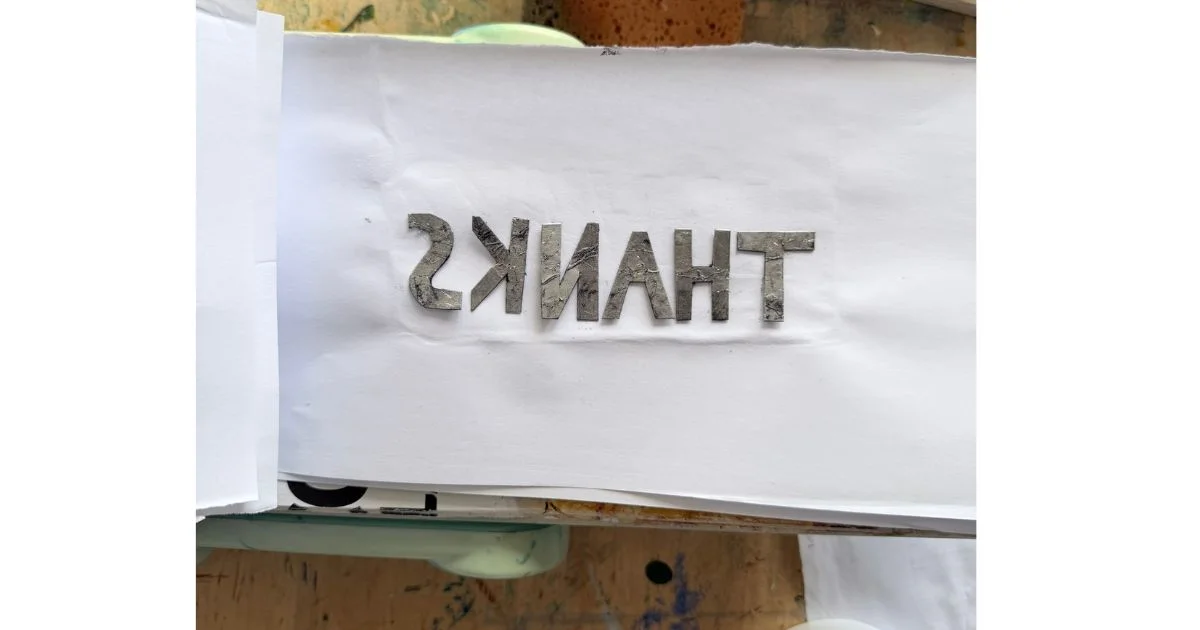
Step 2: Cut and Arrange Your Letters
- Cut out letters to spell THANKS.
- Important: Arrange the letters in reverse, because the print will flip when transferred.
- Many people forget this on the first try—don’t worry if you do too!

Step 3: Print Wet Strength Tissue Paper (Optional)
- Apply a thin, even layer of acrylic paint to your Gelli plate.
- Print a piece of wet strength tissue paper in your favoured color.

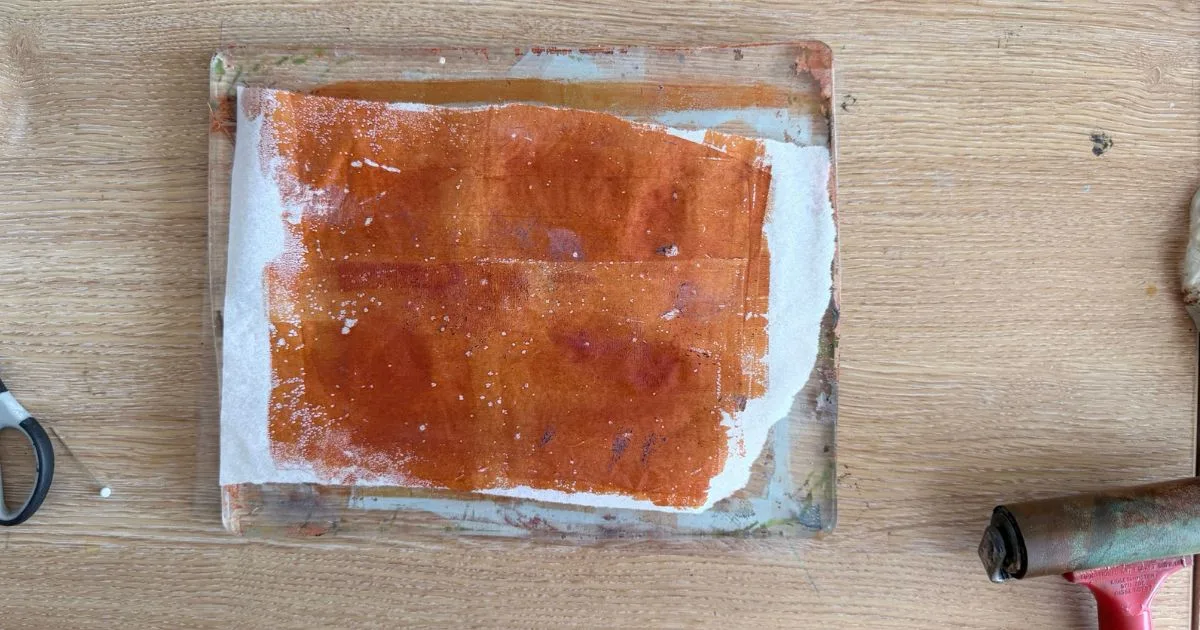
If you are new to gelli plate printing check out my How to gelli plate print post.
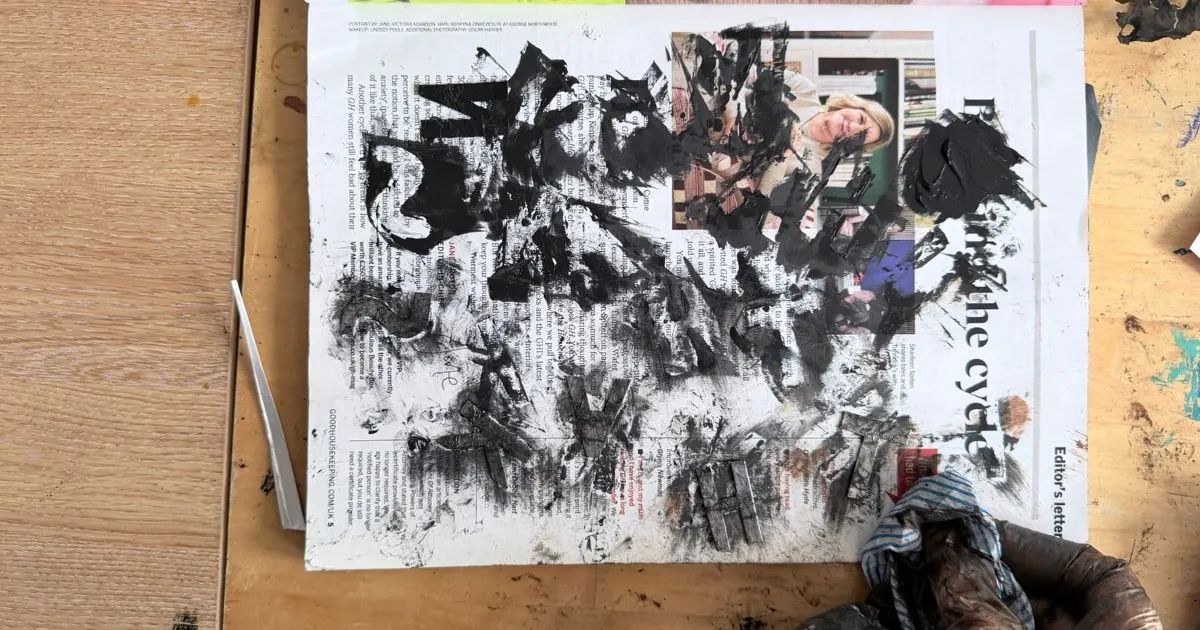
Step 4: Ink up Tetra Pak Printing Plates
I strongly suggest wearing disposable gloves for this step, as etching ink stains.
- Apply etching ink over each tetra pak letter – I have used a Inoue ink applicator but you can easily use a toothbrush. Make sure the ink is worked into the creases of the letters.

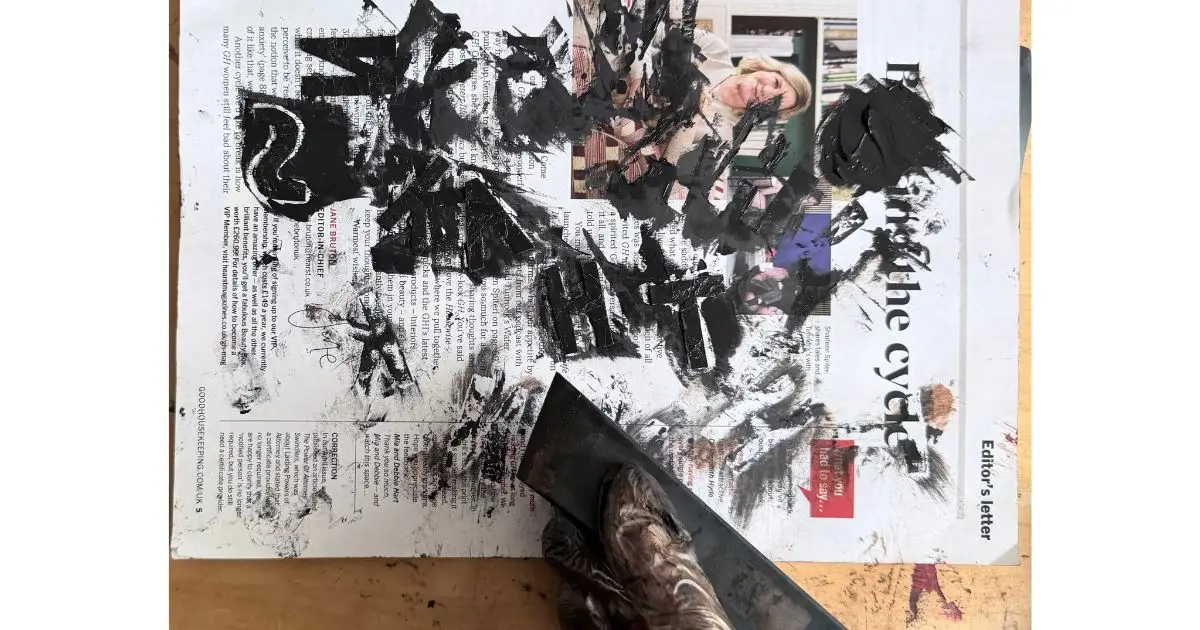
2. Rub the etching ink off the plate but not fully, you can use an old rag or jay cloth. This is a trial and error process.

Step 5: Set up printing press /die cut machine/pasta machine
Grab your chosen machine, I am using a Sizzix machine. You will need the biard which comes with the machine, layers of paper and lastly a sheet of felt. When you turn the handle you should feel when you reach the tetra pak, if you cant add more layers of paper or cereal box card.
Step 6: Print Your Design
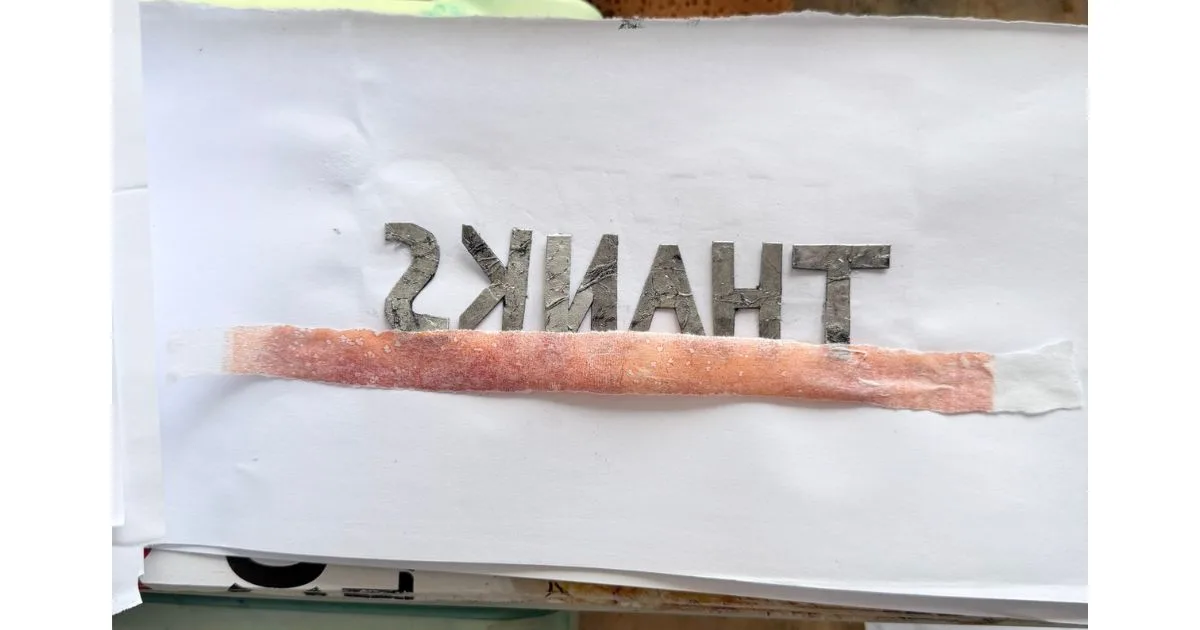
- Place your Tetra Pak letters in reverse order on a sheet of paper, I found using a dot of double sided tape under helps keep them in place.

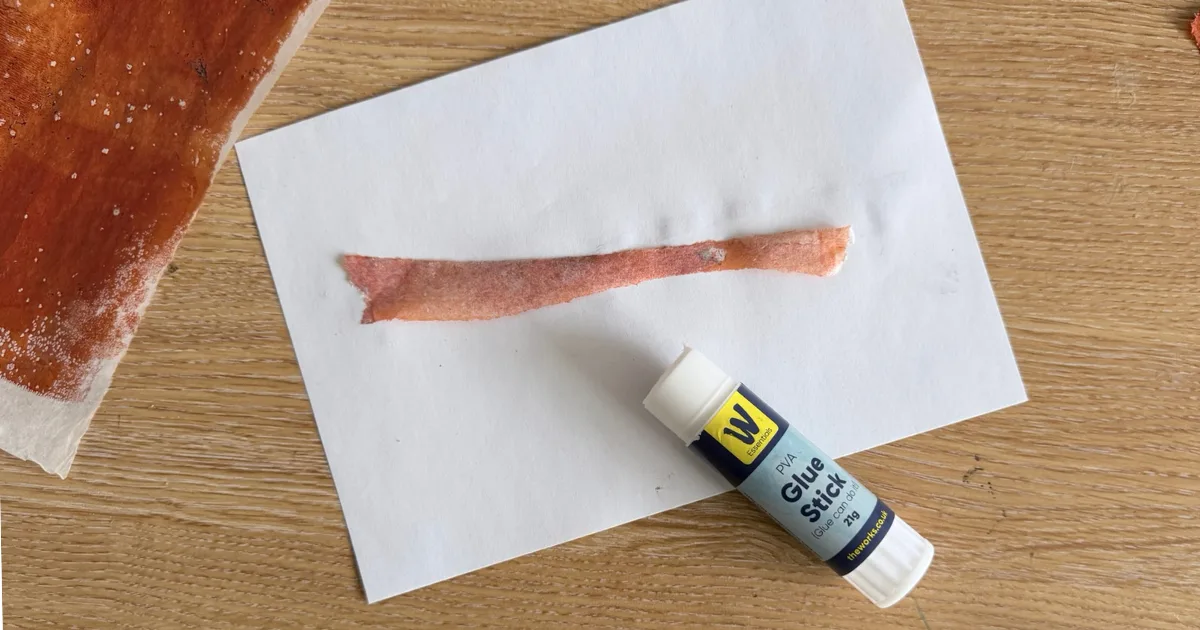
2. Rip a piece of your chosen tissue paper (printed or bought), apply glue on the reverse, a glue stick works well.

3. Place the piece of tissue paper glue side upwards along the bottom of the tetra pak letters.

4. Dip a thin piece of card or thick paper in water, pull out and remove excess water (between blotting paper or a towel). Place your damp paper on top of your prepared printing plate.

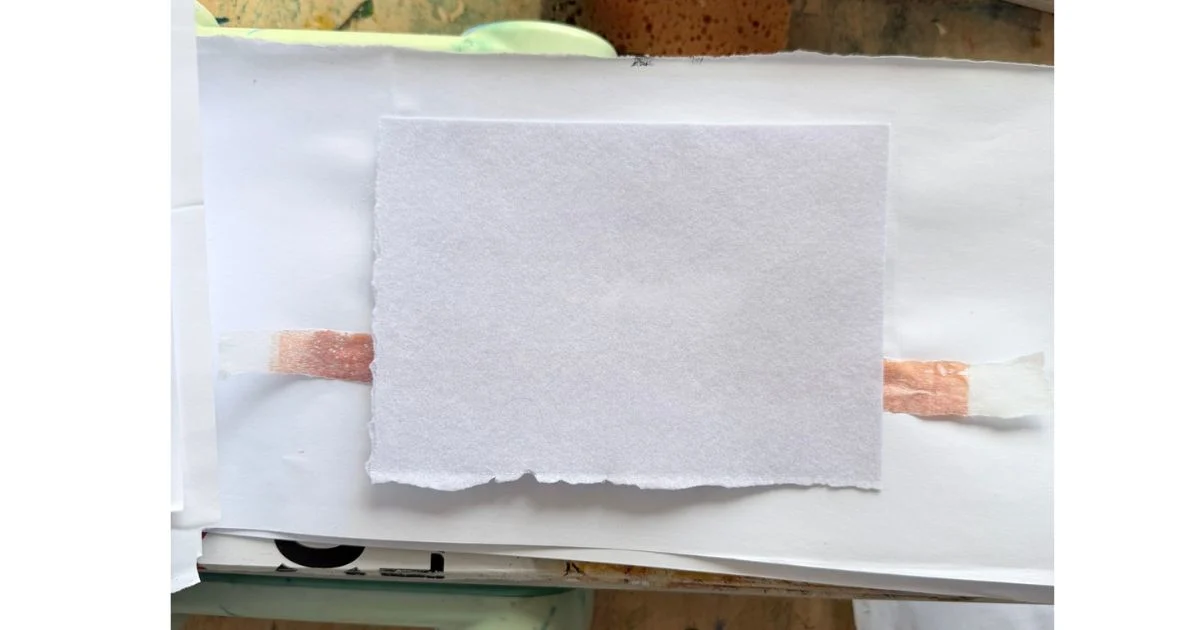
5. Roll the paper through the die cut machine or pasta making sheet and make your gorgeous print.

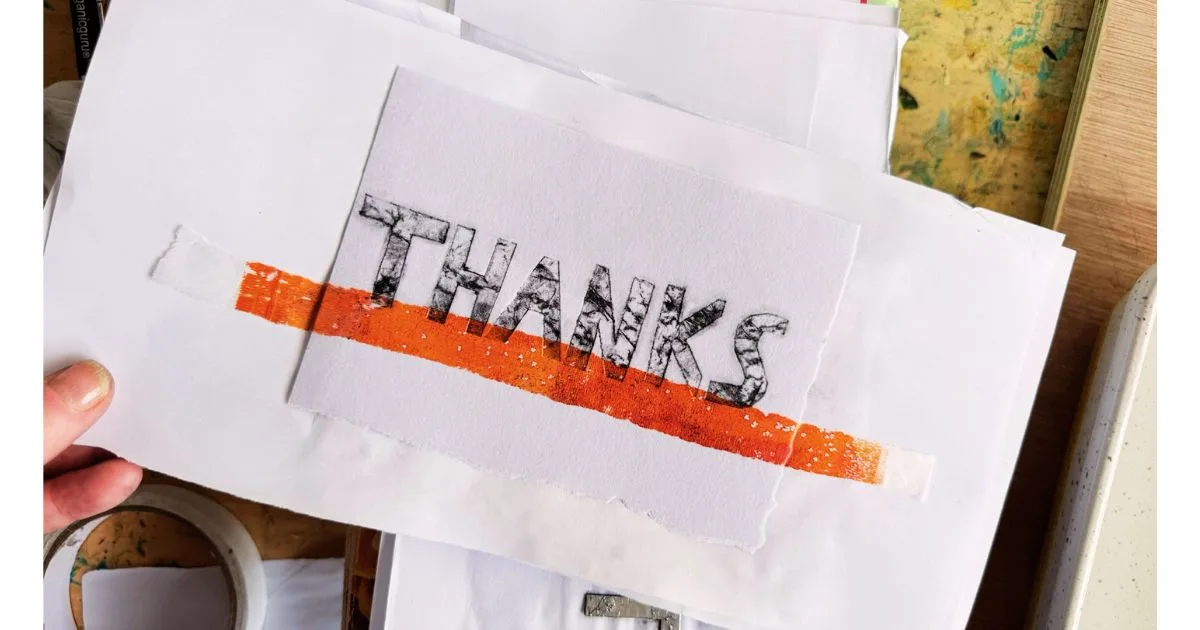
Step 7: Turn It Into a Thank You Card
Once you have a print you love:
- Let it dry completely.
- Trim the edges.
- Mount it onto cardstock.
Video Tutorial
Expect a Few Attempts
It’s normal for the first few prints to be imperfect—letters reversed the wrong way, paint too thick or thin, or the plate slipping. Even experienced artists need several tries.
Your fourth attempt might be the charm. That’s part of the joy of handmade printing.

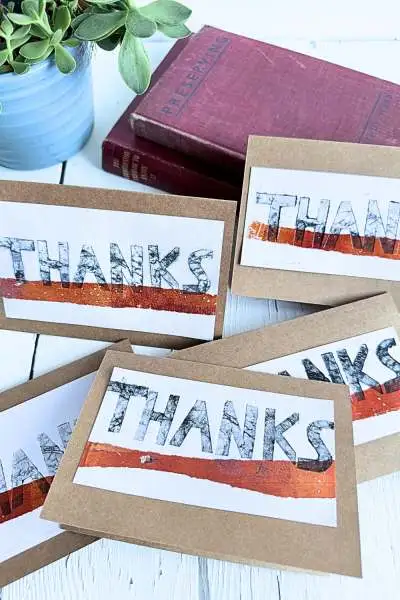
You now have a unique, textured, handmade THANK YOU card.
Now all I have to do is persuade the children to write their thank you notes – there’s nothing like receiving a thank you note in the post, its so personal in comparison to a text or email.

