
I’m super excited to have a new toy – a Cricut (here in the UK they are far from cheap). Naturally I have just had to have a play with my old jeans stash to whip up a new pillow design. This week we are enjoying an Indian summer but I know autumn is literally waiting around the corner – it’s time to cosy up and enjoy the new season.
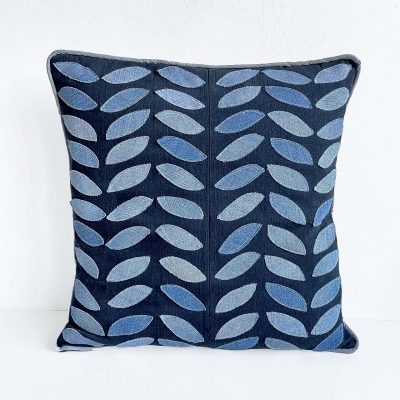
This old jeans DIY pillow cushion is inspired by autumn leaves – I have made you a free SVG pattern for your Cricut.
I don’t have a Cricut, can I still make this DIY Pillow Cushion Cover?
No problem, simply grab the leaf template and cut out each leaf individually using sharp scissors. I recommend adhering heat n bond to the wrong side of your denim before you cut them out.
Before I share the full details of the tutorial if you are as keen as I am re upcycling your old jeans, and love pillow covers check out my other free patterns!
DIY Denim Pillow
This post contains affiliate links for your convenience.
To make this denim leaf pillow cover you are going to need:
- Cricut,
- Heat n Bond,
- Scissors,
- Stronggrip cutting mat,
- Bonded Fabric Blade for Cricut
- Iron,
- Sewing machine
- Denim Sewing machine needle
- Two pairs of large old jeans in contrasting colours,
- Quilters ruler,
- Taylors chalk,
- Piping and grey bias binding.
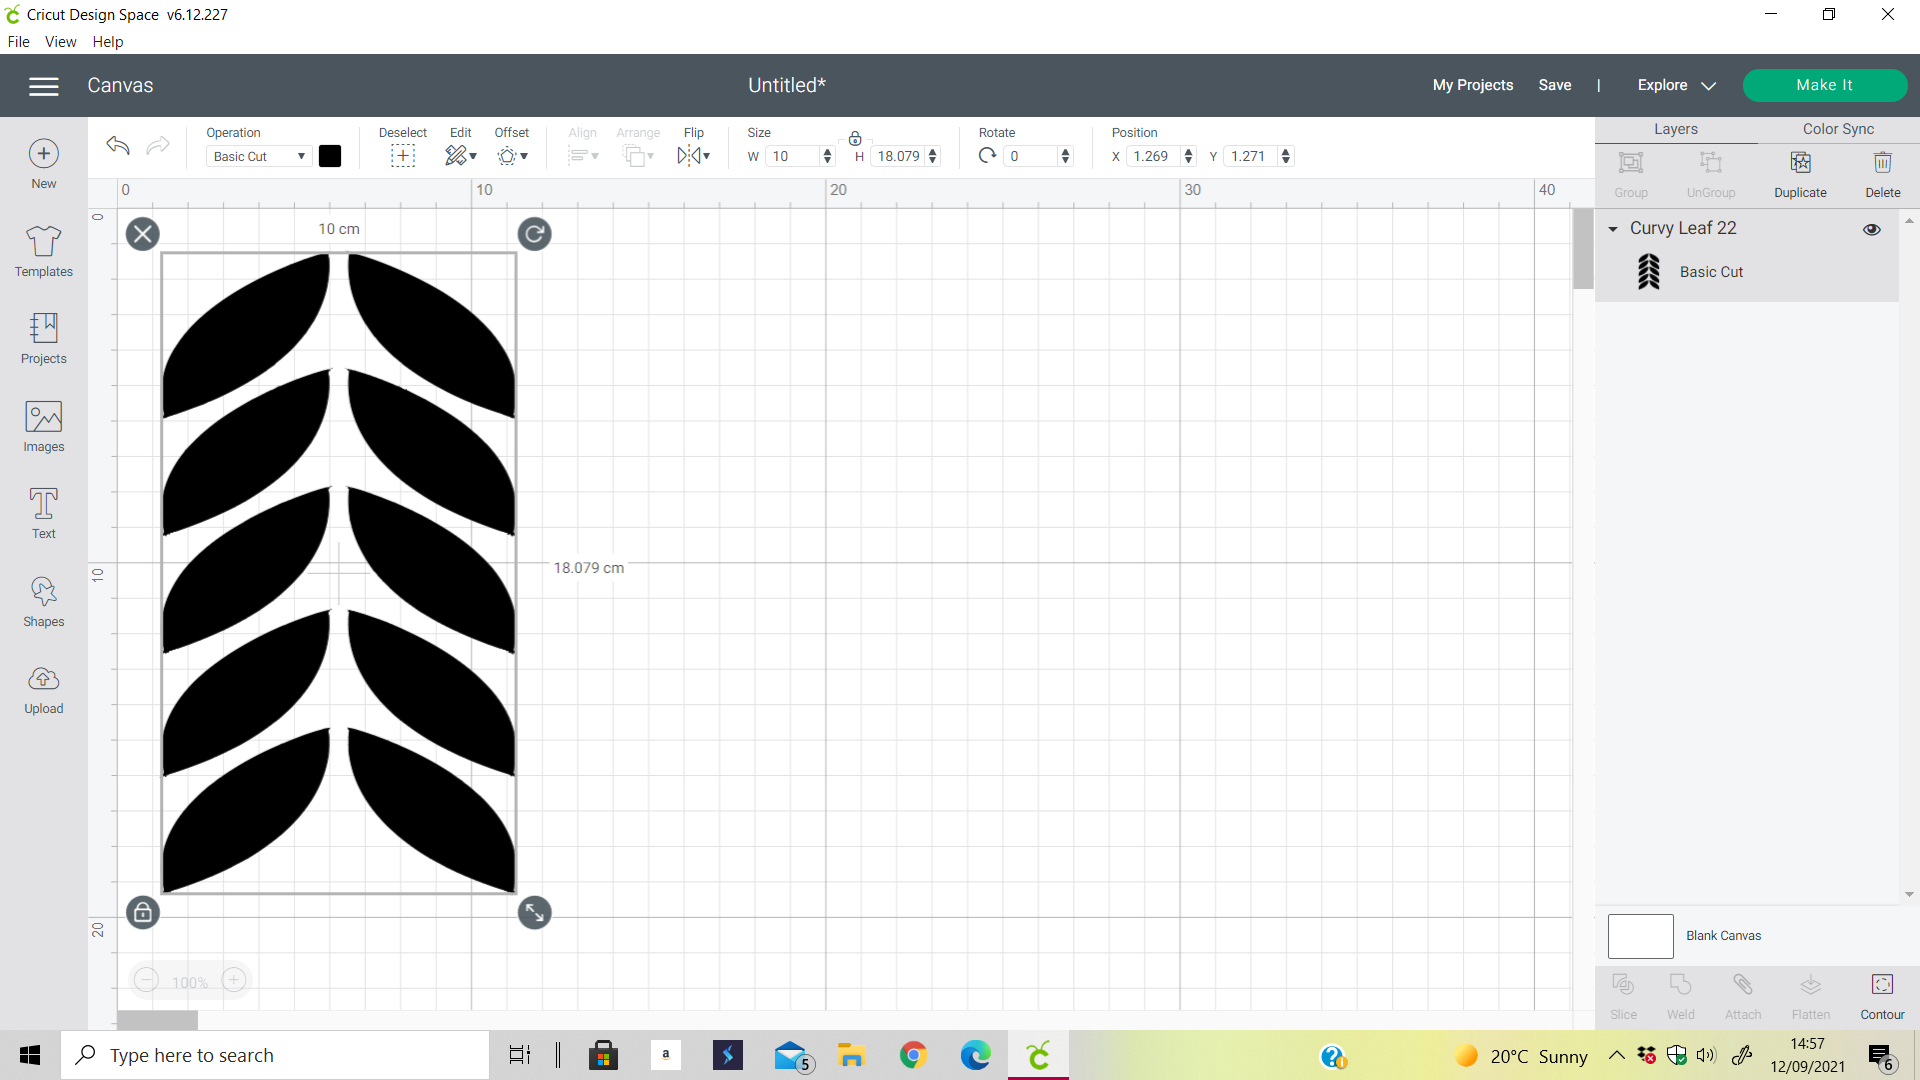
Upload the SVG file to your Cricut (upload button bottom right of the new project page). Resize the leaves. I have chosen to work with six rows of leaves, approx 2″/10cm each (for a 16″ pillow).
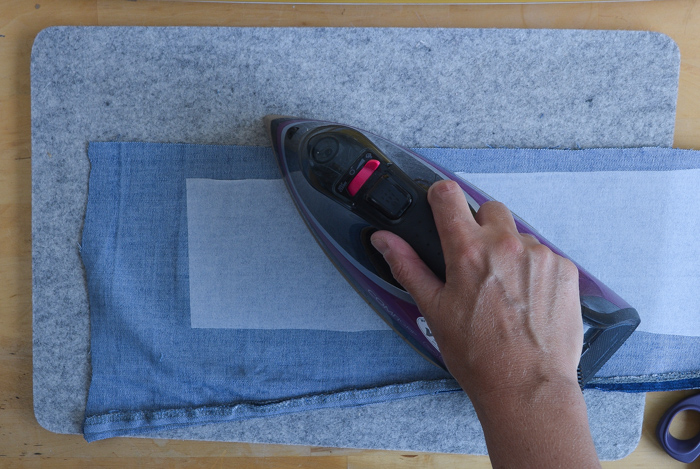
Cut out the legs of your pale jeans – you are going to need three pieces which are 5″ wide and 17″ long. Iron Bond a fabric to the wrong side (whichever side you choose is wrong, you may prefer the internal side of the denim for your cushion). Personally, I prefer to cut the Heat N Bond 5 by 17″ and then iron this to the denim leg, then trim the leg to size (especially as denim can often be stretchy). Ensure you adhere the heat n bond well to your fabric, otherwise, it will peel off your denim onto the cutting mat (thus speaks the voice of experience!).
Place the denim heat n bond side down to the stronggrip cutting matt. Ensure you press it down hard.
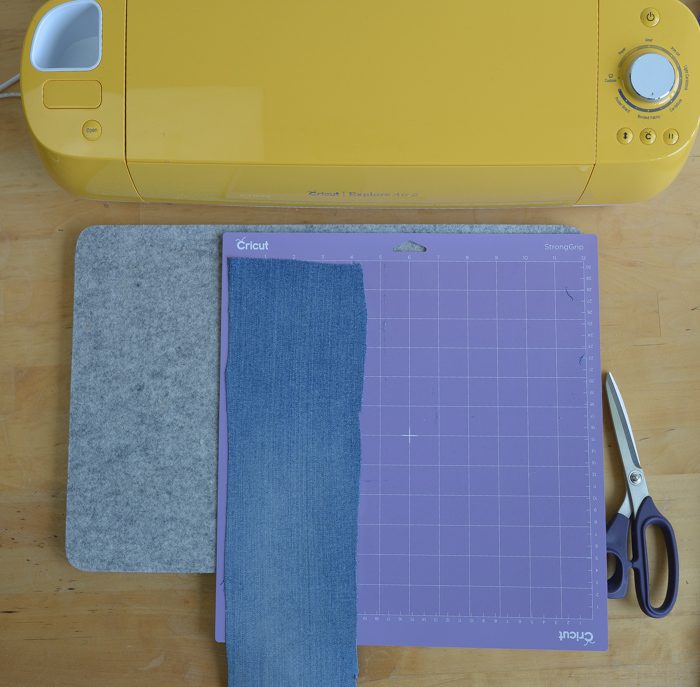
Set up your cricut with the fabric cutting blade, and set the dial to bonded fabric. Cut out your leaves. If the denim crumples with the blade pause and repress the denim to the cutting matt and ensure it has adhered well. I used a new cutting matt with high stickability!!

Despite my top tips some of my leaves need a little trimming. For my finished cushion I have used 66 leaves, I cut extra so I had a selection to choose from.
Next let’s prepare the base denim for the pillow. This is an envelope pillow – using wide old dark jeans. Cut 18″ length of denim leg, if you have a straight seam just open out. If however, your jeans taper along the grain, trim the denim along the grain and join with a new seam along the grain. Thus creating a 18″ square of denim for the front panel.

For the back of the cushion cut two pieces of denim which will overlap, from my jeans these measure 13 by 17″ and 11 by 17″. Double fold over one long edge of these two pieces of denim and stitch.
Returning to the front panel let’s apply the leaves. I am not a precision person but I have used a quilters ruler to guide the placement of the leaves. If you are a very precise person you can mark the denim with tailor’s chalk to place the leaves precisely evenly.

Once you are happy with the design iron them to adhere to the denim, I use the backing paper from the heat n bond to protect the iron.
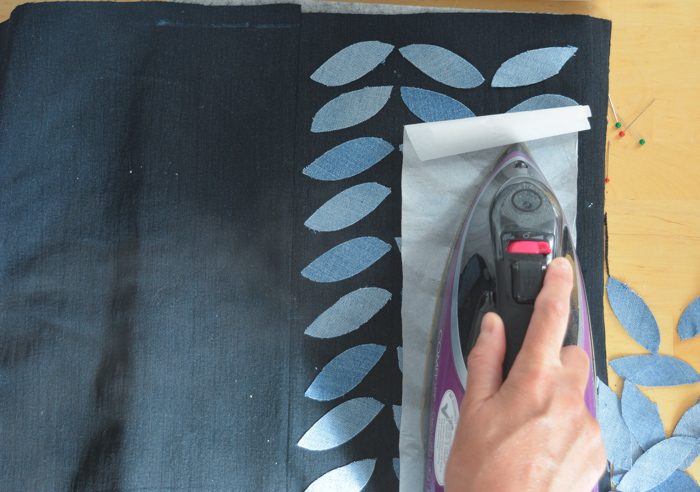
To ensure a good bond machine stitch around the edge of the leaves, individually.
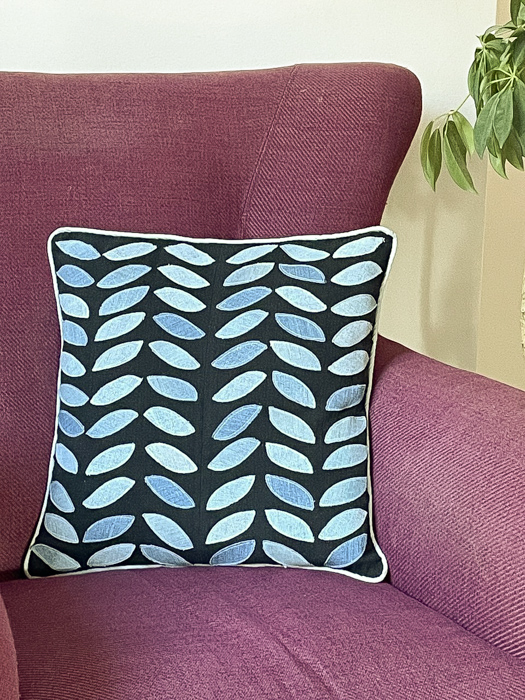
Next place piping around the edge of the cushion. I made my own covered piping opening out bias binding and then encasing the piping. I stitched this in place using the zipper foot of my sewing machine.

Mark out the finished square of the cushion with taylors chalk using the quilter’s ruler (16″ square). Then using large hand stitches tack to hold the covered piping in place.
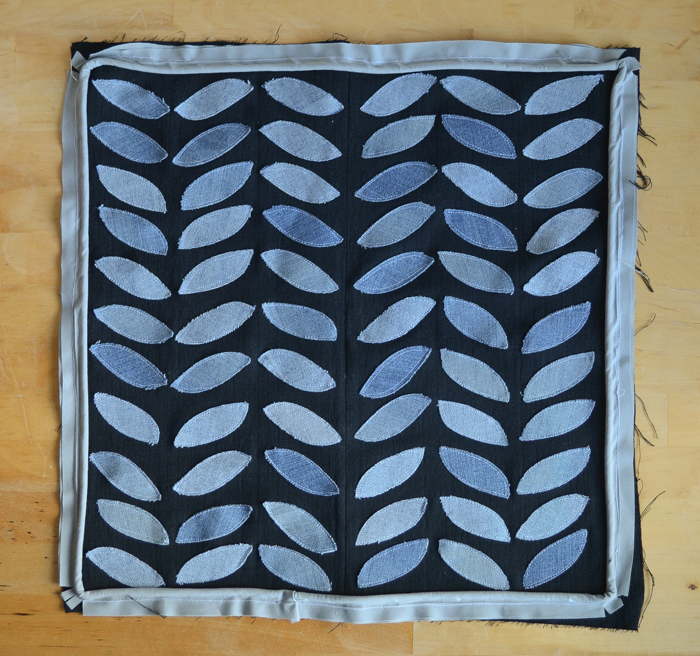
Place your two back pieces of denim on top of the front panel so the right sides are facing each other and the back panels are overlapping in the middle (creating the envelope). Pin then machine stitch all round to finish (using your zipper foot).

Trim the corners to reduce the bulk (within the seam allowance). Turn the pillow cover right side out, add your pillow inside and you are done! Admittedly this pillow cover took me longer than anticipated but I am delighted with the result.

If you love reusing your old jeans do check out the many different denim tutorials I have. Plus I have yet more fun DIY pillow cover patterns to share with you.

Claire
Tuesday 8th of February 2022
A cool pillow, I love the contrast of the darker denim with the lighter leaves.
Vicky
Thursday 10th of February 2022
Thanks Claire :)