
There are so many ways to decorate a tote bag from fabric paint, to iron-on transfers, to permanent fabric markers, to embroidery, to crochet embellishments. Today I am going to show you how to use your fabric scraps to applique fabric in a modern simple design – no sewing machine is required.

Cotton tote bags are often given as freebies at work seminars, and networking events. The carbon footprint of a cotton bag is high so rather than wasting these promotional tote bags I love to decorate them, changing the tote bag up with applique. I have chosen to work with applique as it’s a great decoration technique and an easy way to cover the logo of this freebie canvas bag.
Don’t have a logo’d tote bag? You can easily pick up canvas totes at craft stores ready for you to start embellishing.
There are so many possibilities for this fun tote bag craft, this is such an easy DIY for a plain tote bag. Applique is a great way to let your imagination play and create your own design.
Table of Contents
Fabric Scrap Choices
To make your life easier I strongly suggest working with woven rather than stretchy fabric. This will greatly help keep an even tension on the tote bag. Cotton is the easiest fabric to work with however if you have a slippery fabric you can always apply starch to assist you.
I am using different fabric scraps bought from a local Japanese shop Mizu-Usagi, with small scraps ranging from 10p to £1.
Applique supplies to decorate a tote bag
- Fabric scraps (cotton fabric is easiest to work with)
- Freezer paper
- Iron
- Needle and thread
Video tutorial for your own unique design
Step-by-step guide to decorate a tote bag
Let’s start with a base shape – I have chosen to start with a circle. My circle is slightly larger than the printed logo on the fabric tote bag. The first thing is to draw the finished size of the base shape on freezer paper.


Cut out the freezer paper and place the shiny side on the wrong side of your base fabric. Iron to adhere.
Cut out the fabric with a seam allowance, then press the seam allowance in using the freezer paper as your guide.


Peel the freezer paper off and place the base fabric onto the tote bag. Now for the fun part – playing with scrap pieces of fabric with different colors.


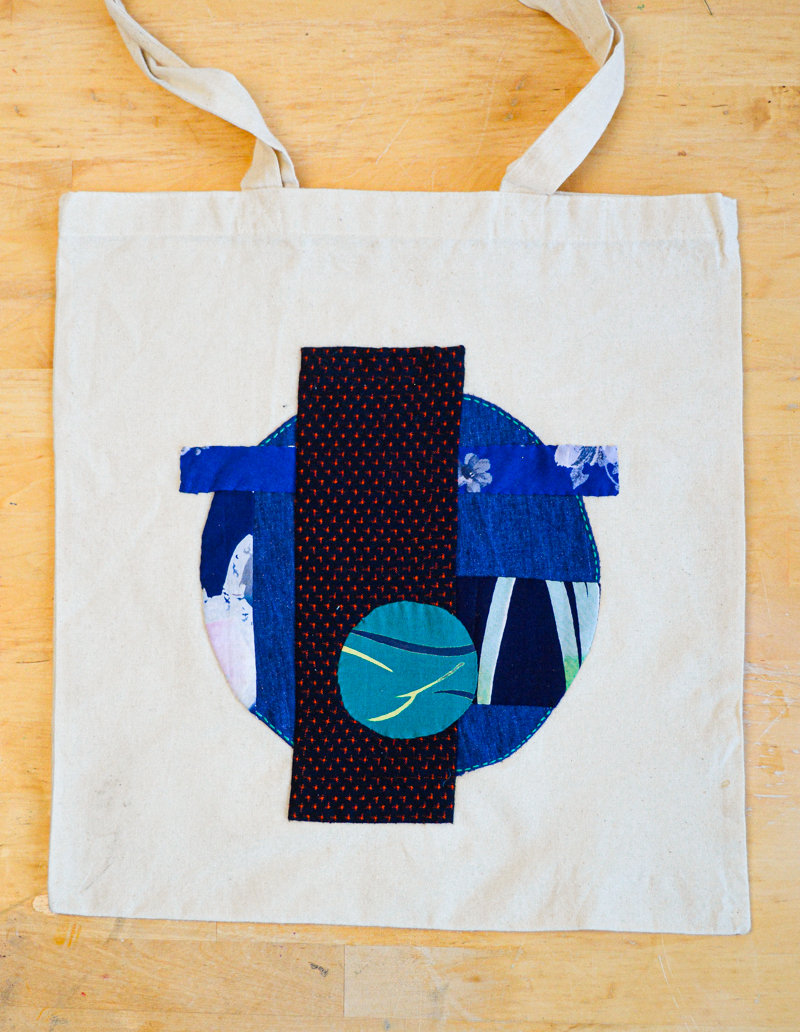
Think about color balance, prints and shapes – I have mainly used rectangles with one circle on top reinforcing the circle design of the base shape.


Once you are satisfied with your unique design the next step is to pin or baste the pieces into place. Basting is simply large stitches to hold the fabric pieces in place, when I was first taught sewing we called this a tacking stitch.


The final step to decorate your tote bag is to hand-stitch the fabric scrap pieces into place.
Bring your sewing needle up through the folded edge of your applique shape.
Insert your needle into the base fabric against the folded edge, opposite where the thread comes out of the folded edge.
Move the sewing needle so that it travels a short distance behind the base fabric and comes up through the base fabric and along the edge of your folded applique shape.
Personally, I couldn’t help but add a simple running stitch in embroidery thread close to the edge of my circle.


I used my transformed cotton tote bag straight away, with a lovely day at the coast hunting through the charity shops (thrift stores)


Plain tote bags are easy to decorate, bringing your style and personality to form cute tote bags.

