
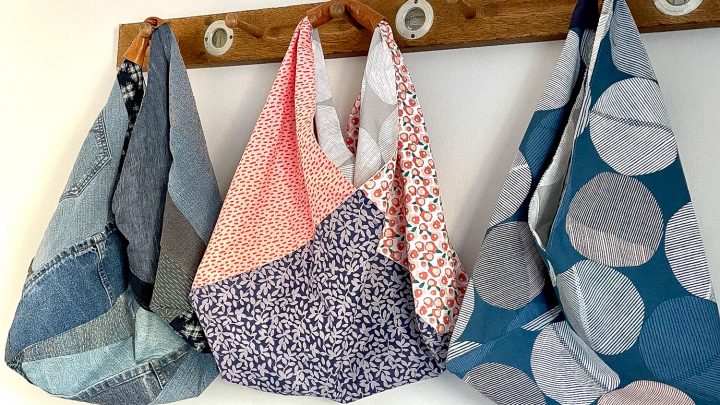
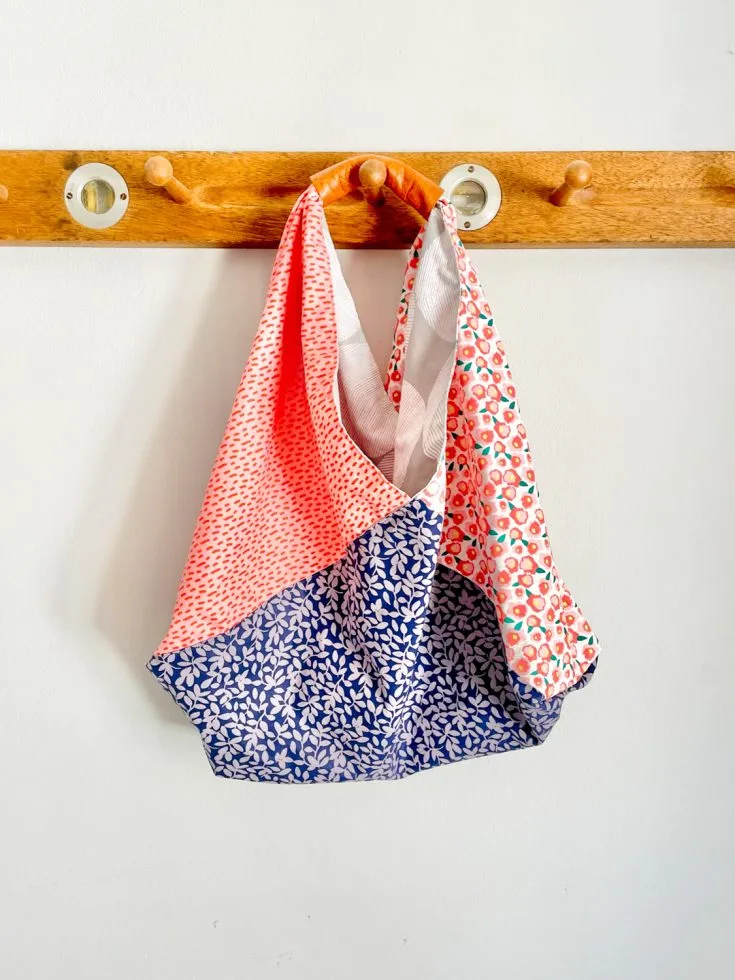
The Origami bento bag, sometimes called the origami market bag, or a origami tote bag is so quick and easy to make. It’s a slouchy type bag, so it’s soft and drapey without any solid form.
The lined bento bag itself is easy to make and quick to sew up. I suggest reading through the tutorial and folding a rectangle of fabric so you can visualize how the origami folds come together before you consider any of the variations I suggest.


What type of fabric should I use for my bento bag?
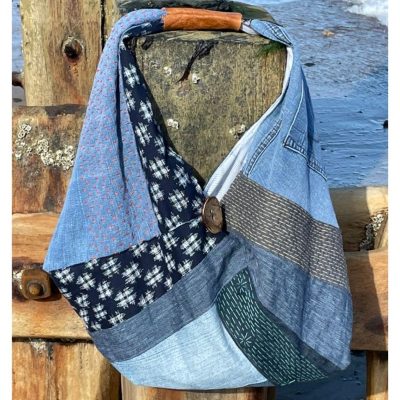
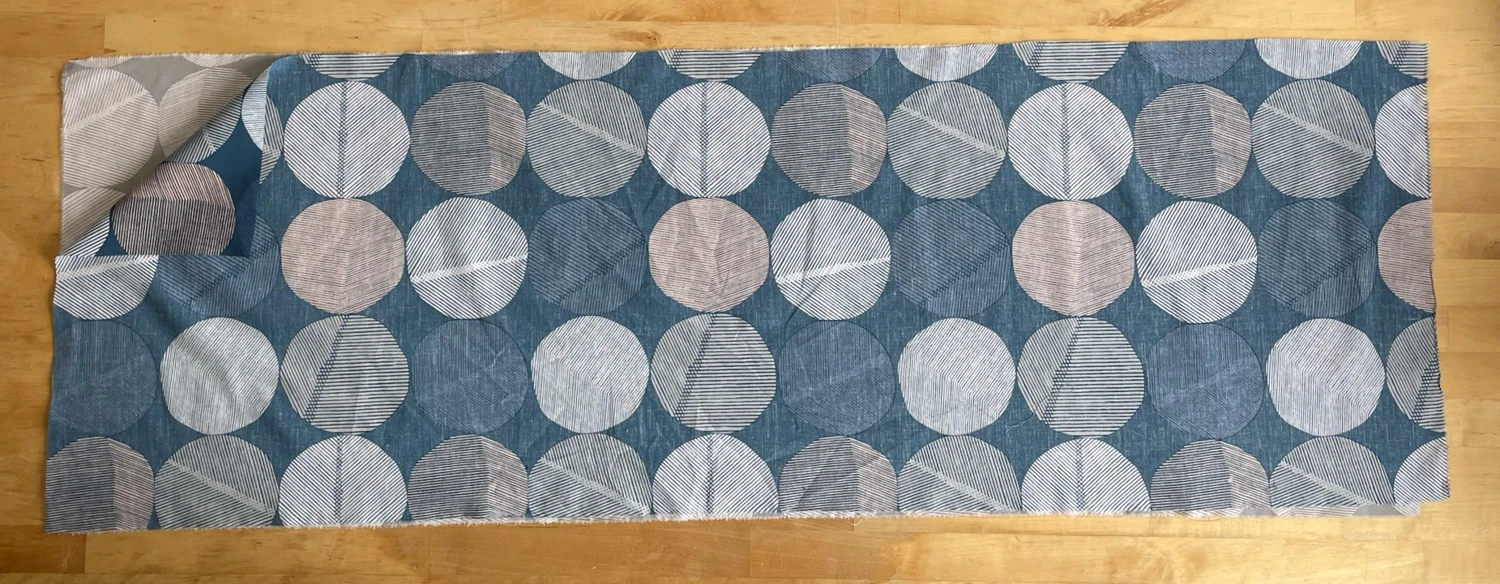
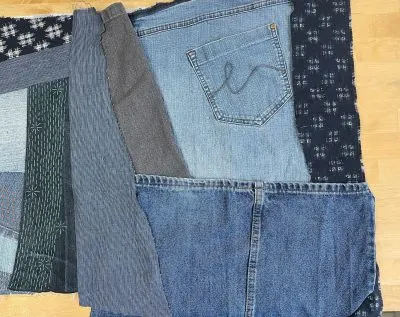
You can use a wide range of different fabrics for this Japanese-style bento bag sewing pattern, I have made it with a former duvet cover but you could easily use squares of fabric stitched together (such as fat quarters), home decor fabric, old sari fabric or even tea towels. I have made up the lined bento bag in different shades of denim embellished with some hand stitching, this makes a much sturdier bag. After all, I love making bags out of denim!
If you are tempted to make an upcycled denim origami bag I suggest making one out of scrap fabric first so you can see how the bag is constructed, where the diagonal lines fold etc.

The finished size of the origami bag is 19 (width) by 9 (height) by 6 (wide)” (see youtube video):
Origami Tote Bag Instructions
Materials for bento tote:
- Two rectangles of fabric 16 by 48″ one exterior fabric, one lining fabric)
- Bag handle rectangle of fabric or leather 7 by 4″
Place the two pieces of fabric right sides together. Stitch with a small seam allowance – I use the edge of my sewing machine foot so approx quarter of an inch seam allowance, leaving a good turning gap of 6 ” along one of the raw edges. Personally, I prefer to do this along one of the short sides, unless I am adding a button with a loop of thread (see How to add a closure to your bag).

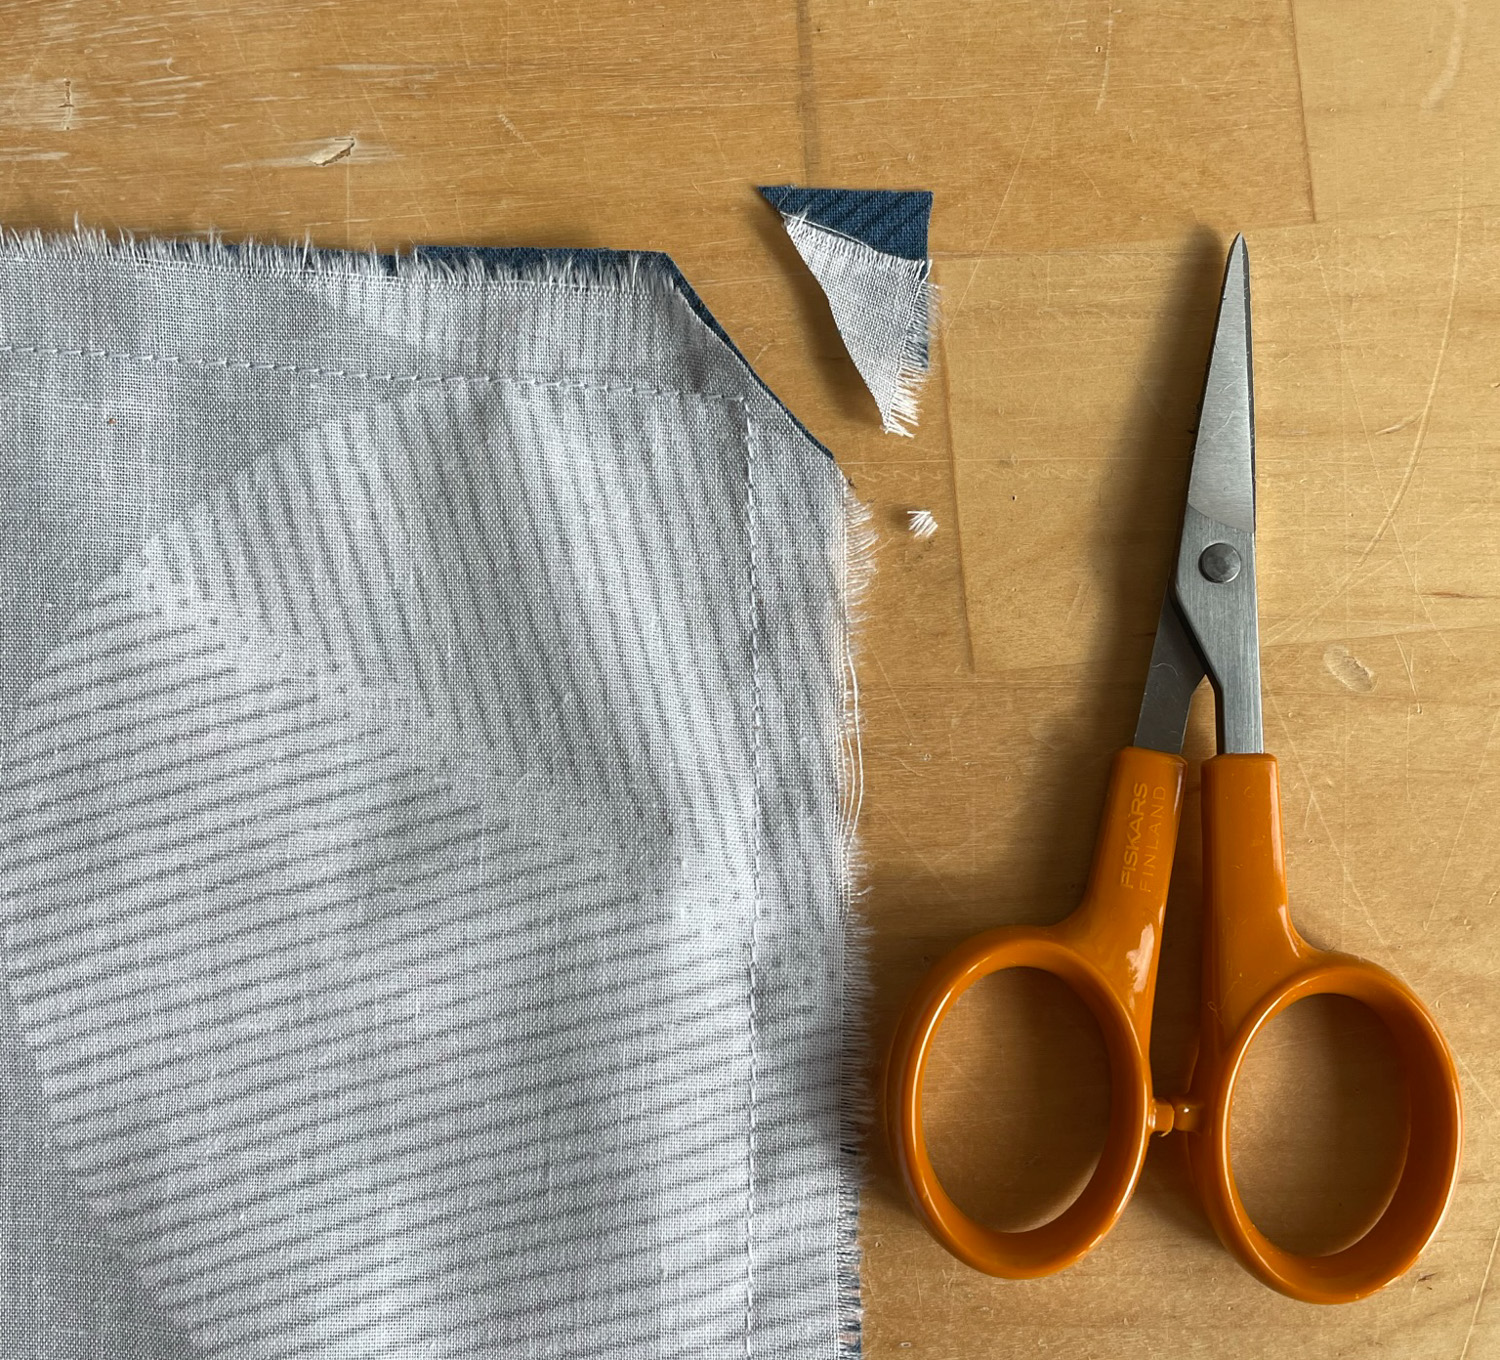
Trim the corners within the seam allowance, taking care not to snip any of the machine stitching by accident.

Turn your fabric right side out, fold in your raw edges and press, so you have one rectangular piece of fabric. I suggest using a chopstick to help with the corner points.
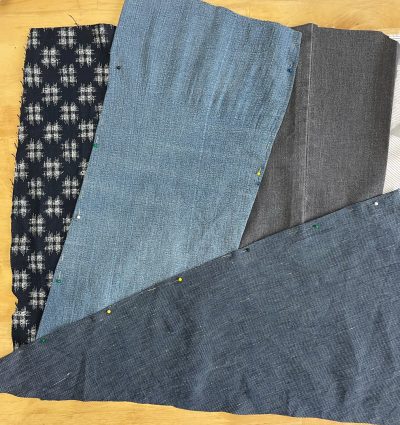
Now for the fun part, folding the fabric. I find it helpful to imagine my fabric as three squares of fabric. We are going to make three folds as per the diagram, which clearly shows the fold lines.
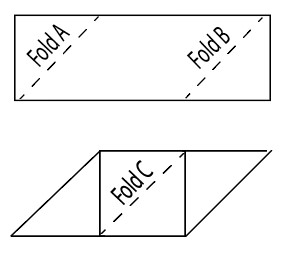

On the left-hand side fold the bottom corner up to the top edge of the fabric creating a triangle (Fold A).
On the right-hand side take the bottom corner and fold it up to the top edge, creating a second triangle (Fold B).

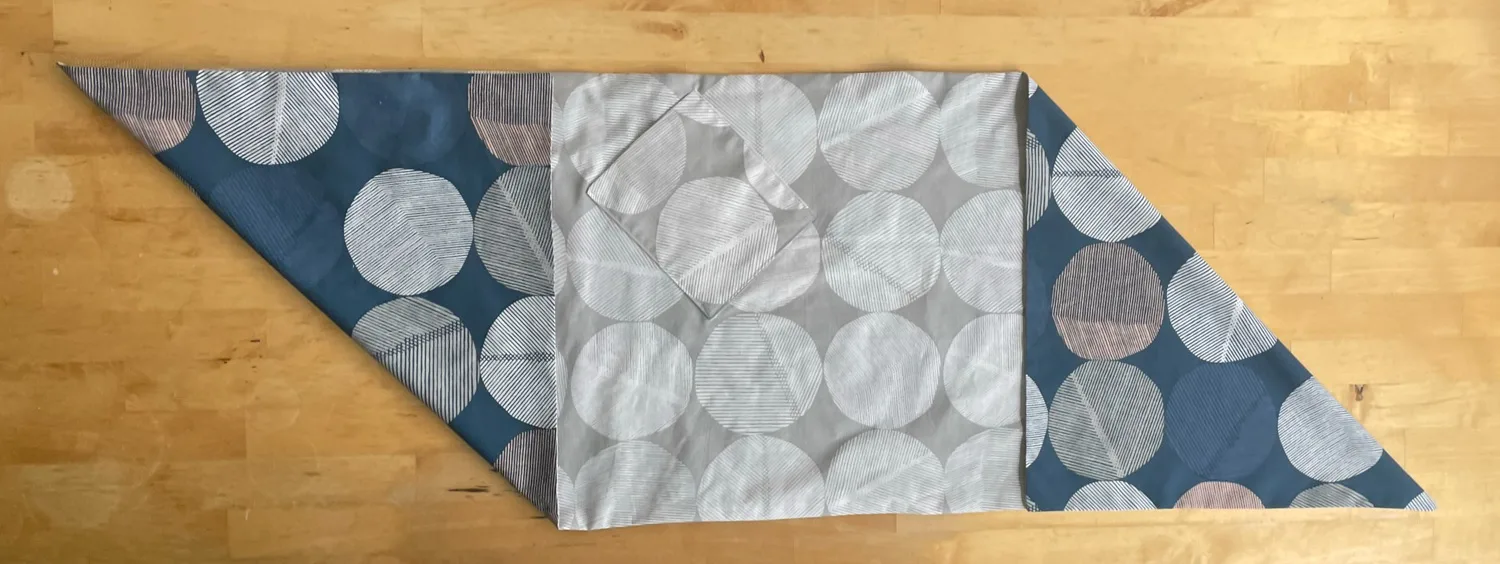
Now down that middle square visualize a diagonal line running the right corner to the left corner. Fold along this imaginary line (Fold C).

Pin the two triangles together, straight stitch along the diagonal line taking care not to catch the opposite side of the bag. Repeat for the second side of the origami bag.
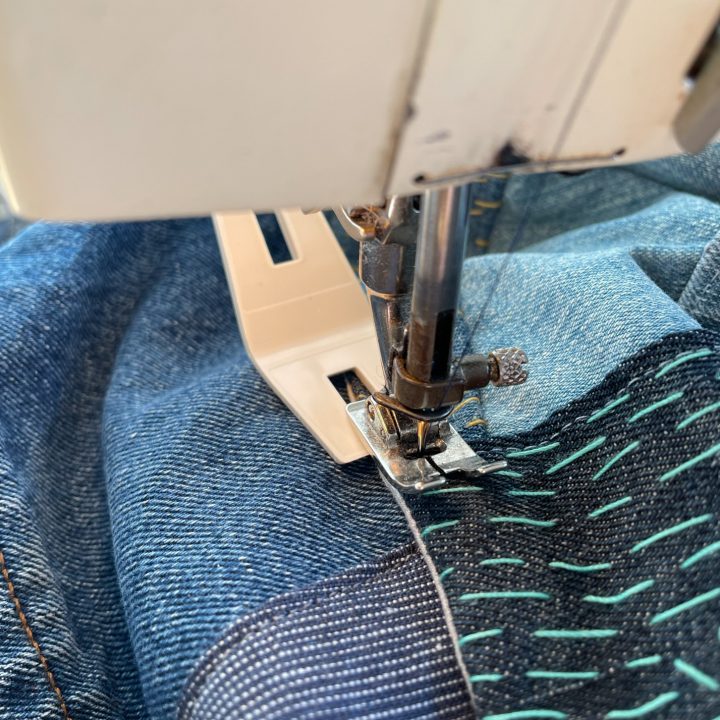
Top stitch the top of the bag – if you are upcycling denim I suggest using a denim needle and a walking foot for this. This not only gives a professional finish but closes the turning gap.
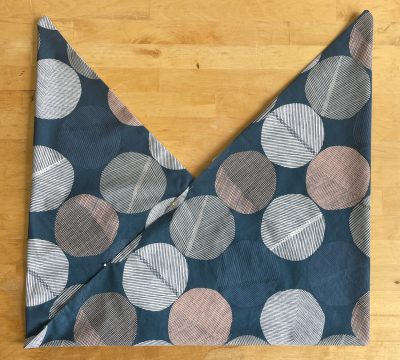
Let’s box the corners at the bottom of the bag, and turn the bag so the lining is facing you. Fold the bottom edge of the bag to meet the sides of the bag. I place a pin on the side of the bag and one of the base of the bag and then align these.

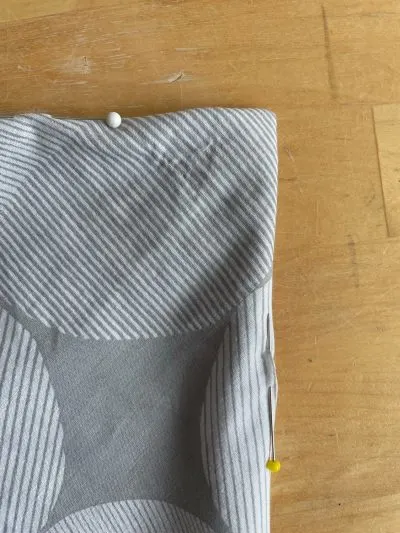
Draw a line diagonally across the corner. If you would like a 4″ bag depth sew a 4″ line. Stitch with a straight line ensuring you backstitch at each end. Repeat for the second corner of the bag. Boxing the corners gives the bento bag shape.


Finally, let’s add a handle to the origami bag. If you are using fabric turn under each short end by 1/4″ and press. Fold the fabric in half so the right sides face each other and stitch along the edge, backstitching at each end. Turn the tube right sides out (this is a little fiddly but doable).


Slide the tube (bag handle) onto one of the triangular parts of the bag pushing it down as far as you can.
Gather the two triangular parts, overlap and machine stitch the pieces together securely (this is a stress point of the bag, so you may wish to stitch a square diagonally across the square from each corner).


Finally, pull the handle back over this join, you may wish to slip stitch in place but I think it is unlikely to shift around too much!
How to Adjust the Origami Tote Bag Size
You can make a variety of sizes by adjusting the size of the bag by using the formula:
- (width of fabric x 3) = length of fabric
If we decide on a width of fabric of 16″ we multiply it by 3 (16″ x 3) = 48“ to provide the length of the rectangle
Frequently Asked Questions
How to add a slip pocket to the lining of the origami bag
Please note you need to add the pocket before you sew up the bag. Firstly stitch up your slip pocket using a piece of lining fabric measuring 5 1/2″ by 12″. Next work out the placement of the pocket, fold your lining fabric as you would when making the bag. Position your pocket in place and pin. Unfold your fabric and stitch the pocket in place then continue with making your bag.
How to add a closure to the bento bag
I have two suggestions for you:-
Firstly a button with either a button hole or a loop of thread. If you decide to use a loop of thread (or elastic thread I suggest your turning gap is a third of the way along the long edge. Once you have the folded rectangle you will be able to see where to insert the loop before topstitching the turning gap closed.
Secondly, insert a magnetic snap at the v closure point. Note as this is on a seam I suggest inserting a magnetic snap on a rectangle of fabric, turning in the edges of the fabric, place on the lining of the bag, and stitching to secure through the layers of the bag. Use a toning thread for the exterior fabric.
Making the origami bag out of old jeans
Original bento bags stem from Japan, where there is a history of making use of scraps of fabric and hand stitching such as sashiko and boro. I have made up a version of the free pattern with old jeans and some fabric scraps. I started by cutting the lining, using it as a size guide. I then visualized three squares in a row of denim scraps for the outer fabric.
The central square is denim pieces I had started with a different project in mind with hand embroidery.

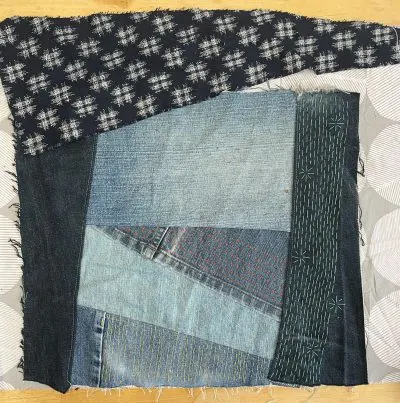
I then worked on the block to the right, thinking about the balance of texture and colours.

Followed by the block to the left.

Next I joined them all up to create one long panel.


I then folded the fabric as it would be for the finished bento bag and established which panels to add further hand stitching to.


TOP TIP If you decide to make up the bento bag tutorial using denim yourself do ensure you use a denim needle and a bulky seam aid is a very handy tool when stitching the bag together.

Today I am taking part in an Upcycling Blog Hop.
Now let’s take a look at the other Upcycle Challenge Blog Hop Participants and see what they’ve been upcycling.

Beverly | Across the Blvd
Gail | Purple Hues and Me
T’onna | Sew Crafty Crochet
Marci | Stone Cottage Adventures
Vicky | Vicky Myers Creations
Julie | Sum of their Stories
Upcycled Wooden Pineapple into a Bookend
Trash to Treasure Twisted Cord Basket
Candle Jar into a Cute Pincushion
Lined Bento Bag Pattern Free

Learn just how quick and easy it is to whip up an origami tote shopping bag.
Materials
- Two rectangles of fabric (one exterior fabric, one lining fabric), 17 1/2 by 53 1/2"
- Bag handle rectangle of fabric or leather 7 by 4"
Instructions
- Cut out your fabric
- Place the fabric's rights sides together, stitch all around leaving a turning gap of 6"
- Trim the four corners, taking care not to snip the stitching by accident.
- Turn the fabric right sides out, fold in the raw edges, and press. Use a chopstick to help the corner points.
- Place the fabric so the wrong side is facing you.
- Fold the bottom left corner up to the top edge of the long rectangle, creating a triangle (Fold A).
- Fold the bottom right corner to the top edge of the long rectangle, creating a second triangle (Fold B).
- Fold the right-hand side of your fabric over, creating a new diagonal fold from right to bottom of the central square (Fold C)
- Pin the two triangles together and stitch to close, for both sides of the bag.
- Turn the origami bag wrong side out.
- Fold the bottom edge of the bag to meet the side edge of the bag.
- Mark a triangle to create the boxed corner. Machine stitch, backstitching at each end. Repeat for the second side of the bag.
- Press under 1/4 of both short edges of bag handle (skip this step if using leather).
- Fold the bag handle in half, right sides of fabric facing each other, Machine stitch along the long raw edge.
- Turn the tube of fabric right side out,
- Thread one of the triangles of the bag fabric through the tube, pushing it down as far down as possible
- Overlap the two triangles of fabric and securely machine stitch the two together.
- Pull the handle across the join, so the join is enclosed inside the handle.


Stella
Monday 6th of November 2023
I'm wondering for step 9 when you stitch the triangles together, are wrong sides facing each other or right sides? Thank you!
erica
Sunday 27th of August 2023
Thank you for sharing, very useful and nice
Marci
Wednesday 16th of March 2022
Oh, wow! These are so cute! I especially love the patchwork ones, wonderful way to use some scraps! Thank you for the directions! pinning -Marci @ Stone Cottage Adventures
T'onna | Sew Crafty Crochett
Monday 14th of March 2022
These bags are so cute! I especially love the denim bag. I just love denim crafts/creations. Pinning!
Vicky
Tuesday 15th of March 2022
The denim is definitely my favourite :)