
Handmade tassels are great fun, a very quick and easy way to add personality to many projects, from the zips on bags, to crocheted throws, add a denim tassel to your key ring, or make yourself some trendy jewelry with tiny tassels. The possibilities for combining tassels and home decor are endless.
Today I am sharing various methods for making your own DIY tassels suitable for a huge variety of fun projects. For each style of pretty tassels, you will need some sharp scissors to hand.
1 How to make tassels out of yarn
2 How to make tassels with embroidery floss
3 How to make a leather tassel
5 How to make upcycled tassels


Looking for a way to display your finished tassels? Check out my DIY Tassel Wall Decor.
HOW TO MAKE TASSELS VIDEO
I have made for you a YouTube video on how to make tassels. Subscribe to my YouTube channel for regular sewing and craft videos.
How to make a tassel out of yarn
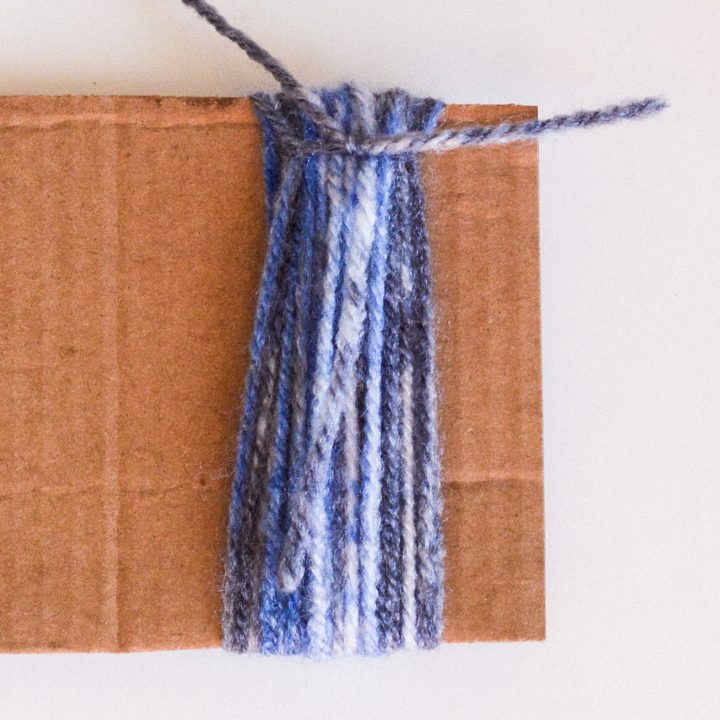
When making yarn tassels a cardboard template is very useful. Start by cutting a piece of cardboard sheet that measures the length of your desired yarn tassel.
Wrap yarn around your cardboard template several times until you have reached the desired thickness of the tassel (remember both sides of your cardboard are included in the finished thickness).


Using a tapestry needle thread a piece of yarn through your layers of yarn at the top of your tassel and tie a tight knot, repeat to create a double knot. If you don’t have a tapestry needle you could use a crochet hook to pull a strand of yarn under the strands of yarn.

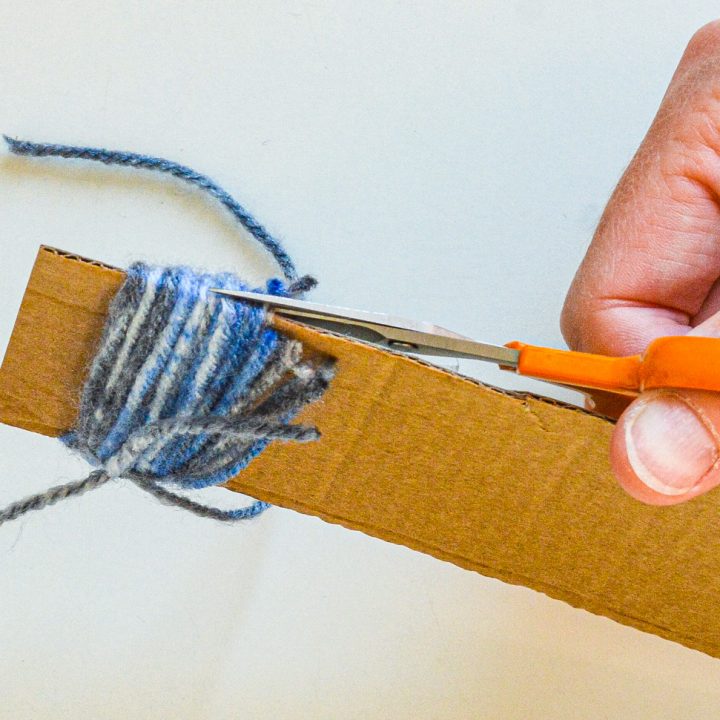
Using sharp scissors cut through the opposite end of the yarns at the bottom of the piece of cardboard.

Fold the yarn in half forming a loop shape, then holding the yarns in one hand wrap a length of yarn around the top third of the tassel, about 1/4″ from the top thus forming the top ball shape of the tassel.


Using a tapestry needle thread the yarn behind the wrapped yarn. Lastly, trim the ends of the bottom of the tassel.
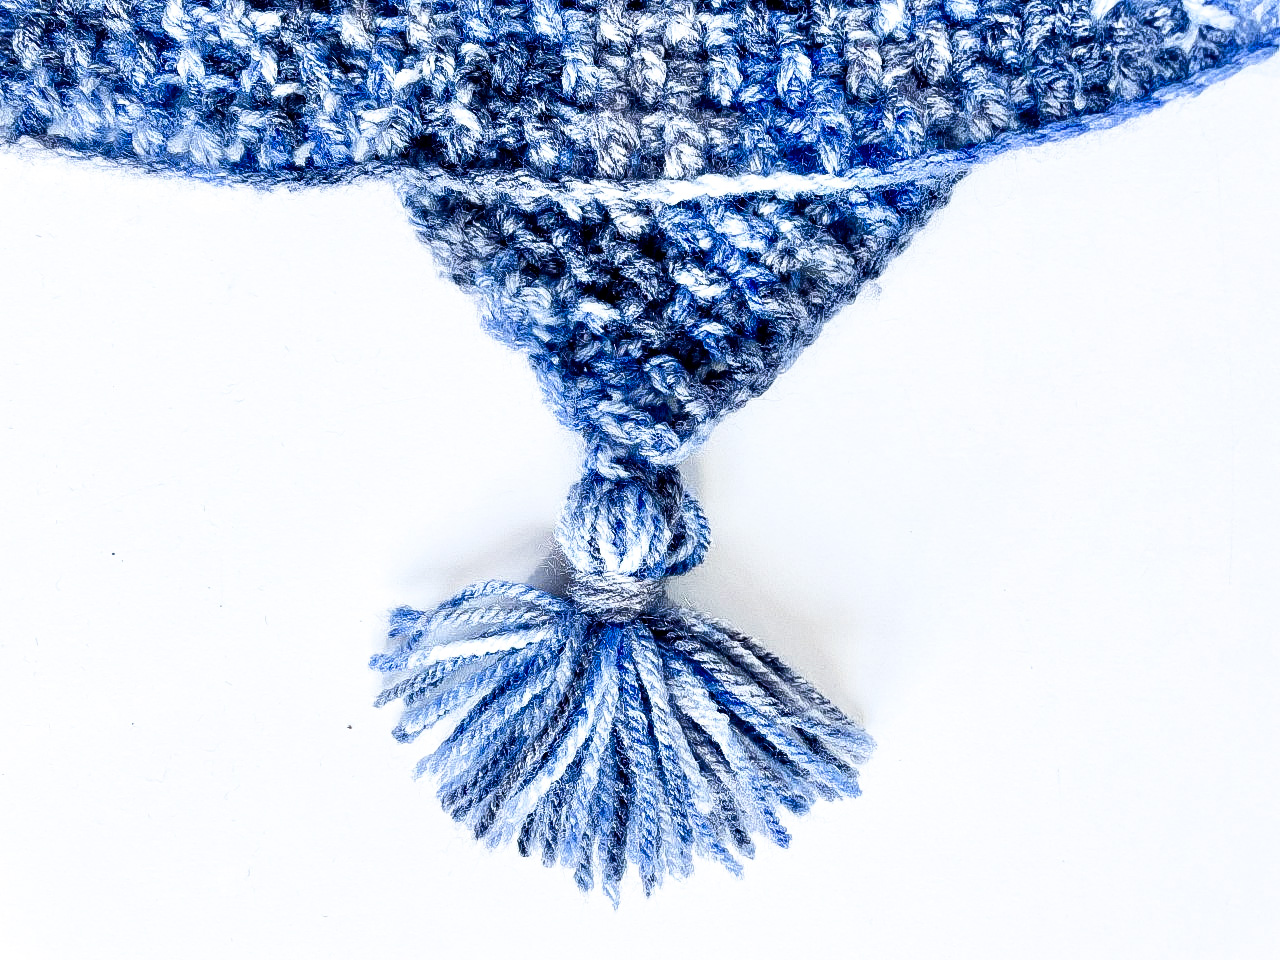
DIY yarn tassels are perfect for knitting projects and crocheted blankets.

How to make tassels with embroidery floss
A tiny tassel is perfect for jewelry making, or for understated decor to bags. This method for embroidery thread tassels is super quick and easy.
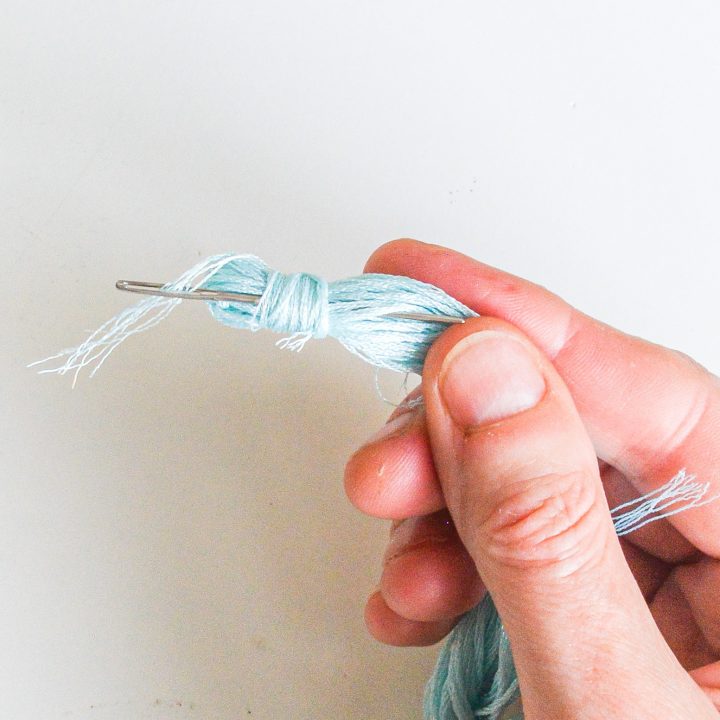
Cut two pieces of thread from the embroidery floss skein (so you can make two tassels out of your one skein). Using a needle thread through one end of the skein and tie a tight knot to secure the threads together.


Next, holding the embroidery floss together, wrap the length of thread around and around close to your top knot, thus creating the top of the tassel. Secure the end of the thread, I have double knotted and then with my needle threaded it behind the wrapping and down.

Lastly, cut the embroidery floss across and trim the ends of the bottom of the mini tassel.


This beautiful small tassel has been made with shiny embroidery floss.


If you wish to turn the embroidery floss tassels into earrings thread through the top of the tassel with a piece of embroidery floss and through a jump ring attached to an earring wire. I have threaded this through three times, secured with a knot before passing the finished ends down through the center of the tassel.


How to make a leather tassel
Cut a rectangle of leather, mine measures , plus a strip of leather 3mm wide and
Let’s create a leather fringe. Cut into the leather stopping about a cm or 3/8″ from the top edge, making thin strips about 3mm wide.


Fold your thin strip in half to create the loop, gluing the two ends together. Using strong glue adhere the loop to the top-right corner on the back side of the leather. I have used Fabric Tack as it is quick-drying.


Once this is fully dry the next step is to apply a thin layer of glue across the top of the tassel above the fringe, before rolling it tightly. Ensure you wipe away any excess glue. It’s that easy!!
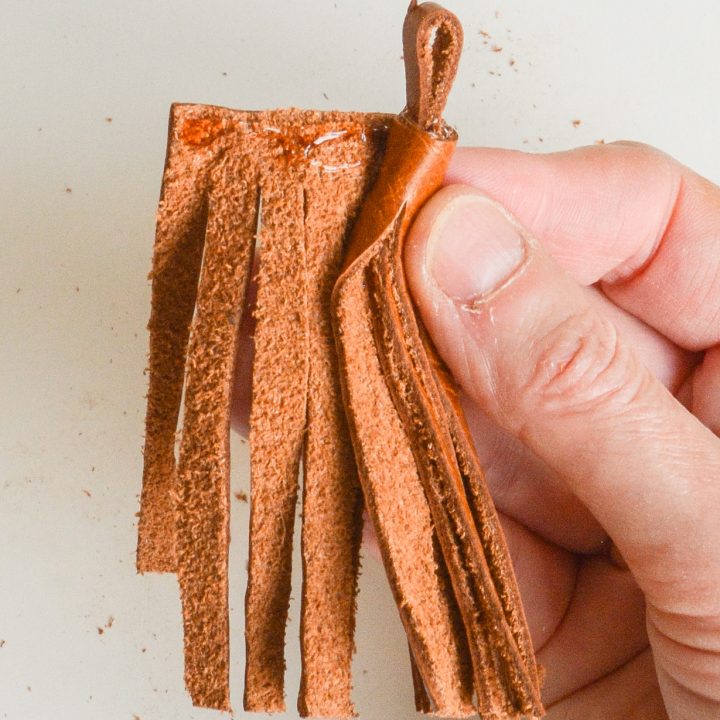

Personally, I love leather tassels as zipper pull tabs, I love this leather tassel on my DIY laptop case.


But even more on these beautiful DIY Candy Christmas Decorations.
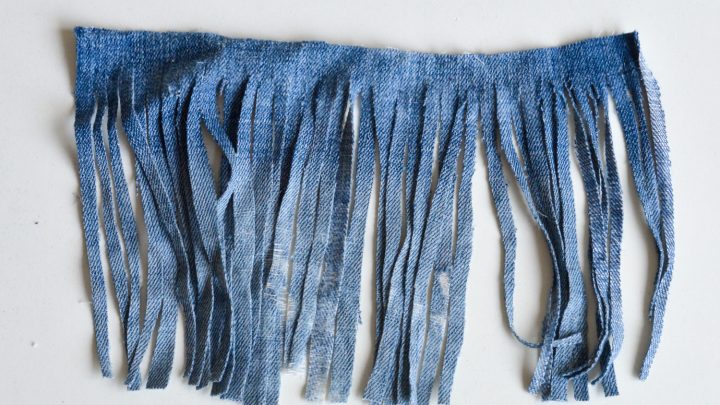
How to make denim tassels
There are a variety of ways of making denim tassels. Today I am going to make some super quick and easy denim tassels.
My denim tassel is been combined with a pom pom and beads to add as decor to a bag.
For this long tassel cut a piece of denim 21 by 14cm. Cut into the denim creating thin strips (3mm approx) up to almost the top, stopping about 1cm from the top. Repeat all the way across your fabric.

Fold a piece of yarn in half to create a loop (for attaching your finished tassel to your project). As I am adding wooden beads and a pom pom I have threaded my yarn through these first with a yarn needle.


Place the tails of your yarn loop on the top of your denim close to the right-hand edge and glue to secure, this is the head of the tassel. I have used E6000 but Fabric Tack would dry quicker.

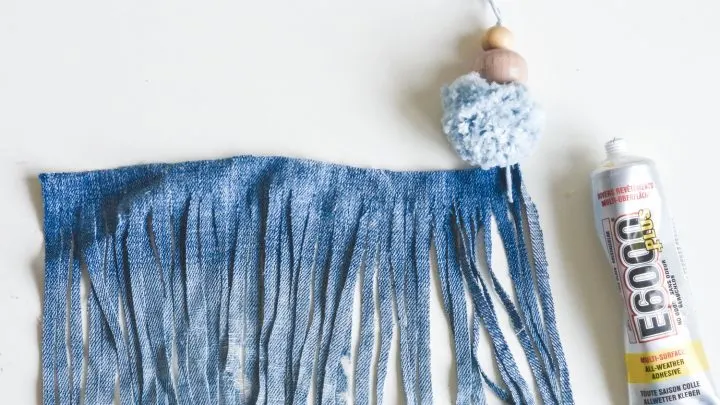
Once this is dry, place glue all along the top edge, then gradually roll your fabric tightly. The glue will adhere at the top of your tassel.
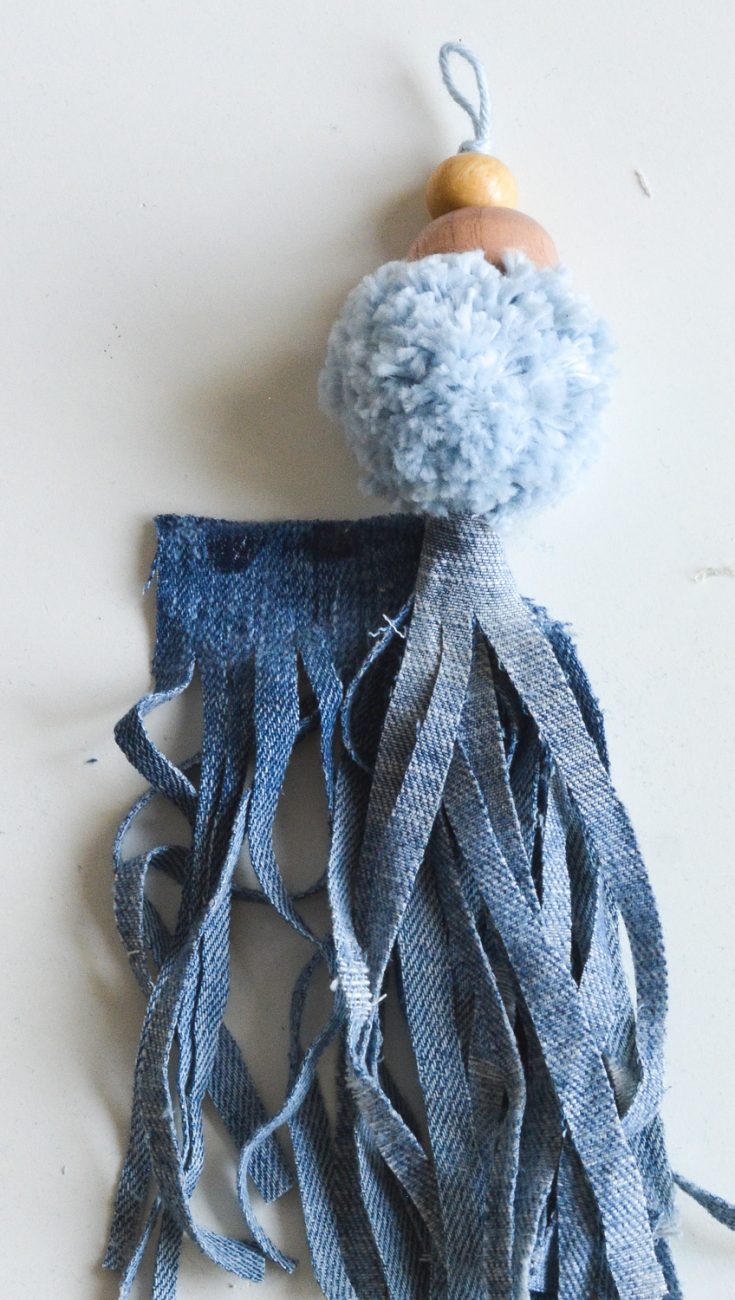

To finish your denim tassel cut a strip of denim, I have used a strip of an old pair of jeans seam, which is approx wide. Apply your fabric glue around the top of your tassel and wrap your denim strip around.


Check out Pillar Box Blue for further denim tassel inspiration.
How to make upcycled tassels
Grabbing materials to hand can make a vibrant fun tassel with lots of different textures.
Using the cardboard method you can wrap a whole variety of materials, I suggest, lace, ribbon, leather, fabric, yarn, anything you have to hand.
Or alternatively cut lengths of thread, ribbon, lace, leather cord, strips of fabric. I have passed mine through a metal hoop.


Fold your various materials in half.


Then using a thread wrap around near the top of the tassel, to create the tassel head. Lastly, tie your threads off.


I hope I have inspired you to start making a whole variety of tassels for your home.


Celine Goldammer
Tuesday 5th of March 2024
Thank you for the time you spent teaching! These are wonderful ideas and very creative.
Beston CarnivalRides
Wednesday 15th of June 2022
Wow. It's amazing! Hop I can make this beautiful things in the furure.
Kathy E.
Saturday 2nd of April 2022
Thank you, Vicky, for these great tutorials and ideas to add some special touches to my projects!
Vicky
Sunday 3rd of April 2022
Glad you find the ideas inspiring Kathy