
I am super excited to share with you my new free drawstring bag pattern, I have designed this bag as the perfect size for my latest crochet project. This free drawstring purse pattern has external pockets, ideal for crochet hooks, scissors, printed pattern, crochet markers… need I go on?!

I don’t really want to admit how long I have had a pile of yarn and semi-completed sweater in the corner of my bedroom! Now is the time to treat myself to a new drawstring bag, to keep ongoing projects in.
The finished drawstring project bag measures 5 by 12 by 9 1/2″. If you are looking for a slightly larger or smaller project bag then check out my tutorial on how to adjust bag patterns.
If you prefer to make your own handles rather than using bought leather handles check out my how to sew bag straps post (you will insert these between the external bag and facing).
Continue reading for printable instructions and youtube video.
If you would like an ad free drawstring project bag pattern with the printable pattern pieces, then for less than a coffee you support me and purchase one in my Etsy shop. Alternatively, enjoy the free instructions below. It is easy to measure out the rectangles required on your fabric., especially with a quilters ruler. Newsletter subscribers there is a PDF in the resource library just for you.
Drawstring Bag Pattern Free PDF
- Exterior Bag Fabric:- Two side panels measuring 10 1/2″ high 5 1/2″ wide Two front and back panels 10 1/2″ high 12 1/2″ wide, One Base 5 1/2 by 12 1/2″, Two Facings 2 1/2 by 17 1/2″
- Lining fabric – Two side panels measuring 8 3/4 by 5 1/2″ Two front and back panels 8 3/4 by 12 1/2″, One Base 5 1/2 by 12 1/2″
- Pocket Fabric, external two side pockets 5 1/2 by 5 1/2″, two front and back pockets 5 1/2 by 12 1/2″
- Pocket Fabric lining two side pockets 5 1/2 by 5 1/2″, two front and back pockets 5 1/2 by 12 1/2″
- Drawstring Closure two pieces 18″ by 8″
- Drawstring two pieces measuring 44″
- Two leather handles measuring 19″ (or length to suit you)
Prepare Pattern pieces
Cut out your pattern pieces, I find a quilter’s ruler and rotary cutter very helpful for accurate cutting.

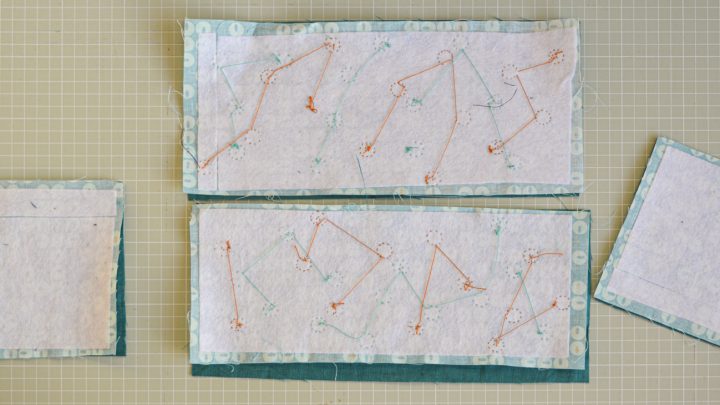
Iron fusible fleece to the back of your outer bag pieces and the outer fabric for the external pockets. I suggest cutting your fusible fleece 1/2″ smaller all around. This means you do not have fusible fleece in your seam allowance thus reducing the overall bulk and making the bag easier to sew on a domestic sewing machine.
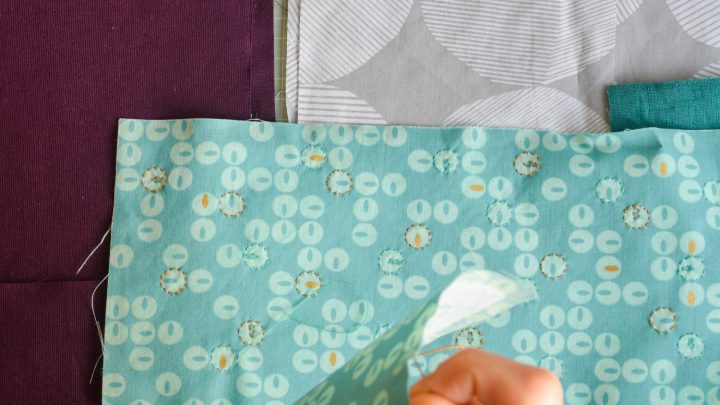
If you wish to add any embellishment with hand stitching to your external pocket fabric now is the time to do it. I have used a simple running stitch to compliment the print of the cute fabric I have chosen.
Iron lightweight interfacing to the back of your lining fabric pieces, and your two facing pieces. I like to use cotton fabric for my lining, often reusing old duvets and sheets.
External Pockets
Place the right sides of the external pocket fabric to the right side of the external pocket lining fabric. Align the raw edges along the top. Stitch with a 1/4″ seam allowance. Repeat for the four sections of external pockets.
Open out the seam and press open the seam allowance (this gives a crisper edge on the next step). Fold the fabric so the wrong sides face each other. Press and topstitch along this top edge 1/8″ from the edge.

Place the external pocket long piece along the long piece of the main bag external fabric so the bottom edges align. Baste in place along the side seams and bottom, within the seam allowance of 1/4″ (basting is a long stitch to hold the fabric in place and top it moving around). Repeat for the three other pocket pieces on the corresponding outer bag pieces of fabric.

Using a quilter’s ruler measure out and mark dividers for the two long edges. Measure and mark 4 1/4″ in from each side seam, using taylors chalk and a quilters ruler mark a stitch line running down parallel to the side seam from this mark to the base of the bag. Stitch along these marked lines creating dividers to create three pockets.
Stitch this marked line taking care to ensure you backstitch at the top of each line (this will be a pressure point for the pockets).
Sew up External Project Bag
Before we start it is important to emphasize the stitching of the seams, the seams will start at the top of the fabric for the side seams but stop 1/4″ before the end of the fabric at the base. Along the base of the crochet project bag the seams start 1/4″ in from the edge and end 1/4″ in from the edge. This enables us to sew the bottom of the bag in.
Line up the raw edges of a side panel with the front panel (ensuring the top of your pockets align). Stitch the side seam from the top to 1/4″ from the bottom.
Line up your bag bottom with the panel pieces, sew 1/4″ in from the edge and sew to 1/4″ from the end.
Sew on your other side panel, along the side seam, and along the base.

Lastly, sew in your back panel, completing the external bag.
Sew up Lining
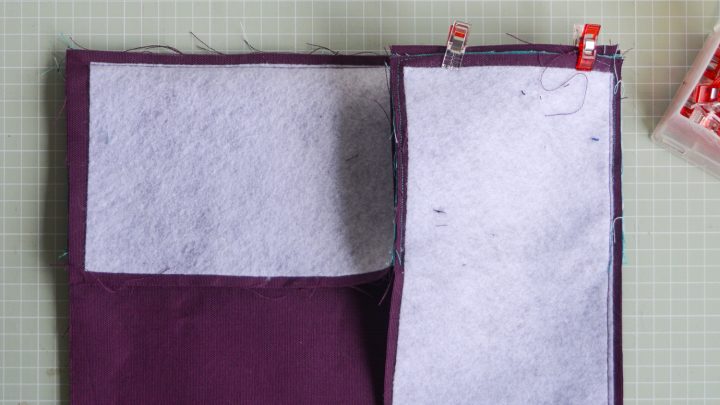
You are going to follow the same steps as for the outer fabric with one exception. You need to leave a turning gap along the base of the bag.
Along the base stitch 1/4″ in from the edge for an inch and stop. Repeat from the other corner, therefore, leaving a long turning gap in the base of the lining (between the two clover clips on the picture below).

Facing
Now we have the external bag sewn up we are going to add the facing.
Place right sides together and stitch the short side seam with 1/4″ seam allowance.

Place over the top of the outer bag so the long edge meets the top long edge of the bag, right sides together. The seams of the facing should be central on the two side panels. Pin.

Stitch to secure. Press the seam allowance open (this will help with a neat crisp edge when we finish the bag).
Drawstring closure
Place the two pieces of drawstring fabric, right sides facing.
We are going to sew the two side seams leaving a 1″ gap along the seam for the drawstring piping. Mark with a pin 4 1/2″ from the top, and then 1″ down. Stitch the side seam with 1/2″ seam allowance, leaving a gap between the pins. repeat for the second side seam.

Press the seam allowance open. Fold in the raw edge of the seam allowance and press under. Stitch to finish the seam along this folded edge, repeat for the second side of the seam allowance. Repeat for the second side seam.

Fold the fabric in half, wrong sides facing each other, so the long edges align. Press.

To finish the casing for the drawstring stitch a parallel line to the press folded seam, at 3/4″, this creates the cord channel.
Finish assembling the Project Bag
Pin the raw edge of your drawstring fabric to the right side of the external bag with the side seams matching the side seams of the facing.

Now add the lining (which will at this point feel too shallow, but it really isn’t!). Place the external bag inside the lining so the right side of the external bag faces the right side of the lining, with all the raw edges aligned. You will have four layers of fabric. Ensure the four seams of the external bag and the four seams of the lining are lined up. Stitch with a 1/4″ seam allowance.

Pull the eternal bag through the gap in the base of the lining fabric, and place the lining inside the bag. Fold the top of the bag so the facing is inside the bag. Press this fold.
Next, let’s close the gap in the lining fabric. Fold the raw edges in and either ladder stitch to close or topstitch with corresponding thread.

Press the top of the bag, pin, then topstitch to finish. I suggest using a size 14 or larger sewing machine needle and a long stitch as the layers of fabric will be quite bulky.

To finish the drawstring you will need two pieces of piping cord 44″ long. Wrap a bit of tape around one end to prevent it from unraveling and place a safety pin through the end. Thread the piping through the casing all around the bag and back out, tie a knot with the two ends.

Repeat from the other side opening with a second piece of cord.

Attach bag handles
You will need a hole punch, double cap rivets, bag handles, rivet setter tool for the cap rivets and a hammer.

Using the hole punch punch a couple of holes near the base of the handle. Place the handle onto the bag and using Taylors chalk or similar mark through your punched holes into the fabric, then punch holes through the fabric on these marks. My bag handle is positioned 2″ from the side seam and the base of the handle is 1 12″ from the top of the bag (it needs to remain within the depth of the facing).

Insert the double cap rivet through the hole, and place the corresponding cap onto the back. Using the hammer and rivet setting tool hammer the double cap rivet to secure. Repeat so that the handle has two double cap rivets per end.

I hope you love this pattern as much as I do – my only problem now is choosing which work in progress to keep in it!!

If you are new to bag-making do check out my free bag-making course for beginners. Plus I have many free bag patterns for you to enjoy.
