
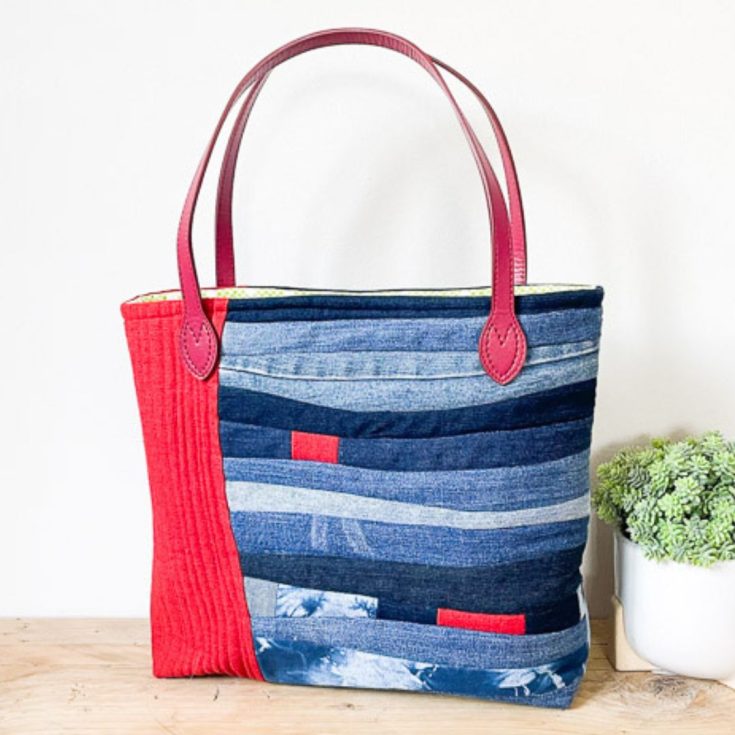
I am super excited to share with you my new quilted tote bag pattern. I love my denim scrap quilted bag, a LOT! Naturally, you can make this modern quilted tote bag in any fabric.
The original inspiration for this free quilted tote bag pattern came from @toni26568 on Instagram, do check out her feed for amazing denim bags. She has a real eye for color balance.
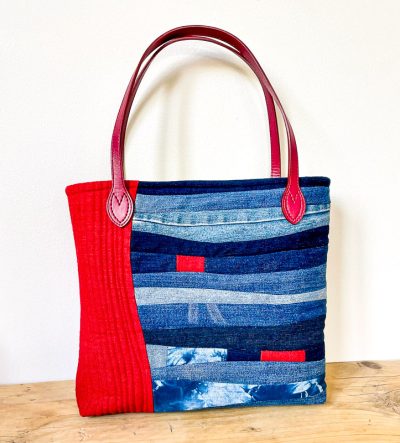

My new go-to favorite tote bag has a recessed zipper closure with one slip pocket.
The finished quilted tote bag pattern measures 3″ by 12″ by 15″ (depth, width, height).
Table of Contents
If you wish to adjust the finished bag size you can create this new tote bag in lots of different sizes. Simply start with a different size of paper for your pattern, if you need additional guidance for this check out my post on how to adjust bag patterns.


This free bag pattern shows you how to make the wavy panels of denim, and how to make the color blocks. You can see that I have included some tie-dyed denim in my quilted tote bag – check the video displayed with this post if you wish to see how to tie-dye old jeans, it’s ever so easy.
I highly recommend reading the step-by-step instructions before you start your new tote bag, at the bottom of the post is printable PDF Tote bag instructions just for you.
Materials for the quilted tote bag
- Denim, old jeans
- Contrasting fabric
- 1/2m or 1/2 yard cotton fabric for lining the bag
- Lightweight fusible interfacing
- Annies Soft and stable or car header foam, two pieces 17 by 14″
- Denim sewing machine needles
- Bag handles 23″ long (I have bought faux leather from Wish, alternatively make your own padded bag handles)
- Pen and paper 17 by 14″
- Scissors
- 12″ zipper
Free Quilted Tote Bag Pattern


Step 1 Cut out a piece of paper 17″ by 14″, the 17″ is the width of the bag, and the 13″ is the height of the bag. If you prefer to print the rectangle you can download pattern pieces here.
Draw your composition of waves for the denim, and the side panel in contrasting fabric, compositionally I recommend the contrasting fabric is approx a third of the way in from one side edge.

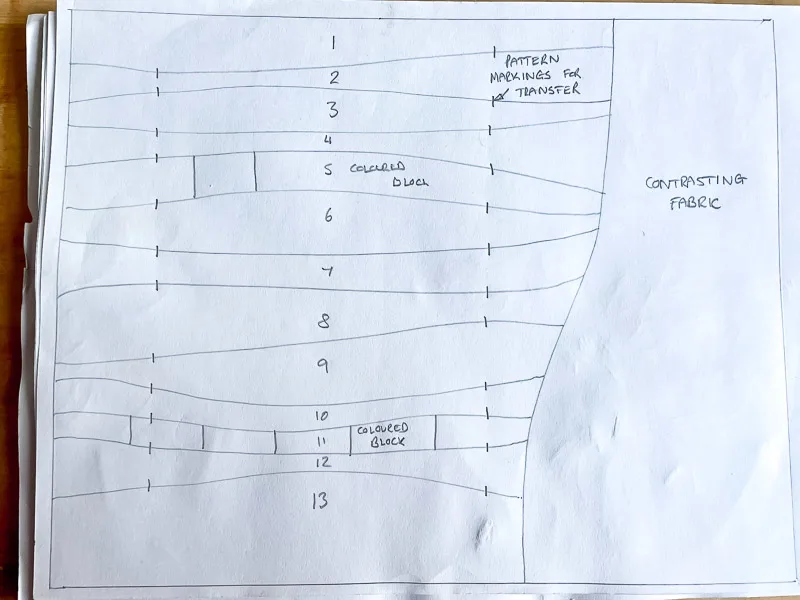
This is your basic pattern. I suggest numbering each of your waves and marking along the edges of the waves, these markings will help you line up your pieces of denim.
Step 2 Cut out your paper pattern, using this as your guide cut out strips of contrasting denim, adding a 1/4″ seam allowance along each edge. For ease, as you work keep the paper pieces pinned to the strips of denim for now so you don’t find yourself in a muddle! Transfer the markings with taylors chalk.


For the waves which are made up of blocks, sew random lengths of denim together, along with a piece of your contrasting fabric (approx 2″ wide) and press the seams open. Place your wave template over this strip of fabric and cut out.


Step 3 Pin piece one to piece two, matching up the raw edges, right sides together, ensuring the taylor chalk markings align. Machine stitch with a denim needle with a 1/4″ seam allowance. Press the seam open.


Step 4 Repeat this process until you have your wave section complete.


Step 5 Pin and align your contrasting fabric to the side edge of your now complete denim panel (right sides facing). Machine stitch and press the seam allowance open.


If required trim the side panel, using a rotary cutter and quilters ruler so that the panel is 16 1/2 wide and 13 1/2″ high. (Please forgive the photos showing a square, I changed my mind about measurements as I went along!).


Step 6 Cut out a piece of Annies Soft and Stable 16 1/2 by 13 1/2″ and pin to the wrong side of your bag panel. Baste within the 1/4″ seam allowance to hold in place.
Step 7 Machine stitch any quilting lines you would like to add. I have chosen to roughly follow the curve line down the bag quilting the contrasting fabric vertically and stitch in the ditch between the pieces of denim.


This completes one of the fabric panels for the exterior of the bag.


Step 8 Follow the previous steps to make the second side/fabric panel of the bag.
Step 9 Cut out your lining fabric and adhere fusible interfacing to the back. You need
- 2 Pieces 16 1/2 by 13 1/3″
- 1 piece 10 by 6 1/2″ for the slip pocket
- 2 pieces 3 1/2″ by 11″ zipper casing for the zipper closure
Step 10 Fold your slip pocket fabric in half right sides facing. Machine stitch one short edge and the long edge. Trim the excess fabric in the corners.


Turn the pocket right side out, fold in the raw edge,s and press.
Step 11 Place the pocket centrally so the bottom of the slip pocket (the folded in pressed edge) is facing the bottom of the bag and is 3 1/2″ from the bottom edge. Machine stitch in place, ensuring your back stitch at the top of each side of the pocket for additional strength.


Step 12 We are going to make two zipper tabs, I have used contrasting fabric. You will need two pieces measuring 3 1/2 by 1 1/2″. Fold in the raw edges and press, fold so the short edge meets the short edge (wrong sides together) and press. Place the zipper end inside the tab and stitch. Repeat for the opposite end of the zipper.
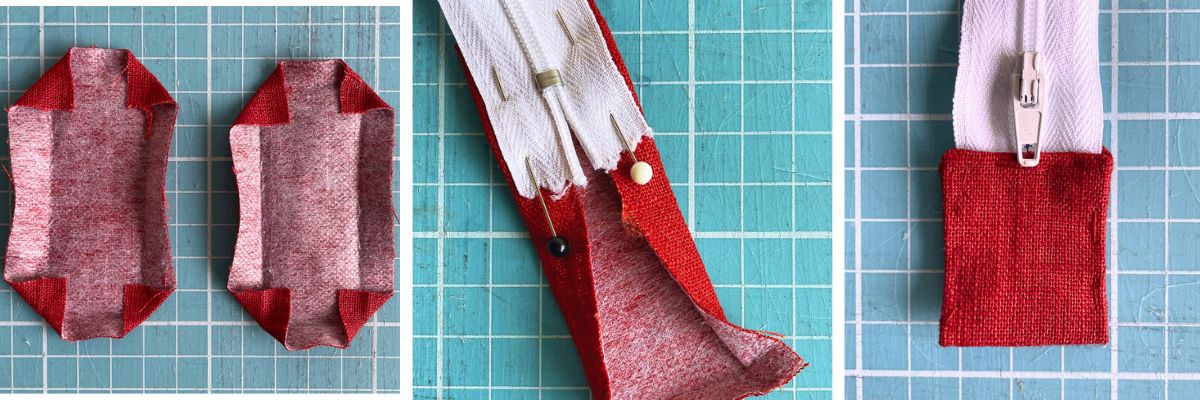

Step 13 Now let’s make the zipper closure (if you would like to skip this step you could always install a magnetic snap instead). Fold and press the wrong sides together of the zipper casing fabric, open out and then fold 1/4″ along each raw edge and press.


Step 14 Place the long edge of the zipper inside the zipper casing matching the edge of the zipper to the turned-in raw edge, I used a little fabric glue to hold it in place, then top stitch to secure. Repeat for the second side of the zipper.


Step 15 Now we are going to add the zipper closure to the lining. Place the zipper casing 1 1/2″ down from the top edge of the lining fabric, centrally, and top stitch close to the edge to secure.


Step 16 Repeat for the second side of the bag, you may find this easier if you open up the zipper.
Step 17 Let’s sew up the lining of the bag with a 1/4″ seam allowance. Place the lining pieces right sides together and machine stitch the side seams and along the bottom from each corner for 3″, leaving a turning gap along the bottom of the lining.
Step 18 To box the corners mark a square 1 1/2″ in at the two bottom corners and cut out. Fold these cut out raw edges together to form a straight line, pin and then machine stitch, ensuring you backstitch at each end for added strength.


Step 19 Now let’s complete the outer bag. Sew up the denim panels, right sides facing each other, along the bag sides and bottom seam (all along) and box the corners (as you have just done for the lining).


Step 20 Place the denim bag inside the lining so the right sides of the denim face the right sides of the lining fabric. Pin in place and machine stitch around, using a seam allowance of 1/4″. At the side seams reduce the bulk by ensuring you have pinned open the seam allowance.


TOP TIP If it’s possible trim excess Annies Soft and Stable, as I have quilted vertically this is not an option for me but if you have quilted horizontally this may be feasible.
Step 22 Now for the fun part, turn the bag right sides out through the turning gap in the lining. Pin and then top stitch along the top edge of your quilted tote bag. I highly recommend a long stitch length and stitching slowly to help your machine cope with the layers of fabric. I found using my quilting foot very helpful.


Step 23 Let’s attach the bag handles. My faux leather straps come with premade holes for hand stitching in place. Place your handles on the outside of the bag – mine are positioned 2 1/2″ in from the side seam with the bottom of the handle 2 1/4″ from the top edge of the quilted tote bag.
Hand stitch through the bag handle, through the outer bag fabric, not catching the lining fabric. It helps to pull the lining out and place one hand through the turning gap to pass the needle back and forth.


You may prefer to attach your bag handles prior to joining the lining and outer bag together. I have chosen not to do this so I could top stitch along the top edge easily, with no handles getting in the way.
Step 24 – the last step! Pull your lining fabric out, turn in the raw edges of the turning gap, and pin. Top stitch to close.


I hope you love your patchwork bag as much as I do.
Frequently Asked Questions
How do I change the size of the finished quilted tote bag? Prefer to make your quilted tote bag pattern bigger or smaller change the size of your paper pattern, when doing this consider the seam allowance and the width of the bag when you box it out. Read more on How to adjust bag patterns
I love pockets, how do I add more pockets to the lining? This is easy to do, the easiest is simply to add a second slip pocket to the other side of the lining. Alternatively, you can add a zipper pocket – read my posts on how to add a zipper pocket and how to add a slip pocket.
I’m not sure my sewing machine will cope with the layers of fabric and denim, help! Start with a new denim sewing machine needle, a good quality thread and a long stitch length. I suggest trying out the layers to see how your sewing machine copes. Do check out my you tube video on How to sew denim, hints and tips.
How do I change the recessed zipper for a magnetic snap? You will be glad to know this is really easy to do. Firstly ignore all the steps for the recessed zipper. Add the magnetic snap parts to the lining, for further information read my how to insert magnetic snaps post or How to add closure to tote bags.
If you are new to bag making I have lots of resources to help you – check out my free how to make a bag series.
And I have lots of free bag patterns for you to enjoy, I wish you many hours of happy sewing.
Quilted Tote Bag Pattern

Materials
- Denim, old jeans, several pairs for contrasting denim
- Contrasting fabric 16 by 13 1/2" (side panels and zipper tabs)
- Cotton Lining Fabric 2 Pieces 16 1/2 by 13 1/2"
- Cotton Lining Fabric 1 piece 10 by 6 1/2" for the slip pocket
- Cotton Lining Fabric 2 pieces 3/2" by 11" zipper casing for the zipper closure
- Lightweight fusible interfacing
- Annies Soft and stable or car header foam, two pieces 17 by 14"
- Bag handles 23" long (I have bought faux leather from Wish, alternatively make your own padded bag handles)
- 12" zipper
Tools
- Denim sewing machine needles
- Pen and paper 17 by 14"
- Scissors
- Quilting foot
- Fabric glue
- Pins
- Taylors Chalk
Instructions
- Bag pattern. Cut out a piece of paper 16 1/2" by 13 1/2", the 16 1/2" is the width of the bag, and the 13 1/2" is the height of the bag. Draw your composition of waves for the denim, and the side panel in contrasting fabric. Numbering each of your waves and place marking along the edges of the waves, these markings will help you line up your pieces of denim. You can download pattern pieces to draw your design on.
- Cut out your paper pattern, using this as your guide cut out strips of contrasting denim, adding a 1/4" seam allowance along each edge. Transfer the markings with taylors chalk.
- To create waves with blocks of different fabric, sew random lengths of denim together, along with a piece of your contrasting fabric (approx 2" wide) then press the seams open. Place your wave template over this strip of fabric and cut out.
- Exterior Bag Panel. Pin piece one to piece two, matching up the raw edges, right sides together, ensuring the taylor chalk markings align. Machine stitch with a denim needle with a 1/4" seam allowance. Press the seam open. Repeat until the wave section is complete.
- Pin and align your contrasting fabric to the side edge of your now complete denim panel (right sides facing). Machine stitch and press the seam allowance open. This is one exterior bag panel measuring 16 1/2 by 13 1/2" complete, repeat for the second exterior bag panel.
- Cut out a piece of Annies Soft and Stable 16 1/2 by 13 1/2" and pin to the wrong side of your bag panel. Baste within the 1/4" seam allowance to hold in place.
- Quilting. Machine stitch any quilting lines you wish to add, for example, stitching in the ditch between the waves.
- Cut out your lining fabric and adhere fusible interfacing to the back.
- Slip Pocket. Fold your slip pocket fabric in half right sides facing. Machine stitch one short edge and the long edge. Trim the excess fabric in the corners.
- Turn the pocket right side out, fold in the raw edge,s and press.
- Place the pocket centrally so the bottom of the slip pocket (the folded in pressed edge) is facing the bottom of the bag and is 3 1/2" from the bottom edge. Machine stitch in place.
- Zipper tabs. You will need two pieces measuring 3 1/2 by 1 1/2". Fold in the raw edges and press, fold so the short edge meets the short edge (wrong sides together) and press. Place the zipper end inside the tab and stitch. Repeat for the opposite end of the zipper.
- Zipper Closure. Fold and press the wrong sides together of the zipper casing fabric, open out and then fold 1/4" along each raw edge and press.
- Place the long edge of the zipper inside the zipper casing matching the edge of the zipper to the turned-in raw edge, I used a little fabric glue to hold it in place, then top stitch to secure. Repeat for the second side of the zipper.
- Sew up the lining of the bag with a 1/4" seam allowance. Place the lining pieces right sides together and machine stitch the side seams and along the bottom from each corner for 3", leaving a turning gap along the bottom of the lining.
- Box the corners, mark a square 1 1/2" in at the two bottom corners and cut out. Fold these cut out raw edges together to form a straight line, pin and then machine stitch, ensuring you backstitch at each end for added strength.
- Outer bag. Sew up the denim panels, right sides facing each other, along the bag sides and bottom seam (all along) and box the corners (as you have just done for the lining).
- Assemble bag. Place the denim bag inside the lining so the right sides of the denim face the right sides of the lining fabric. Pin in place and machine stitch around, using a seam allowance of 1/4".
- Turn the bag right sides out through the turning gap in the lining. Pin and then top stitch along the top edge of your quilted tote bag. I highly recommend a long stitch length and stitching slowly to help your machine cope with the layers of fabric. I found using my quilting foot very helpful.
- Attach bag handles. Place your handles on the outside of the bag, positioned 2 1/2" in from the side seam with the bottom of the handle 2 1/4" from the top edge of the quilted tote bag. Hand stitch through the bag handle and through the outer bag fabric, not catching the lining fabric. It helps to pull the lining out and place one hand through the turning gap to pass the needle back and forth.
- Finally, pull your lining fabric out, turn in the raw edges of the turning gap and pin. Top stitch to close.


Evelyne
Monday 8th of May 2023
Hello Vicky ! Thank you. I love it and i'll try to realise that bag. Have a nice day
Vicky Myers
Tuesday 9th of May 2023
So glad you like it :)
Judy
Monday 8th of May 2023
Love the bag, especially the zip top.
Vicky Myers
Tuesday 9th of May 2023
It’s my new favourite bag. Have to admit I took it out before I sewed up the lining gap!
Elaine
Monday 8th of May 2023
I read through the directions and think I’m going to try this pattern. Thank you.
Vicky Myers
Monday 8th of May 2023
I'm glad you feel inspired :)